Installing the OpenVZ Web Panel

Installing the OpenVZ Web Panel

Get Social!

There are many web front ends to the OpenVZ virtualisation server which offer varying functionality and are at different stages of development.

Take a look at the OpenVZ Control Panels wiki page for a list and a brief description of what each one does.

One that I have found to be very stable, easy to use and the most feature rich is the OpenVZ Web Panel (OWP). It allows you to create and destroy new OpenVZ containers, manage networking, download new OS templates and a few other things all from a clean web based front end.

Installing the OpenVZ Web Panel

Installing the OpenVZ Web Portal couldn’t be easier – simply run a one-line command on the terminal and let the script do the rest. The script will download all the required dependencies, such as Ruby, and set everything up so that you have a working web address which you can use to administer your OpenVZ server.

Run the below command on your OpenVZ server.

wget -O - http://ovz-web-panel.googlecode.com/svn/installer/ai.sh | sh

Once the script completes, the web server will be available on your servers IP or hostname and port 3000. The default username and password, which are required for login are:

  • Username: admin
  • Password: admin

openvz-web-panel-login

If you have iptables installed you will need to add a new rule for the default port 3000.

iptables -A INPUT -i eth0 -p tcp --dport 3000 -m state --state NEW,ESTABLISHED -j ACCEPT
iptables-save

You can also change the port number by editing the config file of OWP.

vi /etc/owp.conf

And change the PORT attribute to the new port number. Remember to update your iptables configuration to the new port number. See my iptables cheat sheet for more information.

Once you have logged in you will need to change the default admin password. Click on My Profile on the left hand side and fill in the information as requested.

openvz-web-panel-change-password

The next time you log in you will be able to log in with your new password.


Install an OpenVZ Server on CentOS

Category : How-to

Get Social!

openvz-logo-150px_new_3OpenVZ servers are hypervisors which allow you to create numerous guest instances within a single hardware node. Unlike other products which offer full hardware virtualisation, OpenVZ creates containers – isolated program execution environments – that share the hardware nodes kernel.

OpenVZ works very differently to the more mainstream hypervisors like VMWare’s ESXI, KVM or Xen and therefore comes with some benefits as well as a few problems. In the benefit category, the big one is performance.  OpenVZ containers loose very little power from what is available on a bare metal machine. The big drawback is that an OpenVZ container can only run Linux guests because each guest is actually using the hardware nodes kernel.

OpenVZ recommends running an OpenVZ server on Red Hat Linux, or one of it’s derivitives such as CentOS. Before starting this tutorial, make sure that you have a freshly installed CentOS server with terminal access. For this example, I’m going to use a fresh install of CentOS 6.5.

There are three stages to the installation of the OpenVZ software; install the OpenVZ kernel, configure system parameters and install the OpenVZ tools.

Install the OpenVZ kernel

All of the packages required to install an OpenVZ server are available in a repository which needs to be added to yum. Once this is complete, you can use yum to install all of the OpenVZ packages, including the kernel. Using this method, we can also keep our packages up to date as future releases are made available by the OpenVZ team.

Download the OpenVZ repository details and add the GPG key which is used to sign each package.

wget -P /etc/yum.repos.d/ http://ftp.openvz.org/openvz.repo
rpm --import http://ftp.openvz.org/RPM-GPG-Key-OpenVZ

We can now install the OpenVZ kernel by running the below command. Type y when prompted to begin the download and installation.

yum install vzkernel

Configure system parameters

We need to configure various system parameters for OpenVZ to work, especially on the networking side.

Open up the sysctl.conf file.

vi /etc/sysctl.conf

Either add or amend the following settings.

# packet forwarding enabled and proxy arp disabled
net.ipv4.ip_forward = 1
net.ipv6.conf.default.forwarding = 1
net.ipv6.conf.all.forwarding = 1
net.ipv4.conf.default.proxy_arp = 0

# Enables source route verification
net.ipv4.conf.all.rp_filter = 1

# Enables the magic-sysrq key
kernel.sysrq = 1

# We do not want all our interfaces to send redirects
net.ipv4.conf.default.send_redirects = 1
net.ipv4.conf.all.send_redirects = 0

OpenVZ needs SELinux to be disabled. Open up the selinux config file and make the SELINUX attribute disabled.

vi /etc/sysconfig/selinux

For example:

 This file controls the state of SELinux on the system.
# SELINUX= can take one of these three values:
#     enforcing - SELinux security policy is enforced.
#     permissive - SELinux prints warnings instead of enforcing.
#     disabled - No SELinux policy is loaded.
SELINUX=disabled
# SELINUXTYPE= can take one of these two values:
#     targeted - Targeted processes are protected,
#     mls - Multi Level Security protection.
SELINUXTYPE=targeted

Install OpenVZ tools

Once the kernel is set up we need to install the OpenVZ tools for creating and managing an OpenVZ server.

yum install vzctl vzquota

You can now reboot your machine. When your machine starts up, make sure that the OpenVZ kernel is loaded with the uname -r command. The result should be similar to below, although the version numbers will change with time.

# uname -r
2.6.32-042stab084.26

And that’s it! You now have an OpenVZ server up and running.


See Basic container management for details on creating your first CT.


Basic OpenVZ Container Management

Category : How-to

Get Social!

OpenVZ containers, or CT for short, work on the premise of using a template as the starting point for each virtual instance. The Template usually holds the basic applications, such as an SSH server, to create a functioning running instance.

See my blog post on Setting up an OpenVZ server for information on creating an OpenVZ server.

Download an OpenVZ Template

OpenVZ hosts a suite of OpenVZ templates for all common Linux distributions. Before you can create a CT you will need to choose a template from the below site and download it to your OpenVZ server. The template must be saved in your servers template directory, by default this is /vz/template/cache.

Download your templates from: http://wiki.openvz.org/Download/template/precreated

I will use the Debian 7 template for this example.

wget -P /vz/template/cache http://download.openvz.org/template/precreated/debian-7.0-x86_64.tar.gz

Create your first OpenVZ container

Most of the administration tasks for a container, such as creating and destroying a container, use the vzctl command.

Before we create our first container we need to understand the components of the create command. This is an example of a basic create command:

vzctl create 200 --ostemplate debian-7.0-x86_64 --config basic
  • 200 is the container ID. This is a unique ID which represents the CT being created. We will use this ID later when we start and stop the machine.  You can use virtually any number, but we usually use a three digit number.
  • –ostemplate is the template file name which we downloaded in the previous section. This file, with a tar.gz extention, must exist in the template directory of your OpenVZ server. By default, the templates directory is /vz/template/cache.
  • –config is what decides how much RAM, disk and other properties the CT will assume. OpenVZ have created some example configurations for us, basic being one of them.

Example:

# vzctl create 200 --ostemplate debian-7.0-x86_64 --config basic 
Creating container private area (debian-7.0-x86_64)
Performing postcreate actions
CT configuration saved to /etc/vz/conf/200.conf
Container private area was created

List available OpenVZ containers

Now that we have created a container, we can list the details with vzlist. Running this command will list all turned on containers so we’ll need the -a switch to list the turned off ones as well.

# vzlist -a
      CTID      NPROC STATUS    IP_ADDR         HOSTNAME
       200          - stopped   -               -

Start/ Stop/ Restart an OpenVZ container

Starting, stopping and restarting a container are done via the vzctl command with either start, stop or restart and the container ID.

vzctl start 200
vzctl stop 200
vzctl restart 200

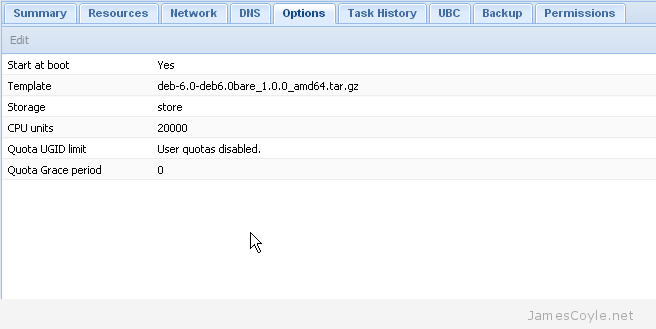
Configure an OpenVZ container

There are many configuration options for an OpenVZ container which specify disk space, SWAP, networking, CPU and plenty of others. I’ll cover a few basic options here.

Networking is a common option, and something we will need in our OpenVZ container. First lets set the hostname to example.jamescoyle.net.

vzctl set 200 --hostname example.jamescoyle.net --save

Next, let’s add an IP address on the same range as our host. Make sure you check that this IP is free and not already in use by another machine on your network.

vzctl set 200 --ipadd 10.10.10.100 --save

The last part of our basic network configuration is to add some nameservers so that DNS entries can be resolved. I’ll use the Google nameservers for this example but you may also wish to include your own local servers.

vzctl set 200 --nameserver 8.8.8.8 --nameserver 8.8.4.4 --save

Execute commands in an OpenVZ container

Using this current example, we can’t connect to our container because we haven’t set a root password. We need to issue the passwd command inside the container and type a password.

There are two ways to do this. We can enter the container directly from the host which will give us a shell running on the container itself.

vzctl enter 200

You can then issue any further commands you require.

The other option is to run a single command from the host using vzctl exec followed by the command to execute.

# vzctl exec 200 passwd
Enter new UNIX password: mypassword
Retype new UNIX password: mypassword
passwd: password updated successfully

Remove an OpenVZ container

Before you remove an OpenVZ container, you must make sure it is stopped. Once the container is stopped, you can use the vzctl destroy command to delete the container permanently.

vzctl destroy 200

Be careful, there is no confirmation for the destroy command!


Change the Password for an OpenVZ Container

Category : How-to

Get Social!

openvz-logo-150px_new_3If you have forgotten the password for an OpenVZ container – relax! Help is at hand.

Luckily OpenVZ makes it very easy to set or reset the password for any user of a container. You’ll need access to the terminal on the hardware node which is running the container to run a simple vzctl command.

vzctl is the CLI command which is used to configure and control an OpenVZ container. Using the –userpassword switch we can reset a users password. We can also use this command to create a new user if the specified user does not already exist.

vzctl set [VMID] --userpasswd [USER]:[PASSWORD]

Run the above command and substitute the following values for your own:

  • [VMID] is the ID of the container to set the new password on.
  • [USER] is the name of the user that you’d like to change the password for. If this user doesn’t exist then a new user will be created.
  • [PASSWORD] is the password to set for the [USER].

Note: The container needs to be running for this command to work as the user information is saved within the container and not in the containers configuration file like many of the other vzctl commands. If the container is not already running, this command will start it.


Add Create OpenVZ Template to the Proxmox Web GUI

Get Social!

proxmox logo gradCreating a template from an OpenVZ container is a very manual process. My biggest problem is that you have to have root access to the Proxmox hardware node in order to create a tar from the root of the CT. See How to make a new OpenVZ template for more information on manually creating a template.

proxmox-create-template-context-menu

I created a small code patch for the Proxmox API and web GUI to add a ‘create template’ feature for CTs. The code adds a context menu entry when you right click on a CT in the Proxmox web GUI.

Before using the feature, the CT must be shut down and any network interfaces removed. The feature presents the user with a dialogue box requesting which storage device the template should be saved to, and what it should be called.

Once the storage has been selected and the template has been given a name, a new ‘create template’ task is created which archives the root directory of the selected container and adds it to the cache folder of the selected storage.

proxmox-create-template-dialogue-box

The changes were declined by the Proxmox team on the grounds that creating a template is a technical process and may not result in creating a working, cloned instance. In addition, it is very easy to leave sensitive information in the CT which is the source of the template – all data on the CTs file system will be archived into the template making it available the next time a CT is created. If SSH keys are left on the CT, for example, then they will be available in the new CT also.

Because the feature was not accepted into the main distribution of Proxmox, I will maintain it myself and manually apply the patches to my Proxmox servers after every update. I have created a public repository on my Gitlab server that holds the git patch file which is available for everyone. 

If you accepts the risks mentioned above, and are happy to hack away at your Proxmox binaries, then you are welcome to try the patch for yourself.

You can download the patch and get more information on my public Proxmox Github page.

I should mention that this patch may not always be up to date. In addition, this is changing the actual Proxmox distribution files and as such may have unintended side effects. Please use these patches with caution and only in your development environments.

gitlabDownload


Proxmox OpenVZ Container and KVM Startup and Shutdown Order

Get Social!

proxmox logo gradFrom time to time you will need to shutdown and startup your Proxmox hardware node. There are many reasons for this such as adding new hardware or to apply new kernel updates.

Before you shutdown the hardware node you must cleanly shutdown all OpenVZ containers and all KVMs. To avoid having to do this manually, Proxmox will issue all running containers and VMs the shutdown command as part of the hardware nodes shutdown procedure. Proxmox also gives us the option to specify which containers and VMs should be started when the hardware node is turned on. This means that the final part of the hardware nodes startup sequence will be to start your containers and VMs. Depending on your environment, this may need to be done in a specific order. For example you may wish your database VM or container to be started before your web application.

Enable automatic startup of containers and VMs

To enable the automatic startup of an OpenVZ container or VM you must specify the Start at boot attribute in the Proxmox web interface. Simply click on the Options tab of the container or VM and double click the Start at boot attribute.

proxmox-start-at-boot

Make sure the checkbox is ticked in the new dialogue box which pops up and click OK.

Your container or VM will now automatically be started when your hardware node next starts.

Startup Order for VMs

It is sometimes necessary to specify which containers and VMs startup first and how long the hardware node should wait until issuing the next startup command. This is easy for KVMs as this can be done through the Proxmox web interface.

Simply click on the Options tab of the container or VM and double click the Start/Shutdown order attribute.

proxmox-start-shutdown-order

You can specify the following attributes for the KVM:

  • Start/Shutdown order – this is the order the VMs will be started in. For example, setting this to 1 will mean that this VM will be instructed to start first. You can specify the same number for multiple VMs which means that all VMs of the same number will be instructed to start at the same time. The reverse order is used when the machines are automatically shutdown.
  • Startup delay – this is the time in seconds which Proxmox will wait until moving on to the next priority. If you set a VM with a Start/Shutdown order of 1 with a Startup delay of 30, Proxmox will wait 30 seconds until instructing the VM with a Start/Shutdown order of 2 to start.
  • Shutdown timeout – when a VM is asked to shutdown, an ACPI shutdown request is sent to the VM which should initiate the guests shutdown procedure. If ACPI requests are not supported by the guest, or an exception occurs during shutdown the process may not complete. In this case the Proxmox will wait for the Shutdown timeout threshold to pass before forcefully terminate the VM. If no value is specified then the defaults are used which are 60 seconds for Containers and 180 seconds for VMs.

Any VMs which have the Start at boot attribute enabled but no Start/Shutdown order attribute will be started after all VMs with a Start/Shutdown order attribute set have been processed.

Startup Order for OpenVZ Containers

Unfortunately Proxmox has not provided this functionality in the web based GUI for OpenVZ containers. To specify the order for a container we need to use the command line on the Proxmox hardware node.

Login to your Proxmox hardware node as the root user and issue the below command to set the machine startup order. You will need to change [PRIORITY] to the priority value to use and [VMID] to the ID of the container.

vzctl set [VMID] –bootorder [PRIORITY] -save

You can use vzlist if you do not know the [VMID] of the container.

vzlist

CTID      NPROC STATUS    IP_ADDR         HOSTNAME
100       32    running   -               test.jamescoyle.net

You must have already enabled Start at boot for the container to start up. Any containers which have the Start at boot attribute enabled but no Start/Shutdown order attribute will be started after all containers with a Start/Shutdown order attribute set have been processed.


Visit our advertisers

Quick Poll

How many Proxmox servers do you work with?

Visit our advertisers