Download Oracle Java From The Terminal With wget

Download Oracle Java From The Terminal With wget

Get Social!

java-logoOracle have a very restrictive license that applies to most of their software downloads which prohibits you from distributing the binaries yourself. What this means, for example, is that you could not download the Java binaries and upload them to your own APT repository for others to use.

There are a few workarounds that exist to help making this install easier, but here we’re going to look at downloading the Java runtime environment (JRE) binaries and installing them all from a command line.

Use wget to download the binaries, so make sure that’s available on your system. If it isn’t, simply apt-get install wget.

One of the important things to note is that the Java version changes over time and therefore the links and commands below may need to be changed to ensure you’re always getting the latest version. Check out the Java Download Page to make sure you have the latest.

wget --header "Cookie: oraclelicense=accept-securebackup-cookie" http://download.oracle.com/otn-pub/java/jdk/8u51-b16/server-jre-8u51-linux-x64.tar.gz

I’m using an minimal version of Debian that doesn’t have the worlds Certificate Authorities installed and therefore wget gives me an error:

ERROR: cannot verify edelivery.oracle.com's certificate, issued by '/C=US/O=GeoTrust, Inc./CN=GeoTrust SSL CA':
  Unable to locally verify the issuer's authority.
To connect to edelivery.oracle.com insecurely, use `--no-check-certificate'.

The fix is to either install the correct CA certificate on the machine or add the no-check-certificate switch to wget to avoid checking the certificate:

wget --no-check-certificate --header "Cookie: oraclelicense=accept-securebackup-cookie" http://download.oracle.com/otn-pub/java/jdk/8u51-b16/server-jre-8u51-linux-x64.tar.gz

Once you have the Java archive downloaded you’ll need to create a target folder and extract the downloaded archive with tar:

mkdir /opt/jre
tar -zxf server-jre-8u51-linux-x64.tar.gz -C /opt/jre

The last couple of steps are to tell your OS to use the Java binaries you’ve just moved into place.

update-alternatives --install /usr/bin/java java /opt/jre/jdk1.8.0_51/bin/java 1000
update-alternatives --install /usr/bin/javac javac /opt/jre/jdk1.8.0_51/bin/javac 1000

Running anything in Java, or using the -version switch should now use your newly installed binaries.

java -version
java version "1.8.0_51"
Java(TM) SE Runtime Environment (build 1.8.0_51-b16)
Java HotSpot(TM) 64-Bit Server VM (build 25.51-b03, mixed mode)


Installing MariaDB on Ubuntu

Category : How-to

Get Social!

mariadb-logoMariaDB is termed a drop in replacement for MySQL – that means that you can deploy MariaDB without changing all of your client applications as MariaDB is compatible with most MySQL features and commands.

MariaDB was forked from MySQL when Oracle took over Sun Microsystems in 2010 and was born of the fear that Oracle would not adhere to the development ethos that was used by Sun. I discuss this in more detail in my blog post on MySQL alternative. There are a few gotchas with the new versioning system used by MariaDB and I’d recommend reading the blog post to familiarise yourself.

MariaDB has not yet made it into Ubuntu’s main repositories but is available as an add-in repository from MariaDB directly.

Installing MariaDB on Ubuntu couldn’t be easier – follow one of the below instructions for your version of Ubuntu.

Install MariaDB 10 on Ubuntu 14.04

Use the below commands to add the MariaDB repository to your Ubuntu 14.04 installation.

apt-get install software-properties-common
apt-key adv --recv-keys --keyserver hkp://keyserver.ubuntu.com:80 0xcbcb082a1bb943db
add-apt-repository 'deb http://mirror.stshosting.co.uk/mariadb/repo/10.0/ubuntu trusty main'

Run the following commands to install MariaDB.

apt-get update
apt-get install mariadb-server

Install MariaDB 10 on Ubuntu 12.04

Use the below commands to add the MariaDB repository to your Ubuntu 14.04 installation.

apt-get install python-software-properties
apt-key adv --recv-keys --keyserver hkp://keyserver.ubuntu.com:80 0xcbcb082a1bb943db
add-apt-repository 'deb http://mirror.stshosting.co.uk/mariadb/repo/10.0/ubuntu precise main'

Run the following commands to install MariaDB.

apt-get update
apt-get install mariadb-server

Install a different version of MariaDB or a use a different target operating system

MariaDB supports all common Linux distributions and they maintain a repository for each. You can see the full list of distro repositories on their repository configuration tool.


Installing Docker on Ubuntu 14.04

Get Social!

docker-logoDocker is an up and coming virtualisation technology utilising Linux Containers (LXC) to provide a private and consistent working environment across all Docker installations. Docker aims to create portable templates which can be created and distributed to run on any Docker enabled host.

Docker works on a similar premise to OpenVZ and is therefore limited by the same constraints, such as only Linux guests can be created in Docker as each guest shares the hosts kernel. Installing Docker on Ubuntu couldn’t be easier since version 14.04 of Ubuntu saw the Docker packages available through the standard Ubuntu repositories.

Install Docker using the apt-get command:

$ apt-get install docker.io

Check that the docker daemon has been started with the status argument, or start it with the start argument:

$ service docker.io status
$ service docker.io start

Create a symlink to the Docker executable so that the Docker documentation commands can be executed without changing the path. This is required because the Ubuntu package for Docker is installed to a different directory to the default Docker recommendation.

$ ln -sf /usr/bin/docker.io /usr/local/bin/docker

And that’s all there is to it! You now have a working Docker environment. See my next blog post for Creating your first Docker container.

Quick Poll

Are you using Docker.io?

Install the Splunk Forwarder on Ubuntu

Get Social!

splunk
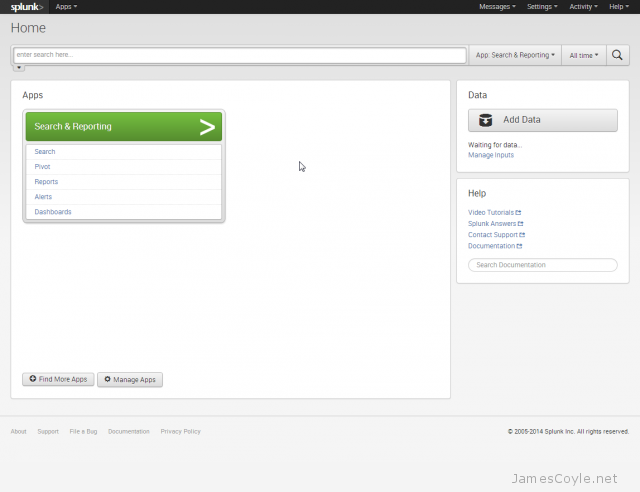
The Splunk Universal Forwarder is a small, light weight daemon which forwards data to your main Splunk server from a variety of sources.

This guide assumes that you have already installed the Splunk server to receive the data.

Download the Splunk Universal Forwarder .deb file from the Splunk website:

Upload the file to your Ubuntu server and place it a temporary directory.

Run the dpkg command to install the Splunk server.  The file name of the .deb file may change as new versions are made available so make sure that you have downloaded.

dpkg -i splunkforwarder-6.0.3-204106-linux-2.6-amd64.deb

The output will look like the below. Once you see complete, the Splunk Forwarder installation will be complete.

Selecting previously unselected package splunkforwarder.
(Reading database ... 28352 files and directories currently installed.)
Unpacking splunkforwarder (from splunkforwarder-6.0.3-204106-linux-2.6-amd64.deb) ...
Setting up splunkforwarder (6.0.3-204106) ...
complete

Next we need to create the init.d script so that we can easily start and stop Splunk. Change the the Splunk directory and run the splunk executable with the below arguments.

cd /opt/splunkforwarder/bin/
./splunk enable boot-start

Press SPACE to view all of the license agreement and then Y to accept it.

You can now start the forwarder daemon using the init.d script.

service splunk start

See reading log files with the Splunk Forwarder to read your first log file and send the data to the Splunk server.


Create a Ubuntu 14.04 OpenVZ Template for Proxmox

Get Social!

proxmox logo gradThe latest Ubuntu long term support is now available, called Ubuntu 14.04.

There isn’t currently a template available over on OpenVZ however I’m sure that will be shortly rectified. In the meantime, however, you can use the below steps to create a 14.04 Ubuntu template for OpenVZ/ Proxmox. This template has only been lightly tested so please report any errors as you find them.

This template is BETA, please report any problems in the comments.

Vistit Downloads Page


You can download a pre-created VM from here directly, or you can create your own using the below notes.


Before continuing, this guide assumes that you already have an installation of Ubuntu up and running which you can SSH to. This could be either a KVM or physical machine.

We will use debootstrap to create the template so make sure it’s installed and install it if you haven’t already.

apt-get install -y debootstrap

Use debootstrap to download and configure all the required packages to a temporary directory. For this example, we’ll use /tmp/deb.

debootstrap --arch amd64 trusty /tmp/deb ftp://ftp.ubuntu.com/ubuntu

Copy the below script into the tmp directory of the template root which has just been created. For this example you’ll need to copy the text into this path:

vi /tmp/deb/tmp/client.sh
#!/bin/bash

echo "root:password" | chpasswd

apt-get update

apt-get purge -y console-setup ntpdate whiptail eject ureadahead sudo vim-tiny rsync
apt-get install -y vim openssh-server

find / -name *ondemand -exec rm -rf {} \;
rm -f /etc/init/console* /etc/init/tty*

sed -i -e 's/^\$ModLoad imklog/#\$ModLoad imklog/g' /etc/rsyslog.conf
sed -i -e 's@\(space:\)\(/var/log/\)@\1-\2@' /etc/rsyslog.d/*.conf
sed -i -e 's/^\#cron./cron./g' /etc/rsyslog.d/50-default.conf

sed -i -e 's/^\console output/#console output/g' /etc/init/rc.conf
sed -i -e 's/^\env INIT_VERBOSE/#env INIT_VERBOSE/g' /etc/init/rc.conf

locale-gen en_US.UTF-8
locale-gen en_GB.UTF-8
dpkg-reconfigure locales

cp /usr/share/zoneinfo/Europe/London /etc/localtime

cat <<EOF > /etc/init/tty1.conf
# tty1 - getty
#
# This service maintains a getty on tty1 from the point the system is
# started until it is shut down again.

start on stopped rc RUNLEVEL=[2345]

stop on runlevel [!2345]

respawn
exec /sbin/getty -8 38400 tty1
EOF

rm -f /etc/ssh/ssh_host_*

cat << EOF > /etc/init.d/generate_ssh_keys
#!/bin/bash
ssh-keygen -f /etc/ssh/ssh_host_rsa_key -t rsa -N ''
ssh-keygen -f /etc/ssh/ssh_host_dsa_key -t dsa -N ''
rm -f \$0
EOF

chmod a+x /etc/init.d/generate_ssh_keys
update-rc.d generate_ssh_keys defaults

apt-get clean
find /var/ -name *.log -exec rm -rf {} \;
rm -rf /boot /dev /media /opt /run /srv /tmp /root/.bash_history /root/.viminfo /etc/ssh/ssh_host_*
mkdir /dev /run /tmp
touch /dev/null

exit

Make the script runnable which chmod.

chmod +x /tmp/deb/tmp/client.sh

Run the above script using the chroot command to set up the template.

chroot /tmp/deb /tmp/client.sh

The script will now run and set up the template using /tmp/deb/ as the templates root.

Once completed, create an archive of the template root device and install it on your OpenVZ/ Proxmox server.

cd /tmp/deb
tar -czpf /tmp/ubuntu-14.04-x86_64-initial1.tar.gz .

Copy the /tmp/ubuntu-14.04-x86_64-initial1.tar.gz file to your cache directory of your Proxmox install and create your first Ubuntu 14.04 container!

proxmox-ubuntu-1404-template


Install Splunk on Ubuntu

Category : How-to

Get Social!

splunkSplunk is the heavyweight open source software which enables you to index, visualise and explore virtually any machine generated data. Splunk is often used to consume Apache and Nginx web server logs as well as website clicks and any other data which maintains a constant format.

Installing Splunk on any Debian based Linux distribution, such as Ubuntu, couldn’t be easier with the .deb package that available for download.

Visit the Splunk download page to download the Splunk .deb package:

Upload the file to your Ubuntu server and place it a temporary directory.

Run the dpkg command to install the Splunk server.  The file name of the .deb file may change as new versions are made available so make sure that you have downloaded.

dpkg -i splunk-6.0.3-204106-linux-2.6-amd64.deb

The output of the command will look like the below example.

Selecting previously unselected package splunk.
(Reading database ... 20803 files and directories currently installed.)
Unpacking splunk (from splunk-6.0.3-204106-linux-2.6-amd64.deb) ...
Setting up splunk (6.0.3-204106) ...
complete

Next we need to create the init.d script so that we can easily start and stop Splunk. Change the the Splunk directory and run the splunk executable with the below arguments.

cd /opt/splunk/bin/
./splunk enable boot-start

Press SPACE to view all of the license agreement and then Y to accept it.

Start Splunk with the service command.

service splunk start

You will now be able to access Splunk’s web GUI which is running on port 8000.

http://10.10.10.10:8000/

Open the URL in the browser and login with the below details:

  • User Name: admin
  • Password: changeme

splunk-dashboard-new


Visit our advertisers

Quick Poll

Which type of virtualisation do you use?
  • Add your answer

Visit our advertisers