Add a new skin to an OBIEE scaled out cluster
Category : How-to
 If you are using a cluster configuration, there are multiple methods you can use to deploy a skin. Below details a method which results in a single shared resource location that each member of the OBIEE cluster will use.
This walk through assumes you already have an OBIEE cluster installed. You will also need a shared storage mount on each of the servers. The storage must be shared, so that if you add a file on one server, it’s available for all the others. You can mount this storage in any location accessible by the oracle user. For this guide, we’ll assume you’ve mounted it in /path/to/share however a more realistic example would be something like /mnt/obiee_skins.
Create a folder in the shared area called analyticsRes.
mkdir /path/to/share/analyticsRes
Copy both the sk_ and s_ directories to the analyticsRes directory.
cp -r/middleware/Oracle_BI1/bifoundation/web/app/res/sk_blafp /path/to/share/analyticsRes/
cp -r/middleware/Oracle_BI1/bifoundation/web/app/res/s_blafp /path/to/share/analyticsRes/
Edit the instance config file on all nodes of the cluster
vi /middleware/instances/instance2/config/OracleBIPresentationServicesComponent/coreapplication_obips1/instanceconfig.xml
Add or edit the following tags between <ServerInstance><WebConfig>.
<URL>
<!--     <CustomerResourceVirtualPath>/analyticsRes</CustomerResourceVirtualPath> -->
    <CustomerResourcePhysicalPath>/path/to/share/analyticsRes</CustomerResourcePhysicalPath>
</URL>
Note: The line which is commented out can be used, however this will be relative to each instances install location. This is fine for a single node install, but will cause problems with clustering as each cluster has it’s own instance.
Add or edit the following tags replacing SkinName with the name of your skin. The skin name will be the name of the folder after sk_.
<UI>
    <DefaultSkin>SkinName</DefaultSkin>
    <DefaultStyle>SkinName</DefaultStyle>
</UI>
Repeat the above instanceconfig steps for each node of the cluster.
We now need to add an Application in Weblogic so that the images, JS and CSS in the skins and style folders can be served to clients browsers. Log in to the Weblogic console.
This can be found on port 7001, by default, on the primary node of your OBIEE cluster: http://biurl.com:7001/console/
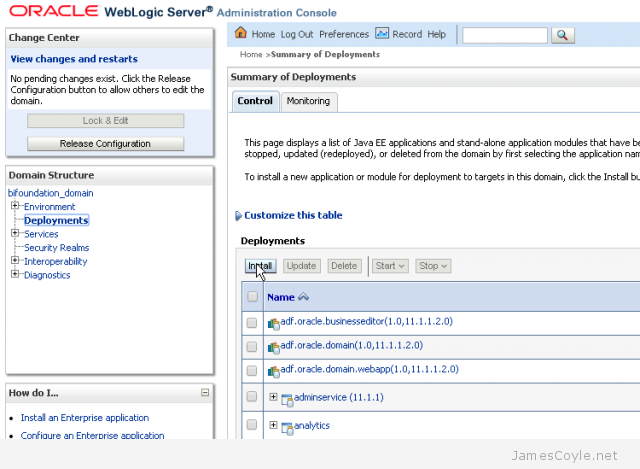
Select Deployments and click Lock and Edit on the left. Click the Install button to add a new deployment.

Enter the full path to your analyticsRes folder, including the analyticsShare part in the Path textbox and click next. For example, enter:
/path/to/share/analyticsRes
Select Install this deployment as an application and click Next. Select the tickbox bi_cluster to enable this application for all nodes in the cluster and click Next.
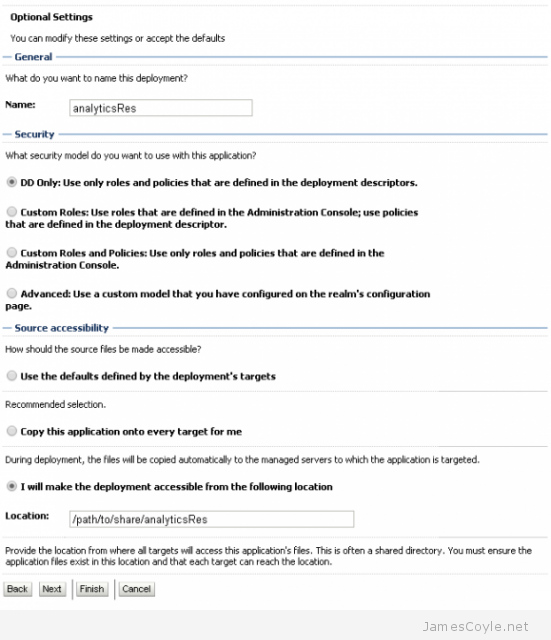
The next screen should be left as default for all options except the bottom one which should be I will make the deployment accessible from the following location with the path to your AnalyticsRes folder already filled in. Click Finish to complete the deployment.
The next step is to start the newly deployed application. Log in to the Weblogic console. This can be found on port 7001, by default, on the primary node of your OBIEE cluster: http://biurl.com:7001/console/
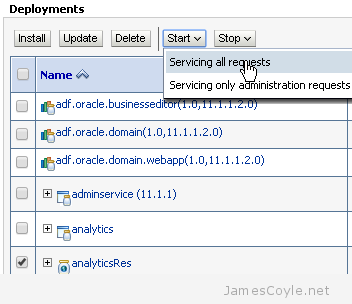
Click Deployments and find your new analyticsRes application which should be in a Prepared state. Click the tickbox next to the deployment and click Start and then Servicing all requests.
You will have to restart all cluster nodes for the changes to take effect – specifically the Presentation Services.
You can add other static resources to this folder which will be accessible from http://biurl.com/analyticsRes/example-resource.png.

