Author Archives: James Coyle

Proxmox OpenVZ CPU units

Tags :

Category : How-to

Get Social!

openvz-logo-150px_new_3OpenVZ containers have a mechanism in place to prioritise CPU resource assignment. You can make sure that your most critical guests have the CPU resource they require.

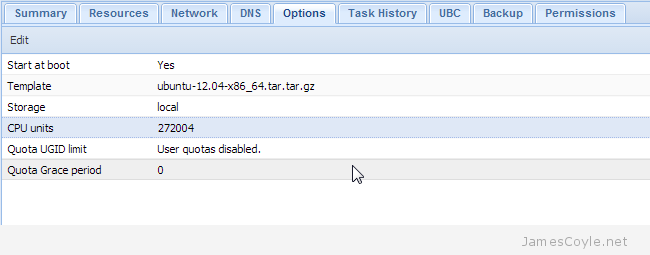
In Proxmox you can set the CPU units attribute through the web GUI by clicking on the container to change, selecting the Options tab and double clicking CPU units.

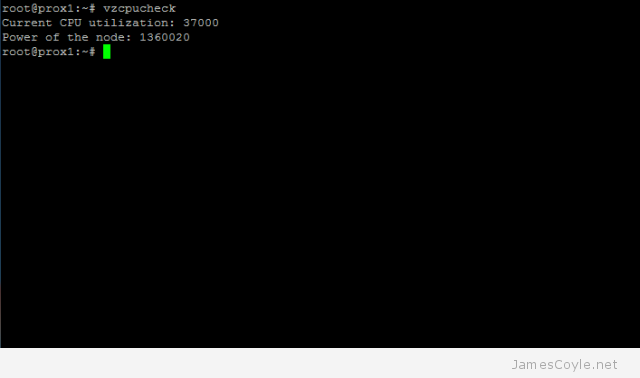
This setting dictates the minimum amount of CPU time, or CPU units, the guest will have. Before you change the setting you will need to find out how many CPU units your system has available. Run vzcpucheck to find out how many CPU units you have available.

Power of the node: 1360020 indicates the maximum CPU units your system has available for use. You can now distribute these CPU units to your guests however, this setting should be used as a minimum amount of CPU time your guest will have. The guest will only use the allocated resource if it needs it, otherwise will be available for other guests.

For example, if you wanted to give a container 20% of the total CPU time, you would would enter 272004.

1360020 * 20% = 272004
(Total units) * (desired %)

This value can be entered into the Proxmox web GUI under Options on the container screen.

proxmox cpu units

If you prefer the command line, on the host you can use the vzctl set command:

vzctl set 101 --cpuunits 272004 --save

Updates for Proxmox (Debian security updates)

Category : Tech News

Get Social!

There are new updates for Proxmox released today for common setups but don’t get too excited, these are from the Debian repository and are just security releases.

After testing these should be applied straight away.

Some of the more common packages are listed below. Your Proxmox setup may be different depending on what software you have installed.

  • bind9-host
  • dnsutils
  • libbind9-60
  • libdns69
  • libisc62
  • libisccc60
  • libisccfg62
  • liblwres60

Simple Apache reverse proxy example

Get Social!

Background

Apache can be used as a reverse proxy to relay HTTP/ HTTPS requests to other machines. This is common practice and comes with two main benefits:

  • Security – Your Apache instance can be put in a DMZ and exposed to the world while the web servers can sit behind it with no access to the outside world.
  • Reduce load – You can reduce the load on the web servers with various methods such as web caching at the proxy, load balancing and deflecting traffic for invalid requests.

The interesting stuff – ProxyPass

To set up Apache as a reverse proxy server you will need to enable mod_proxy. Some other common mods you may need are below.

  • mod_proxy
  • mod_http
  • mod_headers
  • mod_html

To enable mods in Ubuntu/ Debian you need to make sure they are installed, then enabled. For example, installing and enabling mod_proxy would look like this:

apt-get install libapache2-mod-proxy-html a2enmod mod_proxy

Once these mods are enabled, we can begin editing the Apache config. The locations of these vary depending on your Linux distribution. For RHEL based distributions, this will be your httpd.conf; for Debian based, sites-available/default.

Inside your VirtualHost tag create a Location tag which matches the external path you wish to use. For this example we will use /.

<Location />
    # commands go here
</Location>

Inside the Location tag add the proxy options ProxyPass and ProxyPassReverse followed by the site address which will be the target of the proxy. You will also need a couple of lines to allow access.

    ProxyPass http://mywebsite.jamescoyle.net/
    ProxyPassReverse http://mywebsite.jamescoyle.net/
    Order allow,deny
    Allow from all

Outside of the location tags, towards the top of the virtual host add a few extras:

    ProxyHTMLStripComments on
    ProxyRequests off
    SetOutputFilter proxy-html
    ProxyHTMLDoctype XHTML

If you will be proxying SSL traffic, you will also need to add:

    SSLProxyEngine on

Restart apache or reload the settings for the changes to take effect:

    service apache2 reload

You will now have a working proxy – all requests sent to / will be fetched from http://mywebsite.jamescoyle.net.

Example Apache reverse proxy VirtualHost

The below example shows an Apache VirtualHost which is listening on port 80. The confiiguration accepts requests on which match the www.jamescoyle.net hostname and proxys the requests to the backend server mywebsite.jamescoyle.net.

<VirtualHost *:80>
    ServerAdmin [email protected]
    ProxyRequests off
    DocumentRoot /var/www
    SSLProxyEngine on
    ProxyPreserveHost On

    ServerName www.jamescoyle.net

    ErrorLog ${APACHE_LOG_DIR}/error.log
    CustomLog ${APACHE_LOG_DIR}/access.log combined

    # Possible values include: debug, info, notice, warn, error, crit,
    # alert, emerg.
    LogLevel error

    <Location />
        ProxyPass http://mywebsite.jamescoyle.net/
        ProxyPassReverse http://mywebsite.jamescoyle.net/
        Order allow,deny
        Allow from all
    </Location>

</VirtualHost>

Apache 2 catch all virtualhost

Tags :

Category : How-to

Get Social!

Background

Apache VirtualHosts are something of a must for running multiple sites with different web address, all under the same physical server. Using VirtualHost tags you can easily direct traffic for www.domain1.com to one location, and www.domain2.com to another even when both domains point to the same IP address.

I am not going to detail VirtualHost directives here, however I will tell you about the recent issue I had with subdomains and this very blog. A long time ago I had a subdomain redirect.jamescoyle.net which is no longer in use. At the time, Google got hold of this and kindly indexed it for search. The trouble was that redirect.jamescoyle.net points to the same IP address as www.jamescoyle.net even though it is no longer in use. Apache used to be set up to handle the two sub-domains differently but the VirtualHost entry for redirect has since been removed. This means that Google now has an index of this blog on both www.jamescoyle.net and redirect.jamescoyle.net – not ideal to say the least.

What I needed was something which took users of www.jamescoyle.net to this blog, and redirect all other sub-domains to it. After trying numerous directives and ServerName/ ServerAlias options I stumbled upon the answer.

The Interesting Stuff

Apache will respect any ServerName or ServerAlias option until a domain is used which doesn’t match any VirtualHost. When this happens, the very first VirtualHost for that port (usually port 80 for http) is used as a ‘catch all’.

For RHEL based flavours of Linux, it would make sense to add the ‘catch all’ as the first VirtualHost entry in httpd.conf. For Debian based distributions, the default and default-ssl would be the place as these files have a symlink starting with 000 meaning it will likely be loaded first.

To illustrate the resulting configuration, see the below (albeit simplified) files in sites-available/

NameVirtualHost *:80 
<VirtualHost *:80>
 DocumentRoot /var/www
 Redirect permanent / http://www.jamescoyle.net/ 
</VirtualHost>
<VirtualHost *:80>
 ServerName www.jamescoyle.net
 DocumentRoot /var/www
 <Directory /var/www/>
 Options Indexes FollowSymLinks MultiViews
 AllowOverride None
 Order allow,deny
 allow from all
 </Directory>
</VirtualHost>

All requests for www.jamescoyle.net will be managed by the second entry and all other domains will be managed by the first and redirected to www.jamescoyle.net. Give it a go: abcdefg.jamescoyle.net


Install Proxmox

Category : How-to

Get Social!

What is Proxmox?proxmox logo grad

Proxmox is a hypervisor which can host hardware virtualized virtual machines as well as OpenVZ containers. See the OpenVZ wiki for more information on containers and how they differ to the hardware virtualisation environments.

Compare Proxmox against other Hypervisors: http://www.proxmox.com/products/proxmox-ve/comparison

System Requirements

Recommended

  • Dual or Quad Socket Server (Quad/Six/Hexa Core CPUs)
  • CPU: 64bit (Intel EMT64 or AMD64)
  • Intel VT/AMD-V capable CPU/Mainboard (for KVM Full Virtualization support)
  • 8 GB RAM is good, more is better (grab as much as possible)
  • Hardware RAID with batteries protected write cache (BBU) or flash protection
  • Fast hard drives, best results with 15k rpm SAS, Raid10
  • Two Gbit NIC (for bonding), additional NIC´s depending on the preferred storage technology and cluster setup
  • Fencing hardware (only needed for HA)

Minimum (for testing)

  • CPU: 64bit (Intel EMT64 or AMD64)
  • Intel VT/AMD-V capable CPU/Mainboard (for KVM Full Virtualization support)
  • Minimum 1 GB RAM
  • Hard drive 10 GB
  • One NIC

Download Proxmox

Use the below URL to find and download the latest version of Proxmox ISO. You will then need to burn the ISO to a blank CD or DVD.

http://www.proxmox.com/downloads/category/iso-images-pve

Install Proxmox

Make sure the CD Rom is in the CD tray and turn on your computer. You must have the CD Rom as one of the first bootable devices which can be set in your BIOS.

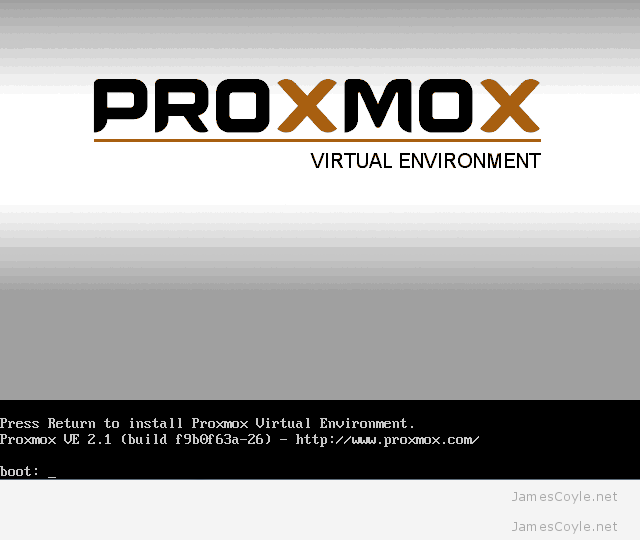
When the installation CD loads, you will be presented with the below screen. Press Return to begin loading the installer.

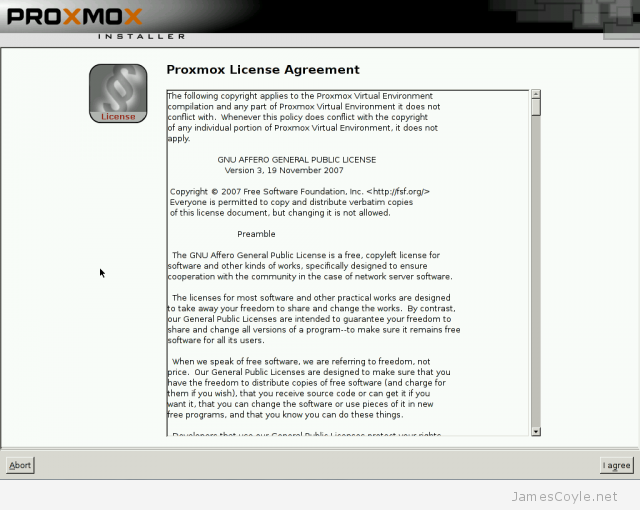
The next screen is the License Agreement. Click on Accept to continue.

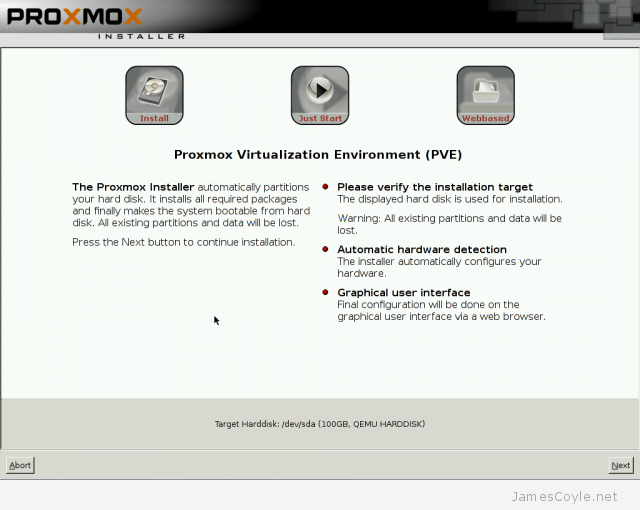
If you only have one hard disk in your machine, simply click Next at the below screen.

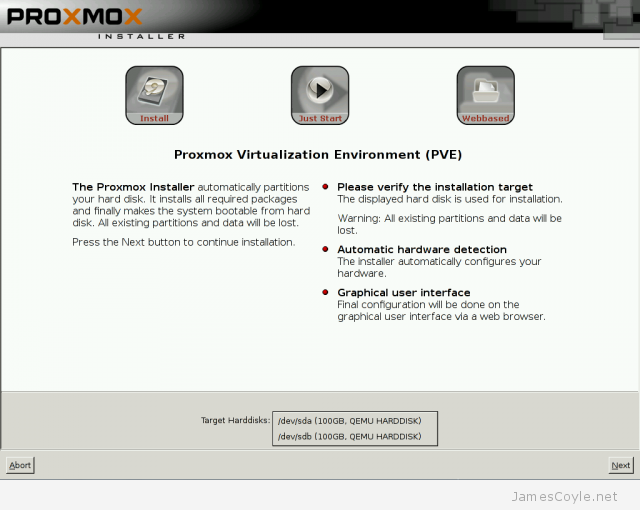
If you have more than one disk, select the disk to install Proxmox to and click Next.

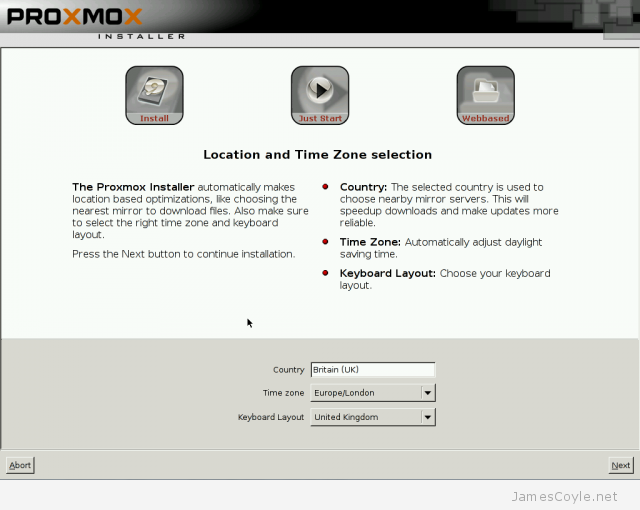
Enter your Country which should set your Time zone and Keyboard layout to match. Then click Next.

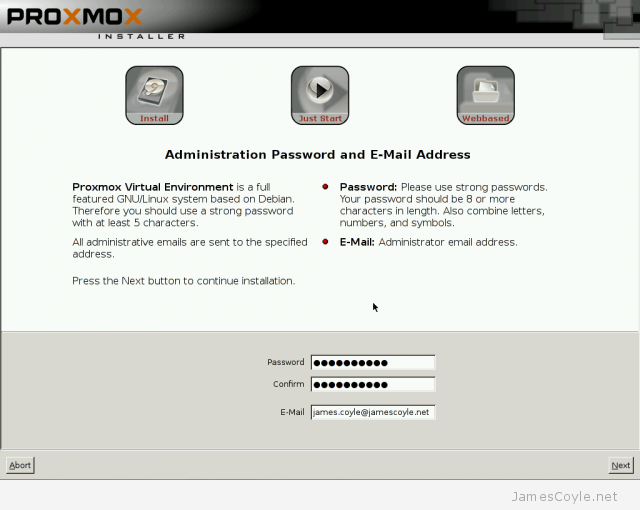
Enter a Password for the root account and E-Mail. Then click Next.

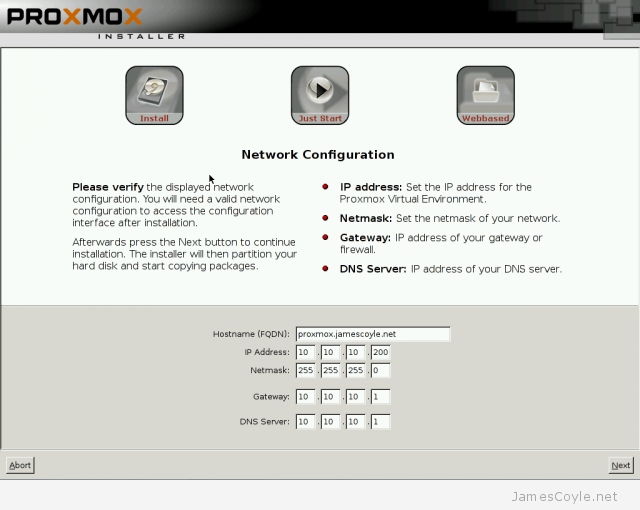
Enter the Hostname (FQDN) for the proxmox server as well as the IP AddressNetmaskGateway and DNS Server. If you have DHCP on your network, these settings will be filled in with values from the DHCP server.

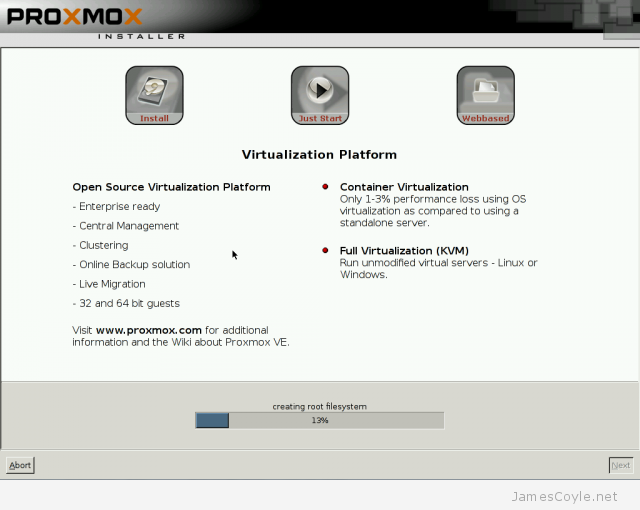
Click Next to begin installing Proxmox.

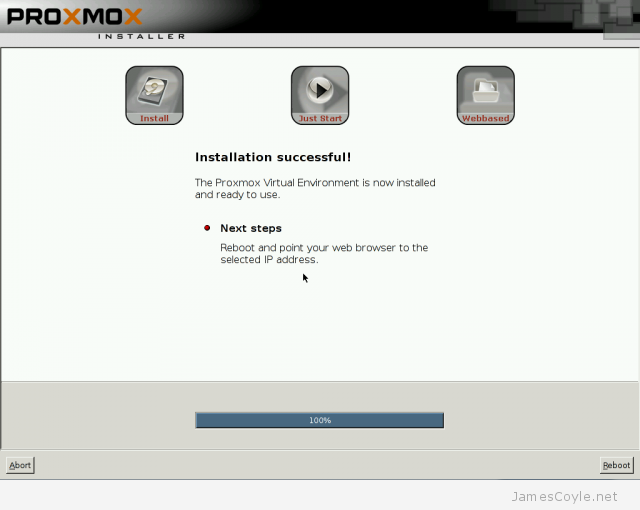
When the install completes, click Reboot to restart your machine and complete your Proxmox install.

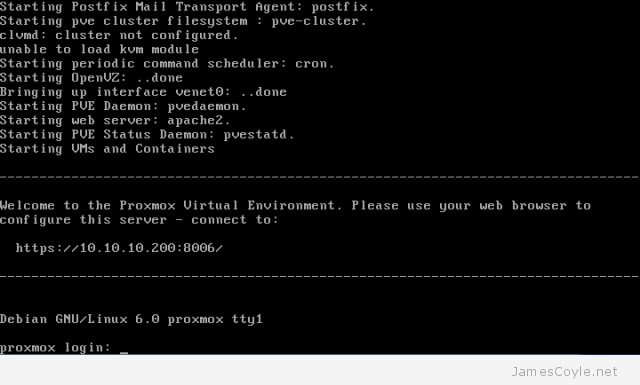
When your server has rebooted you will be sent to the login screen. Here you can use the account root and the password you entered during the installation.

Congratulations – your Proxmox server is ready to use. You can access the web interface using the IP address you entered during the installation, https and port 8006.

Example: https://10.10.10.200:8006/


Login to Proxmox web GUI

Tags :

Category : How-to

Get Social!

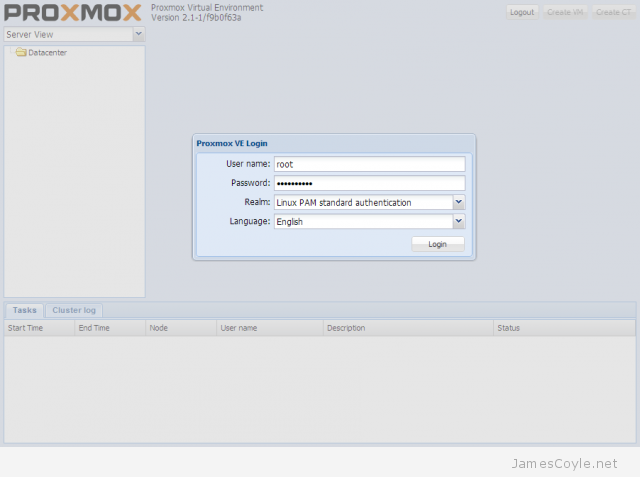
You can access the Proxmox web GUI from a web browser using the https protocol, your Proxmox server IP or hostname and the default port 8006 (https://[proxmox-server-ip]:8006).

Example: https://10.10.10.200:8006

If you are not sure of your Proxmox server IP, you can view the screen of your host server shortly after boot where your IP will be displayed.

Enter root as the User name and the Password which you entered during the install.


Visit our advertisers

Quick Poll

How often do you change the password for the computer(s) you use?

Visit our advertisers