Move Proxmox Container to Different Storage (Updated for LXC)

Move Proxmox Container to Different Storage (Updated for LXC)

Get Social!

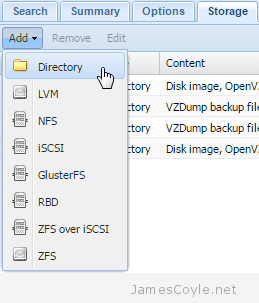
2015-03-05 00_18_04-Proxmox Virtual Environment storageThe Proxmox Web GUI does not give us the ability to migrate a container from one storage device to another directly. To move a container onto different storage we have to take a backup of the container and restore it to the same ID with a different storage device specified. This can be time laborious when working with several containers.

This is an update to the OpenVZ script found here.

The below script allows you to move an LXC container from one storage device to another. The process requires that the container be stopped, which the script will handle.

Save the below script into a file called migrate.

vi migrate
#!/bin/bash
#
# Filename : migrate
# Description : Migrate Proxmox OpenVZ container from one storage to another
# Author : James Coyle
#
# Version:
# -Date       -Author      -Description
# 20-11-2013  James Coyle  Initial
# 13-12-2017  James Coyle  Changes for LXC
#
#

# Variables
TMP=/tmp      #Location to use to create the backup for transferring to new storage. This needs to be big enough to store the backup archive for the container.

# Do not edit
usage() { 
	echo "Usage: $0" 
	echo "          [-c Required: Container ID to migrate <int>] "
	echo "          [-s Required: Target storage ID <string>]"
	echo "          [-d Optional: Delete the backup file after CT restoration <boolean>]"
	echo ""
	echo "Example: $0 -c 100 -s nasarray"
	echo ""
	exit 1; 
}

while getopts "c:s:d" o; do
  case "${o}" in
    c)
      CT=${OPTARG}
      ;;
    s)
      TARGET_STORAGE=${OPTARG}
      ;;
    d)
      DELETE=true
      ;;
    *)
      usage
      ;;
    esac
done
shift $((OPTIND-1))

# Check mandatory fields
if [ -z "${CT}" ] || [ -z "${TARGET_STORAGE}" ]; then
  usage
fi

RUNNING=false

set -e
set -o pipefail

echo "Moving $CT to $TARGET_STORAGE..."
if pct list| fgrep -w -q "$CT" | grep "running"
then
    RUNNING=true
fi

if $RUNNING
then
    pct stop $CT
fi

vzdump --dumpdir $TMP $CT

ARCHIVE=$(ls -t $TMP/vzdump-lxc-$CT-*.tar | head -n 1)

pct restore $CT $ARCHIVE -force -storage $TARGET_STORAGE

if $RUNNING
then
    pct start $CT
fi

if $DELETE
then
    LOG=$(ls -t $TMP/vzdump-lxc-$CT-*.log | head -n 1)
    echo "Deleting $LOG and $ARCHIVE"
    rm -rf $ARCHIVE $TMP/$LOG
fi

Set execution permissions on the script:

chmod + x migrate

The script has several parameters which are detailed below:

  • -d is specified if you would like the script to delete the temporary backup after the process has completed. Leave this out if you would like the backup tar file to be kept, just in case anything goes wrong.
  • -s is required to specify the name of the target storage. You can find this from the Proxmox Web GUI.
  • -c is required for the container ID to migrate.

In addition, the script contains the variable TMP. This will be the location of the backup tar created as part of the migration process and must contain enough space to store the content of the container being migrated. You can change this to suit your environment.

Example command:

./migrate -d -s newstorage -c 101


Reduce Proxmox LXC Backup Size and Time

Category : How-to

Get Social!

Proxmox backs up guests byte-for-byte in a compressed archive. Looking at LXC backups specifically, the file system is compressed into the target backup file with just a few exceptions – temp files aren’t included. You can also add your own exceptions by editing the vzdump.conf to exclude specific file patterns.

All that said, one of the biggest disk space wasters is the cache directory for apt which caches the installation packages for software you have installed. This can generally be safely removed on internet connected machines which will reduce your overall backup size.

For example, a newly created Debian LXC that’s been recently updated shows a total of 206MB of disk used.

du -hs /var/cache/apt/
206M    /var/cache/apt/

After clearing this with the command apt-get clean we can see the space has mostly been freed.

apt-get clean
du -hs /var/cache/apt/
28K    /var/cache/apt/

Considering this whole container is only consuming approximately 1GB of disk space, 200MB is quite significant.

vzdump hooks

Now we can see how much space we can save, we need to make Proxmox issue the apt-get clean command before it creates the backup of our container.

vzdump, the utility which Proxmox uses to perform backups has the ability to call a script for various stages of the backup process – these stages are:

  • backup-start
  • backup-end
  • backup-abort
  • log-end
  • pre-stop
  • pre-restart
  • post-restart

We can use these hooks to run our own commands at any of these points of the backup. For the goal of this blog post, we want to run the apt-get clean command at the point of backup-start.

Create a script on your Proxmox host with the following content:

#!/bin/bash
 
if [ "$1" == "backup-start" ] && [ ${VMTYPE} == "lxc" ]; then
    echo "Running pre backup guest cleanup for $3"
    pct exec "$3" -- bash -c "apt-get clean"
fi

Now edit your vzdump.conf file and add the following line to point to your new script. Remember to change the location of where your script is – I’ve just saved mine in /root/.

script: /root/backup-hook.sh


Rename a Proxmox Host

Category : How-to

Get Social!

Renaming a Linux server’s hostname is usually a trivial task, and that’s no Different to a Proxmox server providing it’s not part of a cluster. If your machine is in a cluster then things get a bit more complicated and that’s a blog subject for another day.

For a single node machine it’s simple – Proxmox is Debian under the hood so simply follow the usual Debian process:

Change the hostname file to contain your new hostname

vi /etc/hostname

To save having to restart, you can also run the hostname command to implement the change on a running machine. Otherwise you’ll need to reboot your server to pick up the change.

hostname [NEW_HOSTNAME]

Next, edit your /etc/hostname file and change all occurrences of the old hostname with the new one.


Proxmox 5.0 is now available

Category : Tech News

Get Social!

proxmox logo gradToday, the Proxmox VE team have released a new version of Proxmox, incrementing the major version to 5.0!

The new version packs in a raft of new features, the headline being the new Replicated Storage feature which enables batch style synchronisation of local storage volumes across servers.

You can download the ISO from https://www.proxmox.com/en/downloads/item/proxmox-ve-5-0-iso-installer

Highlights of the 5.0 release:

  • Based on Debian Stretch 9.0
  • Kernel 4.10.15
  • QEMU 2.9
  • LXC: update to 2.0.8
  • New asynchronous Storage Replication feature (needs ZFS, technology preview)
  • New/updated LXC templates (Debian, Ubuntu, CentOS, Fedora, OpenSUSE, Arch Linux, Gentoo and Alpine)
  • Updated/improved noVNC console]
  • Ceph v12.1.0 Luminous (technology preview), packaged by Proxmox
  • Live migration with local storage
  • GUI improvements
    • USB und Host PCI address visibility
    • improved bulk and filtering options
  • Improved installation ISO
  • Importing Qemu/KVM_Virtual_Machines#_importing_virtual_machines_from_foreign_hypervisors
  • Improved reference documentation with screenshots
  • Countless bug fixes and package updates

Upgrade

Before updating, make sure all your VM’s have been stopped, both LXC and KVM. Ensure you have the required repository entries for apt. You’ll either need a valid license key or to add the less stable pve-no-subscription repository.

Update your apt for Debian, edit /etc/apt/sources.list and replace it with:

deb http://ftp.at.debian.org/debian stretch main contrib

# security updates
deb http://security.debian.org stretch/updates main contrib

And your Proxmox repository source /etc/apt/sources.list.d/pve-enterprise.list to the below. See Proxmox 3.1 package/ updates manager (this also works for version 5.x) for more information.

deb https://enterprise.proxmox.com/debian/pve stretch pve-enterprise

Run the below commands on each server in your cluster.

apt-get update
apt-get dist-upgrade

Restart all Proxmox servers to complete the installation.


Start/ Stop Container Using The Proxmox Web API in Bash

Category : How-to

Get Social!

The Proxmox Web API can perform any actions available in the front end Web. By implementing a REST API, all commands have been exposed and can be used programatically.

In this example we’ll use Bash to call the Proxmox Web API with our authentication token to start and stop an existing LXC Container.

See this post for an introduction to the Proxmox Web API, including all available API commands.

To issue API requests you’ll need to ensure you have already generated an authentication ticket which is described in Parse Proxmox Web API authentication ticket and the CSRFPreventionToken in Bash.

Once you have the authentication ticket you’ll need to call the Proxmox API using curl and parse the result. Use the below scripts and substitute the values as required:

Start an LXC Container

  • TICKET is the authentication ticket that was produced in the Parse Proxmox Web API authentication ticket and the CSRFPreventionToken in Bash post. Ideally you would programatically call the authentication routine and then pass the values straight into the below API calls.
  • CSRF is produced in the same way as TICKET. It’s actually only required when writing data to the API but there is no harm in always including it.
  • HOST is the host or IP address of the Proxmox server.
  • NODE is the node name of the Proxmox server that the LXC Container resides on.
  • TARGET_VM  is the VMID of the LXC Container.
TICKET=[security-ticket]
CSRF=[csrf-token]
HOST=prox-node1
NODE=prox-node1
TARGET_VMID=100

START_TASK_DATA=`curl -s -k -b "PVEAuthCookie=$TICKET" -H "CSRFPreventionToken: $CSRF" -X POST $HOST/api2/json/nodes/$NODE/lxc/$TARGET_VMID/status/start`

START_TASK_RESULT=$(decodeDataFromJson $START_TASK_DATA 'data')

If $START_TASK_RESULT doesn’t come back with null or empty then the command has successfully executed.

Stop an LXC Container

Stopping a VM in Proxmox is very similar to starting one, with just a slight change to the API URL call. All other options are the same as the above section ‘Start an LXC Container’.

TICKET=[security-ticket]
CSRF=[csrf-token]
HOST=prox-node1
NODE=prox-node1
TARGET_VMID=100

STOP_TASK_DATA=`curl -s -k -b "PVEAuthCookie=$TICKET" -H "CSRFPreventionToken: $CSRF" -X POST $HOST/api2/json/nodes/$NODE/lxc/$TARGET_VMID/status/stop`

STOP_TASK_RESULT=$(decodeDataFromJson $STOP_TASK_DATA 'data')

If $STOP_TASK_RESULT doesn’t come back with null or empty then the command has successfully executed.


Getting Started With Proxmox HTTP API Commands

Category : How-to

Get Social!

Proxmox has 2 API access points that can be used to control your Proxmox server and virtual guests. One of the API access points is using the command line, which you’re likely already familiar with. The other is the HTTP web API which is exposed as part of the WEB GUI on port 8006.

The Proxmox uses a JSON data format for returning data that can easily be parsed programmatically. Every command available to the pvesh command line command are available to the web based API as they share the same endpoint.

The endpoint for the Web API can be called using anything that can send and receive web based requests. We’ll use curl for the below examples. The endpoint to call would be similar to below – be sure you substitute yourip for the IP or hostname of your Proxmox server.

https://yourip:8006/api2/json/

API Authentication

The next step is to authenticate your API requests with the Proxmox server. API authentication uses the same mechanism that logging into the Web GUI uses and requires a username, password and security realm.

Authentication is based on a token method which provides a ticket that must accompany all API requests except for the request that generates the token. A username and password will not be accepted for authentication with all other API requests. In addition, any requests that POST or write to the API endpoint must contain a CSRF Prevention Token.

To obtain an authentication token, run the below curl command and substitute your values as required – this example uses the root user and the default PAM realm.

curl https://yourip:8006/api2/json/access/ticket -k -d 'username=root@pam&password=PASSWORD'

Example output:

{  
  "data":{  
    "CSRFPreventionToken":"5922F2C4:e7n+eQ9Lipbga3bY00Jh79MBATk",
    "username":"root@pam"
    },
    "ticket":"PVE:J38560@AD:5922F2C4::oOAcgXvCcAdLG+B50sRZ9WeaKn3gCFEktnHtegUVEcdtYO0NE7THA7pmzKZ14MgOYrp6vrye4ZBDocpu/nhuvUUL3vZeAT7YMstBXR3YLN8IlwQl5HJdgOikdz+gMdWyfx3JxcNhaNpJlHDL8Vm7D0r7GKGsHPirB098eG7pg1MgrkW7U6R5piW66c/p3kdJvT5beD+IPOhst76SoVlFo3ZxFFcqpcD5RFsUpKl9K1/5tgPReh1sErcDhOgUeiAE5XZHFsTE/jBVeSv9O2cXb5fESRtTU3986Gtw85hPJlWDzMz+X94H0rlL25cYkIbnOx5KJi9IcNTnvTHdpaoXuQ=="
}

The two interesting parts here are the ticket value and the CSRFPreventionToken and should be parsed out for use in later requests.

A token is valid for 2 hours and should be re-requested when it expires. Alternatively each request could generate it’s own token, however this generates added overhead.

List of Proxmox API Requests

pvesh is a command line utility can be used to perform the same actions as the web based API. You can, therefore, use the pvesh command to list all the possible API calls and navigate through the API call tree.

# pvesh
entering PVE shell - type 'help' for help
pve:/> 

pve:/> ls
Dr--- access
Dr--- cluster
Dr--- nodes
Dr-c- pools
Dr-c- storage
-r--- version

pve:/>cd nodes

pve:/nodes>ls
Dr--- prox-node1

You can then list the available commands from the root of the API using ls and then change into one of the child paths using cd. You can navigate throughout the whole API tree using these two methods to see what commands are available for calling. This is often the best way to get started with the Proxmox API.

Examples of API Requests

As stated earlier, all operations available in the Proxmox Web GUI can be performed through the API. Here are a few examples of API requests using Bash:


Visit our advertisers

Quick Poll

How many Proxmox servers do you work with?

Visit our advertisers