Install AWS CodeDeploy Agent on Linux

Install AWS CodeDeploy Agent on Linux

Category : How-to

Get Social!

AWS CodeDeploy Agent is the agent that runs deploy jobs on EC2 instances. Before a CodeDeploy job will run you’ll need to make sure the agent is installed, running, and has the correct IAM permissions to execute.

For more information on AWS CodeDeploy, please see: https://aws.amazon.com/rds/

Installation is straight forward on Linux and will have your agent up and running in no time.

The below example is based on Ubuntu, but the same steps would be used on other distributions, with the exception of the package manager for installing ruby.

As the root user, run the below commands. root is required because the deployment could be performing actions that require elevated privileges. Ruby is an installation dependency for AWS CodeDeploy and must be available before installing the agent itself.

apt update
apt -y install ruby

Once Ruby is installed we can download and install the CodeDeploy agent. The below agent is being downloaded from the eu-central-1 region, but you can replace the region with your local region if required. Other than saving bandwidth charges for the download (which will be tiny) there is no real reason to do so.

cd /tmp
wget https://aws-codedeploy-eu-central-1.s3.amazonaws.com/latest/install;
chmod +x ./install

./install auto

The final step is to start the agent and check that it’s running. A systemd entry will be added and needs to be called to start the agent.

service codedeploy-agent start

Finally, check that the agent is running by checking the log. You should be looking for a similar output to the below.

tail -f /var/log/aws/codedeploy-agent/codedeploy-agent.log

2019-11-24 07:30:54 INFO  [codedeploy-agent(31022)]: master 31017: Spawned child 1/1
2019-11-24 07:30:54 INFO  [codedeploy-agent(31022)]: On Premises config file does not exist or not readable
2019-11-24 07:30:54 INFO  [codedeploy-agent(31022)]: InstanceAgent::Plugins::CodeDeployPlugin::CommandExecutor: Archives to retain is: 5}
2019-11-24 07:30:54 INFO  [codedeploy-agent(31022)]: Version file found in /opt/codedeploy-agent/.version with agent version OFFICIAL_1.0-1.1597_deb.
2019-11-24 07:30:54 INFO  [codedeploy-agent(31017)]: Started master 31017 with 1 children
2019-11-24 07:31:54 INFO  [codedeploy-agent(31022)]: [Aws::CodeDeployCommand::Client 200 61.547075 0 retries] poll_host_command(host_identifier:"xxxx")

See here for the installation steps combined into a single script.

Script To Install AWS CodeDeploy Agent on Linux

Get Social!

Here is the script for installing the AWS CodeDeploy agent on Ubuntu. See the full description here.

For more information on AWS CodeDeploy, please see: https://aws.amazon.com/codedeploy/

apt update
apt -y install ruby

cd /tmp
wget https://aws-codedeploy-eu-central-1.s3.amazonaws.com/latest/install;
chmod +x ./install

./install auto

service codedeploy-agent start

Move Proxmox Container to Different Storage (Updated for LXC)

Get Social!

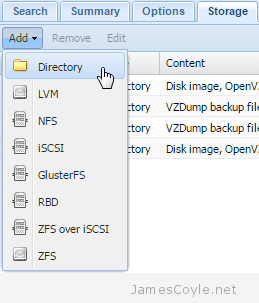
2015-03-05 00_18_04-Proxmox Virtual Environment storageThe Proxmox Web GUI does not give us the ability to migrate a container from one storage device to another directly. To move a container onto different storage we have to take a backup of the container and restore it to the same ID with a different storage device specified. This can be time laborious when working with several containers.

This is an update to the OpenVZ script found here.

The below script allows you to move an LXC container from one storage device to another. The process requires that the container be stopped, which the script will handle.

Save the below script into a file called migrate.

vi migrate
#!/bin/bash
#
# Filename : migrate
# Description : Migrate Proxmox OpenVZ container from one storage to another
# Author : James Coyle
#
# Version:
# -Date       -Author      -Description
# 20-11-2013  James Coyle  Initial
# 13-12-2017  James Coyle  Changes for LXC
#
#

# Variables
TMP=/tmp      #Location to use to create the backup for transferring to new storage. This needs to be big enough to store the backup archive for the container.

# Do not edit
usage() { 
	echo "Usage: $0" 
	echo "          [-c Required: Container ID to migrate <int>] "
	echo "          [-s Required: Target storage ID <string>]"
	echo "          [-d Optional: Delete the backup file after CT restoration <boolean>]"
	echo ""
	echo "Example: $0 -c 100 -s nasarray"
	echo ""
	exit 1; 
}

while getopts "c:s:d" o; do
  case "${o}" in
    c)
      CT=${OPTARG}
      ;;
    s)
      TARGET_STORAGE=${OPTARG}
      ;;
    d)
      DELETE=true
      ;;
    *)
      usage
      ;;
    esac
done
shift $((OPTIND-1))

# Check mandatory fields
if [ -z "${CT}" ] || [ -z "${TARGET_STORAGE}" ]; then
  usage
fi

RUNNING=false

set -e
set -o pipefail

echo "Moving $CT to $TARGET_STORAGE..."
if pct list| fgrep -w -q "$CT" | grep "running"
then
    RUNNING=true
fi

if $RUNNING
then
    pct stop $CT
fi

vzdump --dumpdir $TMP $CT

ARCHIVE=$(ls -t $TMP/vzdump-lxc-$CT-*.tar | head -n 1)

pct restore $CT $ARCHIVE -force -storage $TARGET_STORAGE

if $RUNNING
then
    pct start $CT
fi

if $DELETE
then
    LOG=$(ls -t $TMP/vzdump-lxc-$CT-*.log | head -n 1)
    echo "Deleting $LOG and $ARCHIVE"
    rm -rf $ARCHIVE $TMP/$LOG
fi

Set execution permissions on the script:

chmod + x migrate

The script has several parameters which are detailed below:

  • -d is specified if you would like the script to delete the temporary backup after the process has completed. Leave this out if you would like the backup tar file to be kept, just in case anything goes wrong.
  • -s is required to specify the name of the target storage. You can find this from the Proxmox Web GUI.
  • -c is required for the container ID to migrate.

In addition, the script contains the variable TMP. This will be the location of the backup tar created as part of the migration process and must contain enough space to store the content of the container being migrated. You can change this to suit your environment.

Example command:

./migrate -d -s newstorage -c 101


Add systemd Startup Script For CouchDB

Get Social!

couchdb-whiteCurrently, version 2.0 of CouchDB doesn’t come with any form of startup script. I’m sure that as the CouchDB 2 branch becomes more mature and it’s added to the various software repositories startup scripts will be shipped as standard, but until then we have to make do.
The below script is a systemd startup script with a cat command to create the file with the required content in the systemd config directories. Run the below script to create the startup file. You’ll need to change /usr/bin/couchdb to be the location of your couchdb executable.

cat <<EOT >> /etc/systemd/system/couchdb.service
[Unit]
Description=Couchdb service
After=network.target

[Service]
Type=simple
User=couchdb
ExecStart=/usr/bin/couchdb -o /dev/stdout -e /dev/stderr
Restart=always
EOT

You’ll then need to reload the systemd daemon and add the couchdb service to the startup routine. Run the below commands to enable CouchDB at machine startup.

systemctl  daemon-reload
systemctl  start couchdb.service
systemctl  enable couchdb.service


Manually downloading Java For Use With Webupd8’s apt-get Package

Category : How-to

Get Social!

java-logoOracle Java is one of the biggest problems in life. That’s just a fact. Half of it is the fact that you have to download it directly from Oracle each time, quarter of it is the almost daily updates (compounded by the first problem), and the remainder is dealing with the fact that the first problem is there by design.

Thankfully the boys and girls over at Webupd8 have created and maintain an apt-get deployed version of Oracle Java that handles initial setup and future updates. The apt package doesn’t actually contain the Oracle Java binaries, because that’s against Oracle’s TOC’s, but it contains a script that downloads it for you – all behind the scenes.

Sometimes Corporate networks block access to Oracle’s download servers and therefore block access to you installing Oracle Java by this method. Except…

You can manually download the JDK from Oracle and copy it to the required machine in the apt cache directory. When you then run the apt-get command the installer will realise that the tar.gz containing the Java binaries is available and won’t need to download it. You’ll still need the internet to download the apt package, but you won’t need to access oracle.com.

First off, make the relevant cache directory for use with your version of java. This example assumes Java 8.

mkdir /var/cache/oracle-jdk8-installer

Copy the latest version of Java into the above cache directory. This assumes that the download is in your current directory and is Java version 8 update 91.

cp jdk-8u91-linux-x64.tar.gz /var/cache/oracle-jdk8-installer/jdk-8u91-linux-x64.tar.gz

Finally install the required version of Java.

apt-get install oracle-java8-set-default

You’ll see the message Installing from local file as part of the installation indicating the installer hasn’t needed to download the Java binaries from Oracle.

Reading package lists... Done
Building dependency tree
Reading state information... Done
oracle-java8-set-default is already the newest version.
0 upgraded, 0 newly installed, 0 to remove and 3 not upgraded.
2 not fully installed or removed.
After this operation, 0 B of additional disk space will be used.
Do you want to continue? [Y/n] y
Setting up oracle-java8-installer (8u92+8u91arm-2~really8u91~webupd8~0) ...
Installing from local file /var/cache/oracle-jdk8-installer/jdk-8u91-linux-x64.tar.gz


Install DataStax Cassandra 3 on Debain/ Ubuntu

Get Social!

datastax-logoThe following process will install the DataStax distribution of Cassandra on any Debian based system, such as Debian or Ubuntu. We’ll use the official DataStax apt repositories to install Cassandra using apt-get.

Cassandra is written in Java and the latest version (at the time of writing) of Cassandra requires Java 8. You can use either OpenJDK or visit my Oracle Java post on installing the Oracle distribution of Java 8.

Once you have Java 8 installed and confirmed you can continue to install Cassandra. Use java -version on the command line to check your Java version.

java -version
java version "1.8.0_91"
Java(TM) SE Runtime Environment (build 1.8.0_91-b14)
Java HotSpot(TM) 64-Bit Server VM (build 25.91-b14, mixed mode)

Install DataStax Cassandra 3.4

Note: You can use the simple Bash script to install Java 8 and a single instance of Cassandra found here.

The first step to installing Cassandra with apt is to add the DataStax Cassandra repository and repository key to your local apt list. Run the following command to add the required repository and update your local apt cache. Change the version 3.4 on the first line to match the version you’d like to install.

echo "deb http://debian.datastax.com/datastax-ddc 3.4 main" | tee -a /etc/apt/sources.list.d/cassandra.sources.list
curl -L https://debian.datastax.com/debian/repo_key | apt-key add -
apt-get update

Once you’re updated then run the install command and begin the Cassandra install.

apt-get install datastax-ddc

Debian’s policy is for software to be available locally after the install has completed and therefore your Cassandra instance will be running as a single stand alone node.

You can run the nodetool to check the install has completed and that the Cassandra instance is available.

nodetool status

Datacenter: datacenter1
=======================
Status=Up/Down
|/ State=Normal/Leaving/Joining/Moving
--  Address     Load       Tokens       Owns (effective)  Host ID                               Rack
UN  10.10.10.10 1.29 MB    256          100.0%            c25d396e-fa09-4bf6-837d-676d57cd7987  rack1

The next step is to configure your Cassandra instance by editing the yaml config file /etc/cassandra/cassandra.yaml but that’s a blog post for another day.


Visit our advertisers

Quick Poll

Are you using Docker.io?

Visit our advertisers