Changing the OMS password on OpenNode

Changing the OMS password on OpenNode

Tags :

Category : How-to

Get Social!

open-node

The OpenNode Management Server is installed with a default password. To help ensure your OpenNode server is secure, you must change the password to something more secure.

See my blog post to install OMS if you haven’t yet got it set up.

The default username and password for OMS as below:

  • Username: opennode
  • Password: changeme

You must SSH onto the OMS OpenVZ container to change the password. You could SSH directly to the IP address or use vzctl enter to access it from the OpenNode host.

vzctl enter 999

The above example assumes that the OMS container is running using VMID 999.

Change directory to the OMS bin directory:

cd /opt/oms/bin

Execute the change password command and enter your new password when promted:

omspasswd opennode

Your password will be changed immediately and you can use it to log into the web front end of OMS.


Update OpenNode OMS to the Latest Version

Tags :

Category : How-to

Get Social!

open-node

OpenNodes web management GUI (OMS) runs in it’s own OpenVZ container. To update the running OMS you must connect to the OMS server via SSH and run the update command.

Log into the OMS Server via SSH using the root account.

OpenNode OMS Login

Change your current directory to the location of the update script using the below commands.

cd /opt/oms

Run the update.sh script with the below command.

./update.sh

You will receive a message similar to the below output confirming that the update has completed.

[root@oms oms]# ./update.sh
which: invalid option -- 'S'
/usr/bin/python2.7
Downloading file:///opt/oms/download-cache/setuptools-0.6c11-py2.7.egg
Updating oms.
Getting distribution for 'opennode.oms.core'.
Got opennode.oms.core 0.0-1585-g0bce.
Getting distribution for 'opennode.wsproxy'.
Got opennode.wsproxy 1.0.
Getting distribution for 'opennode.oms.onc'.
Got opennode.oms.onc 0.0-1063-g2fd9.
Getting distribution for 'opennode.oms.knot'.
Got opennode.oms.knot 0.0-779-g78a8.
Generated script '/opt/oms/bin/omspy'.
Generated script '/opt/oms/bin/omsd'.
Generated script '/opt/oms/bin/obj_graph'.
Generated script '/opt/oms/bin/omspasswd'.
Generated script '/opt/oms/bin/plugin'.
Generated script '/opt/oms/bin/fstail'.
Generated script '/opt/oms/bin/zeopack'.
Generated script '/opt/oms/bin/runzeo'.
Generated script '/opt/oms/bin/zeopasswd'.
Generated script '/opt/oms/bin/zeoctl'.
Generated script '/opt/oms/bin/fsdump'.
Generated script '/opt/oms/bin/fsrefs'.
Generated script '/opt/oms/bin/repozo'.
Generated script '/opt/oms/bin/fsoids'.
Generated script '/opt/oms/bin/wsproxy'.

The final step is to restart the OMS service. Use the below command and reload the service .

systemctl restart oms

Install OpenNode web GUI (OMS)

Tags :

Category : How-to

Get Social!

open-nodeThe OpenNode Management service, or OMS, is used to administer OpenNode via a web based GUI. The OMS is not installed by default and has to be added after installation. The OMS is not installed as a package using yum, but instead is a hosted OpenVZ container. The container is then registered with the OpenNode system and can then be used to administer it.

You must have OpenNode installed Before installing the OMS.

OpenNode also has a TUI, this is a text based management utility which can be used to create and manage new virtual machines and help you install the OMS.

Login to your OpenNode ssh session and run the opennode command to start the TUI.

opennode

Select OMS (beta) on the right to be given a set of options for getting the OMS up and running.OpenNode TUI main screen

Select Download OMS image and press ENTER.OpenNode TUI OMS main screen

Select Yes to start downloading the OMS virtual machine archive.OpenNode TUI OMS download

The download may take a while. If you quit the download and restart it, it will resume where it left off and not download the same part of the file twice.OpenNode TUI OMS downloading

Press OK when the download completes. OpenNode TUI OMS downloading finished

Back in the main menu, select Install OMS image to open the settings for the new virtual machine. You will need to enter the following settings

  •  VSwap size (GB): set to 1GB
  • Number of CPUs: set to two. The OMS can be quite CPU hungry when performing certain tasks.
  • CPU usage limit (%): set to 100% to allow all of the assigned CPU to be used.
  • Disk size (GB): as very little is stored on the OMS root device you will not need to assign it much space. 5GB should be sufficient.
  • IO Priority: although very little IO will occur on the OMS container, it is best to give it the priority over other containers.
  • Hostnameset this to the hostname you would like to use for the OMS container.
  • IP-address: set this to the IP address for the container to use.
  • Nameserver: set this to the IP address of your networks DNS server.
  • Root password: enter a password which the OMS container will use for it’s root account. This is not the password which will be used to access the web GUI.
  • Root password x2: Repeat your password to confirm it.
  • Start VM select this and press SPACE to start the container after it has been created.
  • Start on boot select this and press SPACE to enable the container to start up after your OpenNode server starts up after a reboot.

Click Create VM once you have entered all the required settings.OpenNode TUI OMS create VM

You will be taken back to the OpenNode Management Service (OMS) operations menu when your container has been created and started. The final step is to register the OMS with the OpenNode server. Select Register with OMS and enter the OMS server address – this is the IP you just created in the above step. Make sure the OMS server port remains on the default of 4506.OpenNode TUI OMS register

You can now log into your OMS web administration with the below username and password. The URL to use is the IP address you created when creating the container for the OMS. You must also access the page over HTTPS, for example https://10.10.10.8

  • Username: opennode
  • Password: changeme

opennode-login-screen

See my blog post on changing the password to help secure your OMS install.


Installing OpenNode 6

Category : How-to

Get Social!

open-nodeInstalling OpenNode is much like installing any other modern Linux distribution. You start with a text based installer to configure some of the basic options, such as netwokring, then you are presented with a GUI to complete the install.

Download the ISO from the OpenNode website and burn it to a CD, or mount the ISO on your virtual machine.

ISO: http://opennodecloud.com/downloads/

OpenNode system requirements

Recommended

  • Dual or Quad Socket Server (Quad/Six/Hexa Core CPUs)
  • CPU: 64bit (Intel EMT64 or AMD64)
  • Intel VT/AMD-V capable CPU/Mainboard (for KVM Full Virtualization support)
  • 8 GB RAM is good, more is better (grab as much as possible)
  • Hardware RAID with batteries protected write cache (BBU) or flash protection
  • Fast hard drives, best results with 15k rpm SAS, Raid10
  • Two Gbit NIC (for bonding), additional NIC´s depending on the preferred storage technology and cluster setup

Minimum (for testing)

  • CPU: 64bit (Intel EMT64 or AMD64)
  • Intel VT/AMD-V capable CPU/Mainboard (for KVM Full Virtualization support)
  • Minimum 4 GB RAM
  • Hard drive 25 GB
  • One NIC

The first screen you wil see when you boot the install CD is the boot menu. Press ENTER to start the install with default settings. You can use advanced boot options which are coved on my other blog post.

OpenNode Install Screen 1

You will now need to specify your network settings. Move around this screen using the arrow keys and pressing SPACE on the item to enable. You will notice an asterix (*) next to each item which is enabled. Select Manual Configuration for IPv4 and disable Enable IPv6 supportOpenNode Install Screen 2

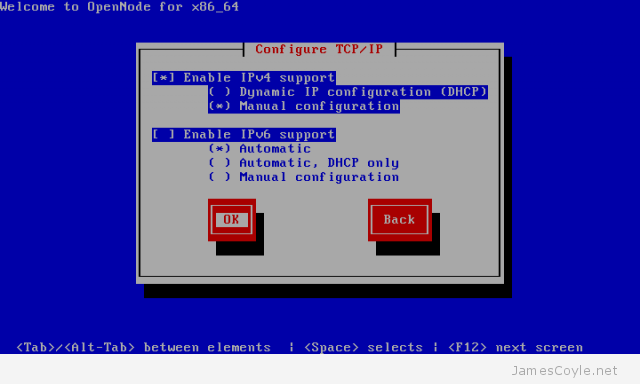
Now enter your IPv4 address, submask, Gateway and Name Server (DNS server) for your network and press TAB to select OK.OpenNode Install Screen 3

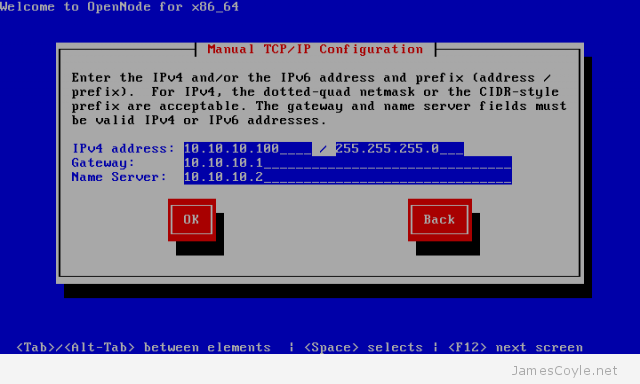
Press 1 and ENTER to use the default file system layout. OpenNode Install Screen 4

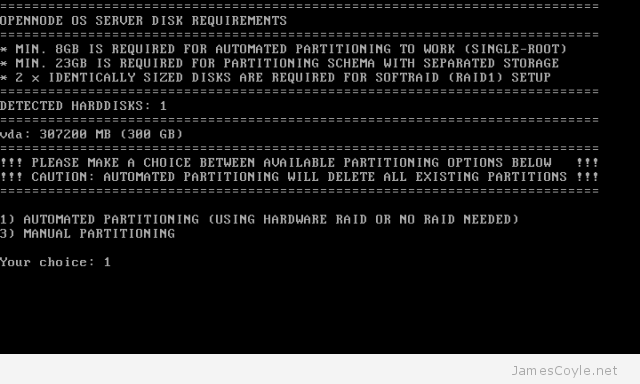
Press ENTER to confirm the changes and commit them to disk. OpenNode Install Screen 5

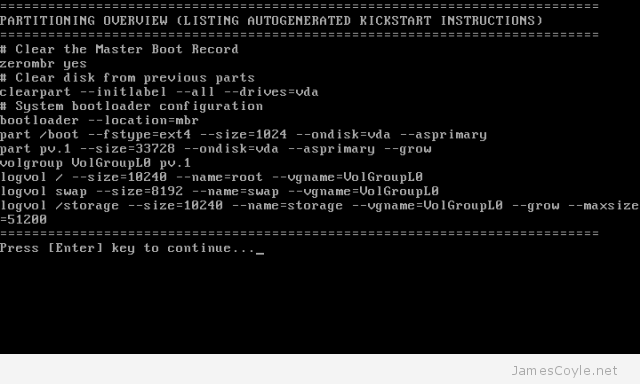
The GUI will now load and you can use either your mouse or keyboard to navigate the screen. Select your language and press Next.OpenNode Install Screen 6

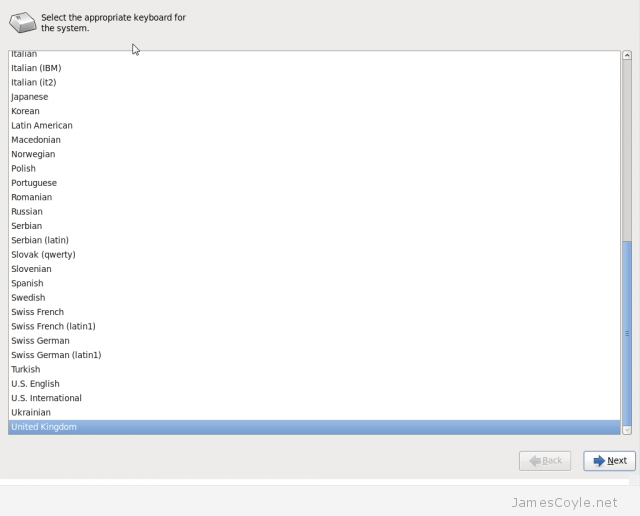
Type in the Hostname for your machine to use and press Next.OpenNode Install Screen 7

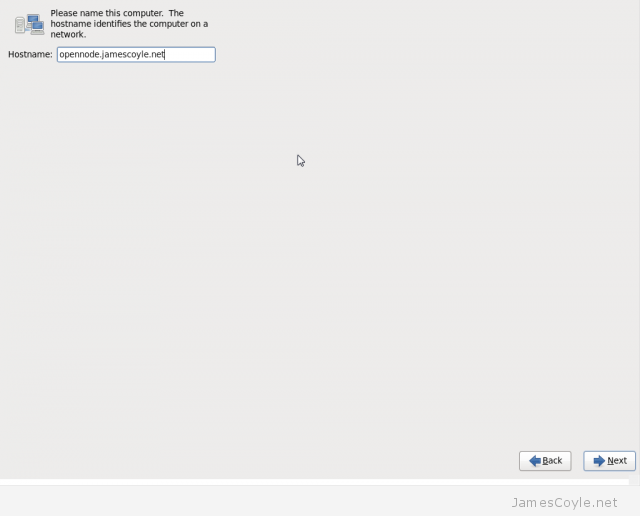
Choose your timezone by clicking areas on the map and press Next.OpenNode Install Screen 8

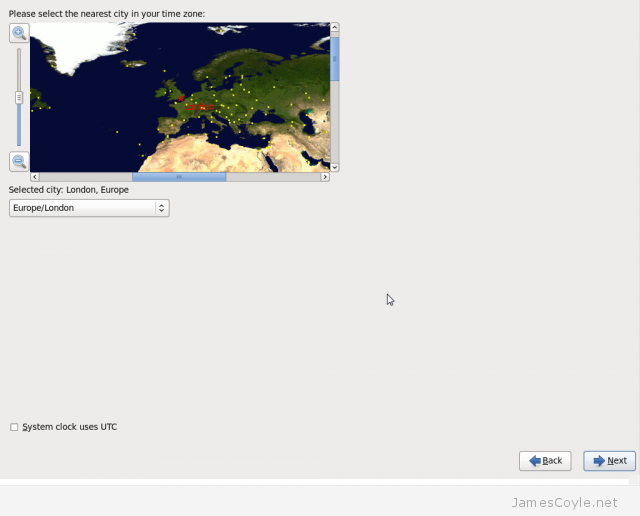
Enter the Root Password for your installation to use. This is the password you will use later to log into the system.OpenNode Install Screen 9

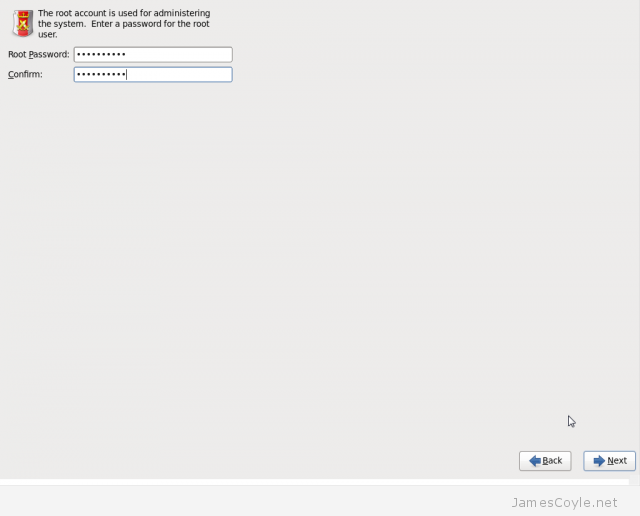
Press Next and the install will start. OpenNode Install Screen 10

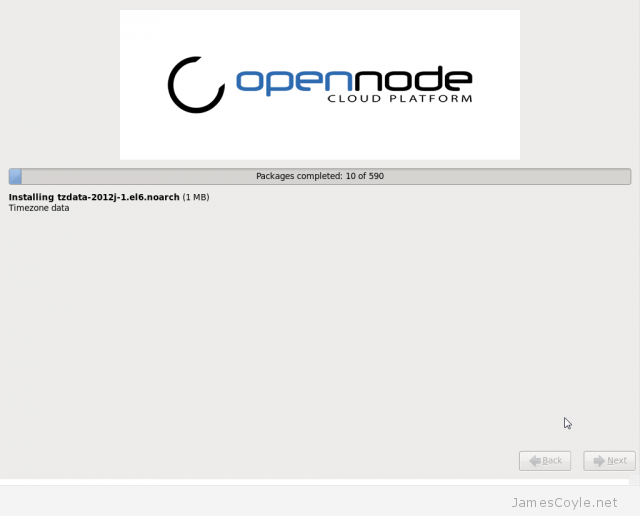
Once the installation completes, click Reboot to reboot your machine and boot from your new installation. OpenNode Install Screen 11

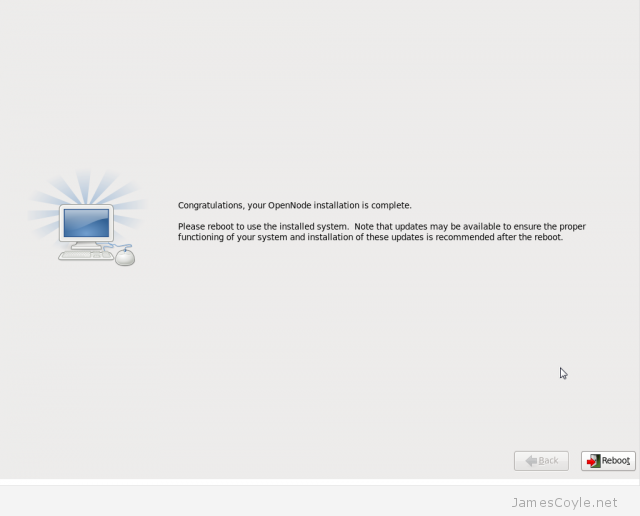
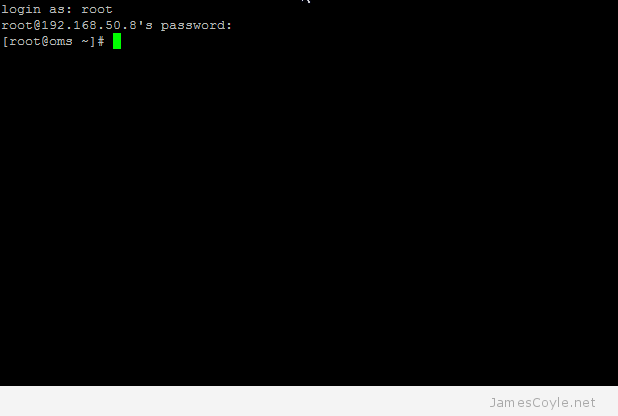
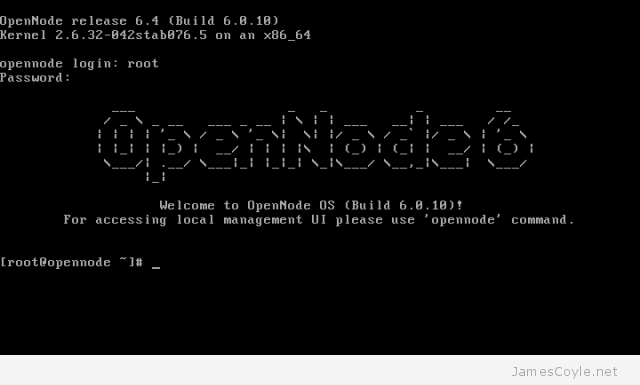
You will be presented with the login screen when your machine restarts. Log in with root as the username and the password you set in the earlier install step. OpenNode Login Screen

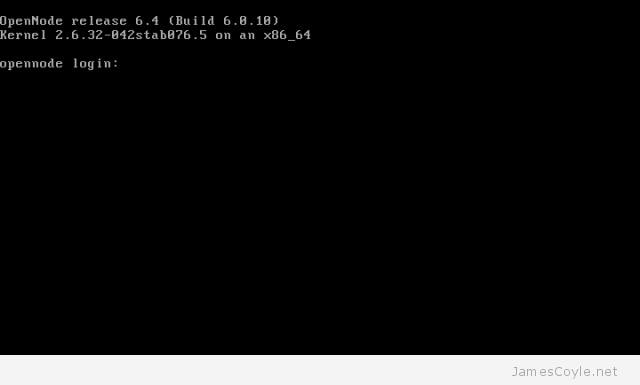
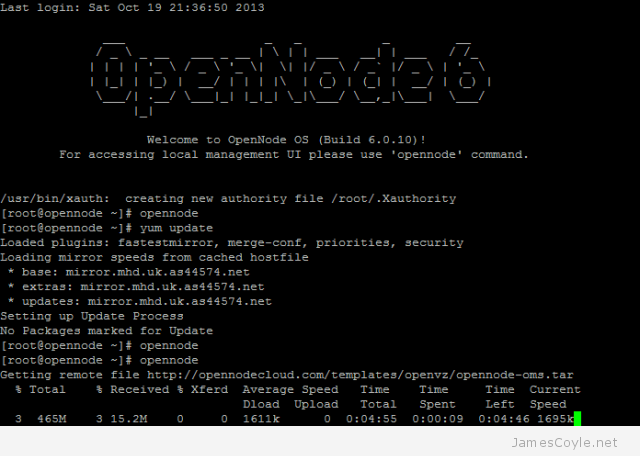
Now your install is complete and your OpenNode system is ready to be used. Before creating any VMs, it’s best to update your system using yum to make sure you have the latest bug fixes and security patches installed. Run the yum command to download and install the latest updates of all your installed packages. 

yum update

OpenNode Loged in Screen

The yum application is downloading the latest list of available software and will update them once you have confirmed that you would like to proceed. OpenNode yum update

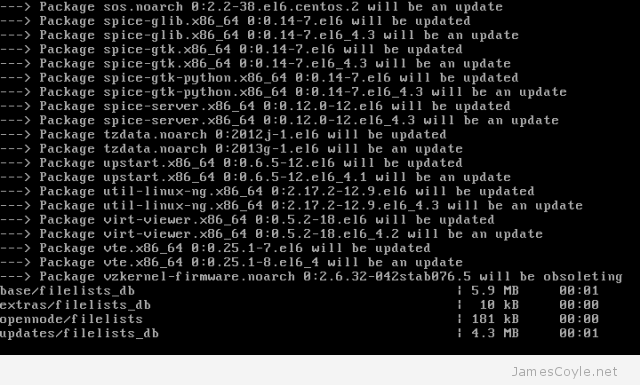
Press y and ENTER to download and install the latest version and their dependencies of your installed packages. OpenNode yum update2

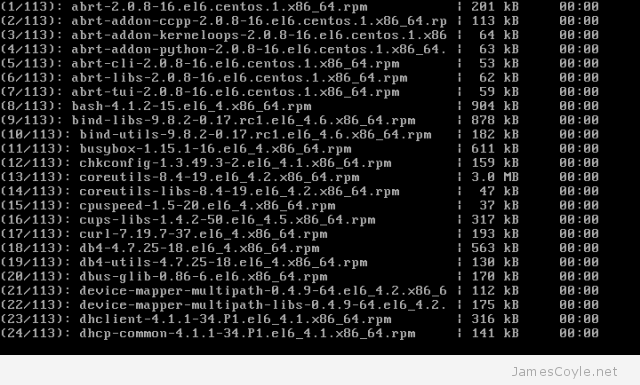
The first time you run yum update you will get warning about importing the GBG key. Press y and ENTER to accept.OpenNode yum update2 gpg key

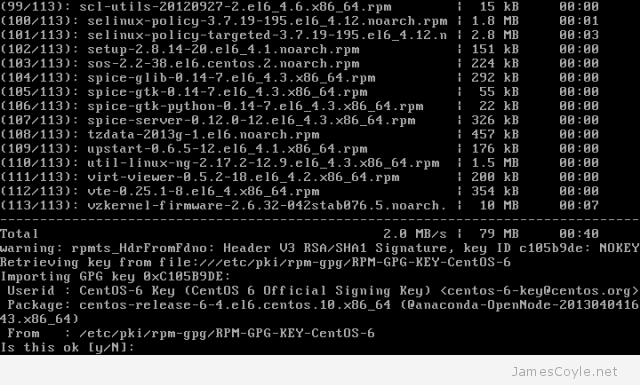
Finally, you need to reboot to make sure all the new packages are used. Issue the command reboot at the prompt.

reboot

OpenNode Booting Screen

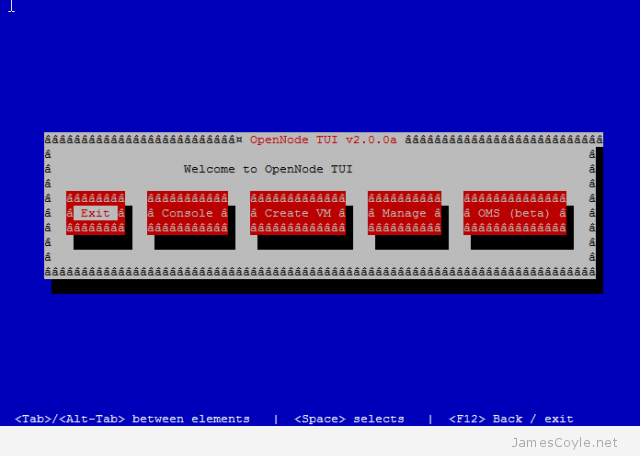
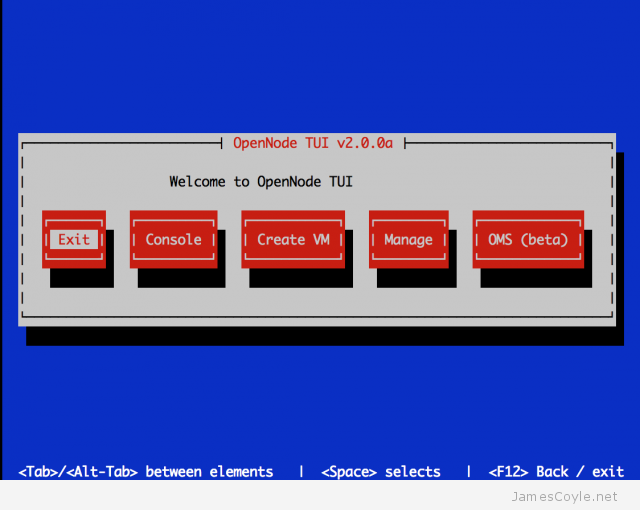
Wait for the operating system to load and you can start to use your new OpenNode installation. To get started, log back in and issue the command opennode to get started.

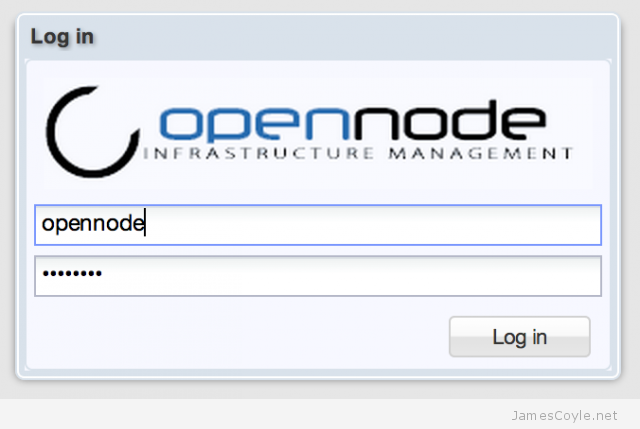
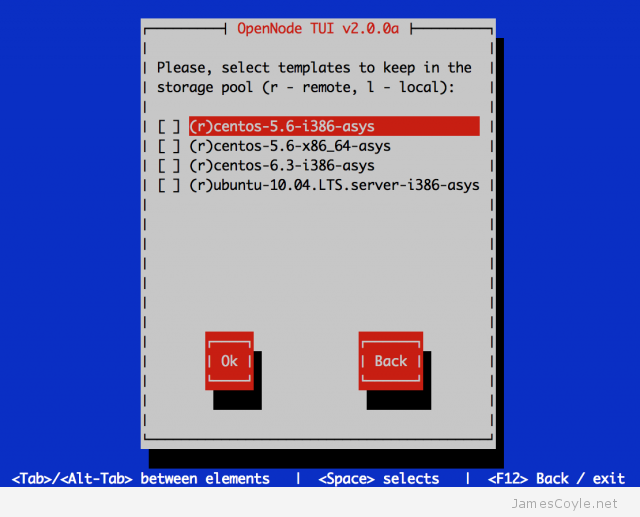
OpenNode does does not have a web based GUI installed by default. See my other blog post on setting up the web based GUI.


OpenNode – the Proxmox alternative

Tags :

Category : Tech News

Get Social!

open-nodeOver the past few days I have been looking at alternative virtualisation servers to Proxmox VE, something which I have been using for the past few years. This has been prompted by Proxmox’ recent move to subscription based stable repositories and free test repositories. What this means is that unless I pay a subscription, I am no longer allowed to use the stable Proxmox binaries through apt-get and have to use potentially unsafe ‘test’ binaries. Of cause, I could build the latest stable binaries directly from git but then there is another problem – I don’t know what commit is marked as ‘stable’ to use as my build source.

The trouble is, Proxmox is very good and has been around for quite a while under constant development. This means that it is feature rich, supporting two virtualisation methods (OpenVZ and KVM), has native support for many storage backends and has a nice web-based GUI to control it all. Other offerings are plentiful but none do quite the same job as Proxmox.

OpenNode is the closest I can find which is an immature version of Proxmox based on CentOS. It has support for both OpenVZ and KVM as well as a web GUI to administer it. It is a much younger product so don’t expect the same functionality as Proxmox but it’s showing promise and has an active and growing user base.

OpenNode has a few extras, compared with Proxmox, such as a SSH based GUI for downloading and maintaining VM templates (OpenVZ and KVM), adding storage locations and creating new VMs. The command is called opennode and starts a shell based GUI which you can move through with TAB and arrow keys.

Opennode TUI

Main menu in the TUI, the shell based administration tool.

Opennode TUI download kvm template

The KVM template download screen above is quite limited, however the are more up-to-date options for OpenVZ templates.opennode-login-screen

The web based GUI is hosted on a running OpenVZ container which, using the TUI tool, is registered with the OpenNode system. You can download and register the web based GUI using the TUI utility from the command line.

After logging in with the following:

  • username = opennode
  • password = changeme

You will be presented with the home page – I have nothing running at the moment as you can see from the below screen.

opennode web gui

As I said previously, this is still a little immature compared with Proxmox – it’s not as feature rich or as polished. That said, it looks after OpenVZ and KVM VMs and makes it very easy to add new templates and edit and create your own. The most understated attribute is the web Terminal – it doesn’t require Java and works like a charm! Combine that with no annoying ‘No valid subscription’ popups and OpenNode is looking more and more appealing.

So… should you ditch Proxmox and make the switch? I’m not sure, but be damn sure to give it a trial.


Visit our advertisers

Quick Poll

Are you using Docker.io?

Visit our advertisers