Mount a Windows/ Samba Share in Linux

Mount a Windows/ Samba Share in Linux

Category : How-to

Get Social!

Linux penguinGiven the amount of trouble you can have getting Linux and Windows to play nicely together, you may be surprised to find out that it’s easy to mount either a Windows file share on Linux. You can also use the same method to mount a Samba share.

This article assumes you already have a Windows or Samba share set up which is protected by a username and password. The user could be part of a domain or local to the machine which presents the storage.

The first step is to create a credentials file which will contain the username and password for accessing the file share. This needs to be in a protected area so that the details cannot be viewed. For this example, I will put the file in the root home directory.

vi /root./smbcreds

Add the following details, substituting the below details

  • [DOMAIN] – this is the domain for the file share user. This may not be required in all environments.
  • [USER] – this is the user name for the file share.
  • [PASSWORD] – this is the password of the above user.
username=[DOMAIN]\[USER]
password=[PASSWORD]

For example:

username=JAMESCOYLE\james.coyle
password=mypassword

Before continuting with the configuration, we need to make sure that the required packages are installed. On Ubuntu, you can use the apt-get command. Use your distributions package manager for other Linux distributions.

apt-get install cifs-utils

The next step is to create a folder where you will mount the Windows or samba share to in Linux. I will use the mount point /mnt/winshare.

mkdir /mnt/winshare

Now open fstab and add a new row at the bottom of the file to mount the remote share to the local folder. Add the below line to your fstab and substitute the values for your environment.

  • [SHARE_LOCATION] – is the remote host name/ DNS and shared folder name.
  • [MOUNT_LOCATION] – is the local path which will be used as the mount point for the Windows or Samba share.
  • cifs – is the type of mount to use. For older Linux systems you may need to use smbfs.
  • [CREDENTIALS_FILE] – is the location of the local credentials file.
//[SHARE_LOCATION]  [MOUNT_LOCATION]  cifs  credentials=[CREDENTIALS_FILE],iocharset=utf8,uid=1001,_netdev,file_mode=0770,dir_mode=0770 0 0

For example:

//windowsbox/sharename  /mnt/winshare  cifs  credentials=/root/.smbcreds,iocharset=utf8,uid=1001,_netdev,file_mode=0770,dir_mode=0770 0 0

Finally we need to create the mount which will use the details in fstab. Change [MOUNT_POINT] to match the mount point you created.

mount [MOUNT_POINT]

For example:

mount /mnt/winshare

doskey in Windows is just like alias in Linux

Category : How-to

Get Social!

doskey on Windows is very similar to alias on Linux, it allows you to set a term which will call a command and allow you to specify default arguments. You can specify that the command showdirs could call the command dir to list the content of a folder.

You may have guessed, the above use of doskey is unlikely and has no real benefit. A better use of the command would be to turn some of the windows commands into their Linux counterparts – such as ls into dir.

Run the below command in a command prompt to alias ls to run the command dir. The $* on the end are required so that any additional arguments are also passed to the dir command.

doskey ls=dir $*

The problem with this is that all of your alias commands will be lost when you close the cmd session. To make them persist we need to create a batch file and add the entry to the windows registry.

Create a new folder in the windows directory called bin and create a new batch file inside it.

C:\>mkdir c:\windows\bin
C:\>notepad.exe c:\windows\bin\doskey.bat

Add your entries to the batch file in the below format.

@echo off
doskey ls=dir $*
doskey mv=move $*
doskey cp=copy $*
doskey cat=type $*

Next, open up regedit.exe and add an entry to the batch file to make the doskey commands permanent for each cmd session.

HKEY_CURRENT_USER\Software\Microsoft\Command Processor

Add a new String Value called AutoRun and set the absolute path in the value of c:\windows\bin\doskey.bat.

The doskey.bat file will now be executed before opening a new cmd session which will set all of your alias ready for you to use.


Map a Network Drive from the Windows Command Line

Get Social!

Screen Shot 2014-01-16 at 15.21.41

The windows command line can be very useful to quickly perform repetitive tasks.

It is easy to write batch scripts which combine actions and can be easily triggered from the command line.

Mapping a network drive in Windows in a common task and can be done from the command line.  The syntax is:

net use [drive letter]: /persistent:[yes|no] "\\path\to\share"

The persistent command will make the mapped drive persist over reboots.

The below example maps drive Z to a server called fileserver.jamescoyle.net and the share homes.

net use z: /persistent:yes "\\fileserver.jamescoyle.net\homes"

Windows Task Manager – what do the memory columns mean?

Get Social!

Screen Shot 2013-10-02 at 18.40.41

I have recently been using Windows to tune a Java application I created to move large amounts of data into a database. The application was very memory hungry as it implemented various queues to buffer incoming data before committing it to the data target.

This meant that I needed to understand the memory which was being used at any given point, both in the JVM and on the operating system itself. On the Windows side, the Task Manager has many extra columns which can be added to the Processes tab to see exactly what each process is doing, and how much resource it is costing to do it.

The CPU and IO columns should be fairly straight forward however the memory columns can be most confusing. Before we can get into it there are a few terms which you must understand

  • Physical memory – this is RAM, physical memory which you have installed in your machine. This is the fastest type of memory and also the most expensive. Physical memory will be used for all your processes memory requirements unless you run out or the operating systems decides to free some for other things.
  • Virtual memory – when you run out of physical memory and another process asks for more memory the operating system needs a mechanism to ensure the requirements can be met. Virtual memory is used much the same as RAM however it is stored on a disk. Disks, even SSDs, are very slow compared to RAM and come with a huge performance impact. Your operating system will move RAM to virtual memory when a process hasn’t been used for a while, or if sacrifices need to be made to free some RAM for something else.

There are many memory related columns in Windows Task Manager which all have subtly different meanings. Here are some of the most common and useful memory column definitions:

  • Memory – Working Set – is the total amount of memory used by the process which is private and unique to the process as well as shared memory used by the process such as shared libraries.
  • Memory – Private Working Set – is the amount of memory used by the process which is unique to the process and cannot be accessed by other processes.
  • Memory – Peak Working Set – is the most memory, both unique and shared, which has been used by the process since it started. This is reset each time the process ends.
  • Memory – Commit Size – is the amount of virtual memory which is reserved, or committed, for the process.
  • Page Faults – is the amount of times memory has been fetched from virtual memory because it was not found in physical memory. This is a counter and similar to Memory – Peak Working Set  in that it is reset each time the process ends.

By understanding an monitoring these values you can get an understanding of what a processes is doing with it’s memory.


Reclaim disk space from a sparse image file (qcow2/ vmdk)

Get Social!

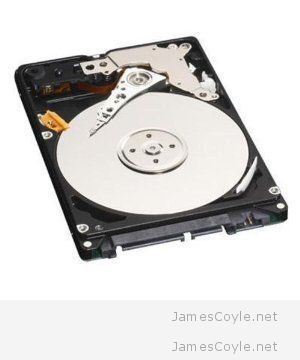
western-digital-diskSparse disk image formats such as qcow2 only consume the physical disk space which they need. For example, if a guest is given a qcow2 image with a size of 100GB but has only written to 10GB then only 10GB of physical disk space will be used. There is some slight overhead associated, so the above example may not be strictly true, but you get the idea.

Sparse disk image files allow you to over allocate virtual disk space – this means that you could allocate 5 virtual machines 100GB of disk space, even if you only have 300GB of physical disk space. If all the guests need 100% of their 100GB disk space then you will have a problem. If you use over allocation of disk space you will need to monitor the physical disk usage very carefully.

There is another problem with sparse disk formats, they don’t automatically shrink. Let’s say you fill 100GB of a sparse disk (we know this will roughly consume 100GB of physical disk space) and then delete some files so that you are only using 50GB. The physical disk space used should be 50GB, right? Wrong. Because the disk image doesn’t shrink, it will always be 100GB on the file system even if the guest is now using less. The below steps will detail how to get round this issue.

On Linux

We need to fill the disk of the guest with zero’s (or any other character) so that the disk image can be re-compressed.

In a terminal, run the below command until you run out of disk space. Before running this, be sure to stop any applications running on the guest otherwise errors may result.

dd if=/dev/zero of=/mytempfile

Once the command errors out (this may take a while depending on your disk image size and physical disk speed) delete the file.

rm -f /mytempfile

Shutdown the guest and follow the steps below under All OS’s.

On Windows

You will need to download a tool called sdelete from Microsoft which is will fill the entire disk with zeros which can be re-compressed later.

Download: http://technet.microsoft.com/en-gb/sysinternals/bb897443.aspx

Once you have downloaded and extracted sdelete, open up a command prompt and enter the following. This assumes that sdelete was extracted into c:\ and c:\ is the disk you would like to use to reclaim space

c:\sdelete.exe -z c:

Once this completes (this may take a while depending on your disk image size and physical disk speed), shutdown the guest and follow the below steps under All OS’s.

All OS’s

The rest of the process is done on the host so open up a terminal window and SSH to your Proxmox host. Move to the directory where the disk image is stored and run the below commands.

Make sure you have shut down the virtual machine which is using the qcow2 image file before running the below commands.

mv original_image.qcow2 original_image.qcow2_backup
qemu-img convert -O qcow2 original_image.qcow2_backup original_image.qcow2

The above commands move the original image file, and then re-compress it to it’s original name. This will shrink the qcow2 image to consume less physical disk space.

You can now start the guest and check that everything is in working order. If it is, you can remove the original_image.qcow2_backup file.


Restart Windows from the command line

Category : How-to

Get Social!

Windows 7 ShutdownSometimes you may want to restart windows without clicking the Start menu. In some cases, such as in a remote desktop session, the option to restart Windows is missing completely from the Start menu.

You can restart Windows XP/ Windows Server 2003 or newer, using the Windows command line or a shortcut.

shutdown -r -t 10

-r: is the argument to request a restart, rather than a complete shutdown.
-t n: is used to specify a delay, before the restart command will take effect. The default is 60 seconds. ‘n’ represents the time in seconds.

To name a few just a few, you can run this command from the Run dialogue, from a CMD, or from a shorcut.


Visit our advertisers

Quick Poll

Are you using Docker.io?

Visit our advertisers