How to make a new OpenVZ template from an existing template for Proxmox

How to make a new OpenVZ template from an existing template for Proxmox

Get Social!

openvz-logo-150px_new_3The kind folks over at OpenVZ.org have created a rift of templates which we can use as a starting point for our template. It is possible however, to create your own template from scratch based on your favorite Linux distribution – that will be coming in a later blog post.

The starting point for this blog post is to have downloaded a template and started it up in a container. If you don’t have any templates you can download one from OpenVZ. If you use Proxmox as your hypervisor you can download one via the web gui by clicking on your storage, clicking and finally Templates.

So, as I say, you need to have a container up and running and for this post we are going to assume it is running under the VMID of 100. Make any required changes to the template such as:

  • apt-get update && apt-get upgrade (for Debian based containers).
  • yum update (for anything RedHat).

When you are ready to create the template, turn of the container by using the GUI’s Shutdown button or issuing the command halt in the containers terminal.

The next thing to do is to remove the network interface. It doesn’t matter if you use veth or venet – just use the web gui and remove the network device. Proxmox container network remove

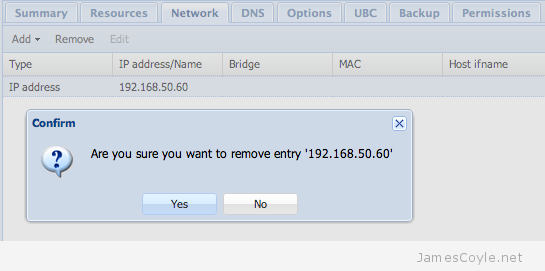
Once this is complete, login via SSH to the Proxmox server and cd to the root directory of the container. If you have the default setup, this will be /var/lib/vz/private/100.

ssh root@proxmoxserver
cd /var/lib/vz/private/100

Issue the tar command to create the template archive (remember to keep the . on the end, it’s important!). You can change the container template name to anything you like, but I have found it best to conform to the following formula:

operatingsystem-version-archtype-description.tar.gz

tar -cvzpf /var/lib/vz/template/cache/oracle-6-x86_64-intitial.tar.gz .

That’s it! You can now select the container when creating a template from either the GUI or using CLI commands.

I have made a patch for the Proxmox web GUI to add this functionality to the the interface. See my GUI changes blog post for more information.


Limit backup I/O bandwidth

Category : How-to

Get Social!

proxmox_logoWhen backing up in Proxmox, especially on the lower end of the server market, the backup process can cause your system to almost grind to a halt. Luckily, there is a config change which we can make to limit the bandwidth of the backup process to make sure there is sufficient bandwidth for everything else.

The setting cannot be changed using the web gui, you must log into your Proxmox server using SSH. Once you have logged in, open the config file:

vi /etc/vzdump.conf

Find the line which contains bwlimit, remove the hash and append the value of KB/s which you would like the backup limiting to. The below example limits the backup process to 40000 KB/s.

bwlimit 40000

To calculate how many KB/s you need will take trial and error to see what affect speeds have on your system. Something which is helpful however, is converting MBs (Megabytes) into KB/s (Kilobytes). The formula is simple – just multiply the MB value by 1024 as there are 1024 KB in a MB.

MB/s * 1024 = KB/s

If you want a transfer speed of 10 MB/s you would use a bwlimit value of 10240 as the below example shows.

10 MB/s * 1024 = 10240 KB/s

Proxmox 2.3 is now available!

Tags :

Category : Tech News

Get Social!

proxmox_logoThere is a new version of Proxmox now available for download. Version 2.3 offers some new features, mostly around KVM. Some of the notable improvements are:

  • update qemu-kvm to 1.4.0
  • extend memory GUI to support ballooning
  • implement auto-ballooning
  • add HD resize feature to expand disks
  • update to latest Debian version 6.0.7
  • qcow2 as default storage format, cache=none (previously raw)
  • KVM64 as default CPU type (previously qemu64)
  • e1000 as default NIC (previously rtl8139)
  • task history per VM
  • Node Summary: added “KSM sharing” and “CPU Socket count”
  • enable/disable tablet for VM on GUI without stop/start of VM (you can use vmmouse instead, for lower CPU usage, works on modern Linux and on all Windows VMs as long as you install the vmmouse drivers)

See the Proxmox Wiki post for more details of the update.

For any 2.x version of Proxmox, you can update via apt-get by using the below commands in a terminal. Before updating, make sure all your VM’s have been stopped. Run the below commands on each server in your cluster.

apt-get update
apt-get dist-upgrade

Restart all Proxmox servers to complete the installation.


Proxmox VE 1.x is now End of Life (EoL)

Get Social!

proxmox_logoVersion 1.x of Proxmox VE is now end of life. This means that Proxmox will no longer be supported, bugs will not be fixed and security fixes will not be released. You will still receive the standard rift of Debian 6 patches and updates from the Debian repositories.

If you are still on version 1.x of Proxmox VE you should upgrade to Proxmox 2.2 as soon as possible. See the official Proxmox wiki on upgrading.

http://pve.proxmox.com/wiki/Upgrade_from_1.9_to_2.0

See our blog post on installing Proxmox 2 – Yes, I know it’s version 2.1 but, the steps are the same for Proxmox 2.2.


More Proxmox 2.2 updates available!

Category : Tech News

Get Social!

proxmox_logoThere are several updates in the Proxmox 2.2 repository available for download. This update introduces updates to software used by Proxmox, such as QEMU 1.3, and many bug fixes.

See the Proxmox Forum post for more details of the update.

For any 2.x version of Proxmox, you can update via apt-get by using the below commands in a terminal. Before updating, make sure all your VM’s have been stopped. Run the below commands on each server in your cluster.

apt-get update
apt-get dist-upgrade

Restart all Proxmox servers to complete the installation.


Proxmox 2.2 updates available

Category : Tech News

Get Social!

Proxmox 2.2 has some updates which have been pushed to the stable repository. There is no new functionality added with these updates, they are just bug fixes.

Reading the forum, there looks to be an issue with this update if you have turned off being able to login to SSH with passwords and enabled keys on your Proxmox host. It looks like the keys are removed and you will need to login to the local shell to re-create the keys. Updating a standard cluster works fine.

Before updating, make sure all your VM’s have been stopped. Run the below commands on each server in your cluster.

apt-get update
apt-get dist-upgrade

Restart all Proxmox servers to complete the installation.

For more information, visit the forum post on Proxmox.com.


Visit our advertisers

Quick Poll

How often do you change the password for the computer(s) you use?

Visit our advertisers