Create a Ubuntu 14.04 OpenVZ Template for Proxmox
Category : How-to
![]() The latest Ubuntu long term support is now available, called Ubuntu 14.04.
The latest Ubuntu long term support is now available, called Ubuntu 14.04.
There isn’t currently a template available over on OpenVZ however I’m sure that will be shortly rectified. In the meantime, however, you can use the below steps to create a 14.04 Ubuntu template for OpenVZ/ Proxmox. This template has only been lightly tested so please report any errors as you find them.
This template is BETA, please report any problems in the comments.

You can download a pre-created VM from here directly, or you can create your own using the below notes.
Before continuing, this guide assumes that you already have an installation of Ubuntu up and running which you can SSH to. This could be either a KVM or physical machine.
We will use debootstrap to create the template so make sure it’s installed and install it if you haven’t already.
apt-get install -y debootstrap
Use debootstrap to download and configure all the required packages to a temporary directory. For this example, we’ll use /tmp/deb.
debootstrap --arch amd64 trusty /tmp/deb ftp://ftp.ubuntu.com/ubuntu
Copy the below script into the tmp directory of the template root which has just been created. For this example you’ll need to copy the text into this path:
vi /tmp/deb/tmp/client.sh
#!/bin/bash

echo "root:password" | chpasswd

apt-get update

apt-get purge -y console-setup ntpdate whiptail eject ureadahead sudo vim-tiny rsync
apt-get install -y vim openssh-server

find / -name *ondemand -exec rm -rf {} \;
rm -f /etc/init/console* /etc/init/tty*

sed -i -e 's/^\$ModLoad imklog/#\$ModLoad imklog/g' /etc/rsyslog.conf
sed -i -e 's@\(space:\)\(/var/log/\)@\1-\2@' /etc/rsyslog.d/*.conf
sed -i -e 's/^\#cron./cron./g' /etc/rsyslog.d/50-default.conf

sed -i -e 's/^\console output/#console output/g' /etc/init/rc.conf
sed -i -e 's/^\env INIT_VERBOSE/#env INIT_VERBOSE/g' /etc/init/rc.conf

locale-gen en_US.UTF-8
locale-gen en_GB.UTF-8
dpkg-reconfigure locales

cp /usr/share/zoneinfo/Europe/London /etc/localtime

cat <<EOF > /etc/init/tty1.conf
# tty1 - getty
#
# This service maintains a getty on tty1 from the point the system is
# started until it is shut down again.

start on stopped rc RUNLEVEL=[2345]

stop on runlevel [!2345]

respawn
exec /sbin/getty -8 38400 tty1
EOF

rm -f /etc/ssh/ssh_host_*

cat << EOF > /etc/init.d/generate_ssh_keys
#!/bin/bash
ssh-keygen -f /etc/ssh/ssh_host_rsa_key -t rsa -N ''
ssh-keygen -f /etc/ssh/ssh_host_dsa_key -t dsa -N ''
rm -f \$0
EOF

chmod a+x /etc/init.d/generate_ssh_keys
update-rc.d generate_ssh_keys defaults

apt-get clean
find /var/ -name *.log -exec rm -rf {} \;
rm -rf /boot /dev /media /opt /run /srv /tmp /root/.bash_history /root/.viminfo /etc/ssh/ssh_host_*
mkdir /dev /run /tmp
touch /dev/null

exit
Make the script runnable which chmod.
chmod +x /tmp/deb/tmp/client.sh
Run the above script using the chroot command to set up the template.
chroot /tmp/deb /tmp/client.sh
The script will now run and set up the template using /tmp/deb/ as the templates root.
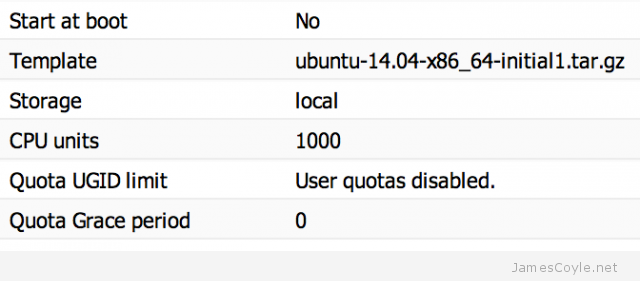
Once completed, create an archive of the template root device and install it on your OpenVZ/ Proxmox server.
cd /tmp/deb
tar -czpf /tmp/ubuntu-14.04-x86_64-initial1.tar.gz .
Copy the /tmp/ubuntu-14.04-x86_64-initial1.tar.gz file to your cache directory of your Proxmox install and create your first Ubuntu 14.04 container!
 Splunk is the heavyweight open source software which enables you to index, visualise and explore virtually any machine generated data. Splunk is often used to consume Apache and Nginx web server logs as well as website clicks and any other data which maintains a constant format.