Start Ubuntu Without Starting The Gnome Desktop (text mode)

Start Ubuntu Without Starting The Gnome Desktop (text mode)

Get Social!

If you’ve installed a desktop, such as Gnome, on Linux you may not need it all the time. Some of the time taken to boot your machine when you first turn it on is used by loading the GUI and everything that comes with it. In addition, once it’s loaded it will consume resources such as RAM.

Once you install a desktop such as Gnome, especially on Ubuntu/ Debian, the default is to boot your computer into the GUI.

You could set the desktop not to load by default so that you’re presented with a terminal login screen on boot.console-login

You can then load the desktop, such as Gnome, if you need to or just use the terminal if you don’t.

To disable the Desktop on boot you’ll need to edit the grub config file and edit the GRUB_CMDLINE_LINUX_DEFAULT parameter.

vi /etc/default/grub

GRUB_CMDLINE_LINUX_DEFAULT will likely be quiet splash and you’ll need to change that to quiet splash text.

GRUB_CMDLINE_LINUX_DEFAULT="quiet splash text"

Save and close the file.

The last step is to run the update-grub command to update the grub bootloader config.

update-grub

Your computer will now always boot in text mode, that is, without a desktop.

Start the Desktop

If you ever want to start the desktop, log in to the terminal session with your user name and password and run the following:

gnome-session


Download Oracle Java From The Terminal With wget

Get Social!

java-logoOracle have a very restrictive license that applies to most of their software downloads which prohibits you from distributing the binaries yourself. What this means, for example, is that you could not download the Java binaries and upload them to your own APT repository for others to use.

There are a few workarounds that exist to help making this install easier, but here we’re going to look at downloading the Java runtime environment (JRE) binaries and installing them all from a command line.

Use wget to download the binaries, so make sure that’s available on your system. If it isn’t, simply apt-get install wget.

One of the important things to note is that the Java version changes over time and therefore the links and commands below may need to be changed to ensure you’re always getting the latest version. Check out the Java Download Page to make sure you have the latest.

wget --header "Cookie: oraclelicense=accept-securebackup-cookie" http://download.oracle.com/otn-pub/java/jdk/8u51-b16/server-jre-8u51-linux-x64.tar.gz

I’m using an minimal version of Debian that doesn’t have the worlds Certificate Authorities installed and therefore wget gives me an error:

ERROR: cannot verify edelivery.oracle.com's certificate, issued by '/C=US/O=GeoTrust, Inc./CN=GeoTrust SSL CA':
  Unable to locally verify the issuer's authority.
To connect to edelivery.oracle.com insecurely, use `--no-check-certificate'.

The fix is to either install the correct CA certificate on the machine or add the no-check-certificate switch to wget to avoid checking the certificate:

wget --no-check-certificate --header "Cookie: oraclelicense=accept-securebackup-cookie" http://download.oracle.com/otn-pub/java/jdk/8u51-b16/server-jre-8u51-linux-x64.tar.gz

Once you have the Java archive downloaded you’ll need to create a target folder and extract the downloaded archive with tar:

mkdir /opt/jre
tar -zxf server-jre-8u51-linux-x64.tar.gz -C /opt/jre

The last couple of steps are to tell your OS to use the Java binaries you’ve just moved into place.

update-alternatives --install /usr/bin/java java /opt/jre/jdk1.8.0_51/bin/java 1000
update-alternatives --install /usr/bin/javac javac /opt/jre/jdk1.8.0_51/bin/javac 1000

Running anything in Java, or using the -version switch should now use your newly installed binaries.

java -version
java version "1.8.0_51"
Java(TM) SE Runtime Environment (build 1.8.0_51-b16)
Java HotSpot(TM) 64-Bit Server VM (build 25.51-b03, mixed mode)


Bash Command to Check Container Disk Space in Proxmox/ OpenVZ

Get Social!

proxmox logo gradKeeping an eye on all of your containers disk space can be time consuming if done one by one. Luckily, the vzlist command gives us access to many of the data and counters associated with each container.

Running vzlist on it’s own will give a list of the currently running containers and a few extra columns of information such as IP address and hostname.

vzlist
CTID NPROC STATUS  IP_ADDR     HOSTNAME
100  27    running 10.10.10.10 test.jamescoyle.net

You might be thinking that the above command doesn’t show anything about containers which are currently turned off, or about disk space. You’d be right!

Adding the –all switch will include all containers, regardless of their running state.

To add the disk space information we add the –output switch followed by the column names we want to display. For disk space, the column name is helpfully named diskspace so the command will look like this:

vzlist --all --output diskspace
DSPACE
1184648

We now see the disk space of all of our containers, but with a problem. We have no idea (although in this example we do because we only have one container) which container the disk space output is for. We need to add a few more columns to the –output switch such as ctid and hostname.  (see below for a complete list of output columns)

vzlist --all --output ctid,hostname,diskspace
CTID HOSTNAME             DSPACE
100  test.jamescoyle.net  1184660

The last trick here is to add a sort using the –sort switch and the column name

vzlist --all --output ctid,hostname,diskspace --sort diskspace
CTID HOSTNAME             DSPACE
100  test.jamescoyle.net  1184660

Let’s put all that together, plus a spot of awk magic to get a nice disk full percentage that we can work with:

vzlist --all --output ctid,hostname,diskspace,diskspace.s,diskspace.h --sort diskspace | awk '{if (NR>1) {printf("%-4s %-30s %-10s %-10s %-10s %d\n", $1, $2, $3, $4, $5, $3/$4*100)} else printf("%-4s %-30s %-10s %-10s %-10s %s\n", $1, $2, $3, $4, $5, "PERC_USED")}'

Output:

CTID HOSTNAME            DSPACE  DSPACE.S DSPACE.H PERC_USED
100  test.jamescoyle.net 1184684 5242880  5767168  22

Complete list of vzlist column headings

You can get a complete list of vzlist column headings with the following command:

vzlist -L
ctid            CTID
veid            CTID
vpsid           CTID
private         PRIVATE
root            ROOT
mount_opts      MOUNT_OPTS
origin_sample   ORIGIN_SAMPLE
hostname        HOSTNAME
name            NAME
smart_name      SMARTNAME
description     DESCRIPTION
ostemplate      OSTEMPLATE
ip              IP_ADDR
nameserver      NAMESERVER
searchdomain    SEARCHDOMAIN
status          STATUS
kmemsize        KMEMSIZE
kmemsize.m      KMEMSIZE.M
kmemsize.b      KMEMSIZE.B
kmemsize.l      KMEMSIZE.L
kmemsize.f      KMEMSIZE.F
lockedpages     LOCKEDP
lockedpages.m   LOCKEDP.M
lockedpages.b   LOCKEDP.B
lockedpages.l   LOCKEDP.L
lockedpages.f   LOCKEDP.F
privvmpages     PRIVVMP
privvmpages.m   PRIVVMP.M
privvmpages.b   PRIVVMP.B
privvmpages.l   PRIVVMP.L
privvmpages.f   PRIVVMP.F
shmpages        SHMP
shmpages.m      SHMP.M
shmpages.b      SHMP.B
shmpages.l      SHMP.L
shmpages.f      SHMP.F
numproc         NPROC
numproc.m       NPROC.M
numproc.b       NPROC.B
numproc.l       NPROC.L
numproc.f       NPROC.F
physpages       PHYSP
physpages.m     PHYSP.M
physpages.b     PHYSP.B
physpages.l     PHYSP.L
physpages.f     PHYSP.F
vmguarpages     VMGUARP
vmguarpages.m   VMGUARP.M
vmguarpages.b   VMGUARP.B
vmguarpages.l   VMGUARP.L
vmguarpages.f   VMGUARP.F
oomguarpages    OOMGUARP
oomguarpages.m  OOMGUARP.M
oomguarpages.b  OOMGUARP.B
oomguarpages.l  OOMGUARP.L
oomguarpages.f  OOMGUARP.F
numtcpsock      NTCPSOCK
numtcpsock.m    NTCPSOCK.M
numtcpsock.b    NTCPSOCK.B
numtcpsock.l    NTCPSOCK.L
numtcpsock.f    NTCPSOCK.F
numflock        NFLOCK
numflock.m      NFLOCK.M
numflock.b      NFLOCK.B
numflock.l      NFLOCK.L
numflock.f      NFLOCK.F
numpty          NPTY
numpty.m        NPTY.M
numpty.b        NPTY.B
numpty.l        NPTY.L
numpty.f        NPTY.F
numsiginfo      NSIGINFO
numsiginfo.m    NSIGINFO.M
numsiginfo.b    NSIGINFO.B
numsiginfo.l    NSIGINFO.L
numsiginfo.f    NSIGINFO.F
tcpsndbuf       TCPSNDB
tcpsndbuf.m     TCPSNDB.M
tcpsndbuf.b     TCPSNDB.B
tcpsndbuf.l     TCPSNDB.L
tcpsndbuf.f     TCPSNDB.F
tcprcvbuf       TCPRCVB
tcprcvbuf.m     TCPRCVB.M
tcprcvbuf.b     TCPRCVB.B
tcprcvbuf.l     TCPRCVB.L
tcprcvbuf.f     TCPRCVB.F
othersockbuf    OTHSOCKB
othersockbuf.m  OTHSOCKB.M
othersockbuf.b  OTHSOCKB.B
othersockbuf.l  OTHSOCKB.L
othersockbuf.f  OTHSOCKB.F
dgramrcvbuf     DGRAMRB
dgramrcvbuf.m   DGRAMRB.M
dgramrcvbuf.b   DGRAMRB.B
dgramrcvbuf.l   DGRAMRB.L
dgramrcvbuf.f   DGRAMRB.F
numothersock    NOTHSOCK
numothersock.m  NOTHSOCK.M
numothersock.b  NOTHSOCK.B
numothersock.l  NOTHSOCK.L
numothersock.f  NOTHSOCK.F
dcachesize      DCACHESZ
dcachesize.m    DCACHESZ.M
dcachesize.b    DCACHESZ.B
dcachesize.l    DCACHESZ.L
dcachesize.f    DCACHESZ.F
numfile         NFILE
numfile.m       NFILE.M
numfile.b       NFILE.B
numfile.l       NFILE.L
numfile.f       NFILE.F
numiptent       NIPTENT
numiptent.m     NIPTENT.M
numiptent.b     NIPTENT.B
numiptent.l     NIPTENT.L
numiptent.f     NIPTENT.F
swappages       SWAPP
swappages.m     SWAPP.M
swappages.b     SWAPP.B
swappages.l     SWAPP.L
swappages.f     SWAPP.F
diskspace       DSPACE
diskspace.s     DSPACE.S
diskspace.h     DSPACE.H
diskinodes      DINODES
diskinodes.s    DINODES.S
diskinodes.h    DINODES.H
laverage        LAVERAGE
uptime          UPTIME
cpulimit        CPULIM
cpuunits        CPUUNI
cpus            CPUS
ioprio          IOP
onboot          ONBOOT
bootorder       BOOTORDER
layout          LAYOUT
features        FEATURES
vswap           VSWAP
disabled        DISABL


Installing the OpenVZ Web Panel

Get Social!

There are many web front ends to the OpenVZ virtualisation server which offer varying functionality and are at different stages of development.

Take a look at the OpenVZ Control Panels wiki page for a list and a brief description of what each one does.

One that I have found to be very stable, easy to use and the most feature rich is the OpenVZ Web Panel (OWP). It allows you to create and destroy new OpenVZ containers, manage networking, download new OS templates and a few other things all from a clean web based front end.

Installing the OpenVZ Web Panel

Installing the OpenVZ Web Portal couldn’t be easier – simply run a one-line command on the terminal and let the script do the rest. The script will download all the required dependencies, such as Ruby, and set everything up so that you have a working web address which you can use to administer your OpenVZ server.

Run the below command on your OpenVZ server.

wget -O - http://ovz-web-panel.googlecode.com/svn/installer/ai.sh | sh

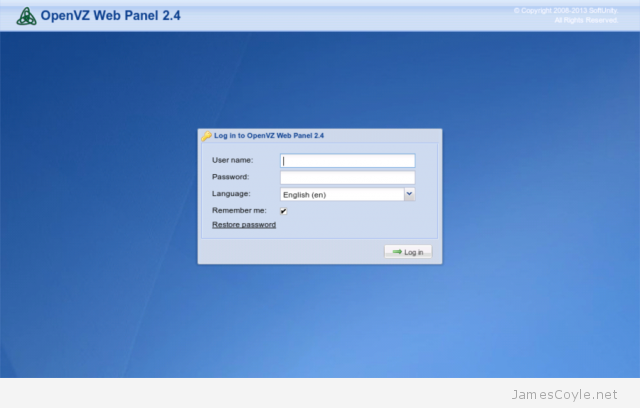
Once the script completes, the web server will be available on your servers IP or hostname and port 3000. The default username and password, which are required for login are:

  • Username: admin
  • Password: admin

openvz-web-panel-login

If you have iptables installed you will need to add a new rule for the default port 3000.

iptables -A INPUT -i eth0 -p tcp --dport 3000 -m state --state NEW,ESTABLISHED -j ACCEPT
iptables-save

You can also change the port number by editing the config file of OWP.

vi /etc/owp.conf

And change the PORT attribute to the new port number. Remember to update your iptables configuration to the new port number. See my iptables cheat sheet for more information.

Once you have logged in you will need to change the default admin password. Click on My Profile on the left hand side and fill in the information as requested.

openvz-web-panel-change-password

The next time you log in you will be able to log in with your new password.


Test Internet Speed from the Command Line

Get Social!

speedtest-netMatt Martez has kindly created and shared a Python script for interacting with speedtest.net for testing bandwidth to the internet from the command line. This is a great script which only has the dependency of Python – something which is available on most Linux distributions.

Grab the script with wget to the server you wish to test. Remember, this is to test the bandwidth to servers which are publically available on the internet – this does not test your internal server to server communication. See Iperf for details on testing LAN bandwidth.

wget -O speedtest-cli https://raw.github.com/sivel/speedtest-cli/master/speedtest_cli.py

Add the execute permission:

chmod +x speedtest-cli

And that’s all you need to start your first speed test! Run the speedtest-cli with the –simple switch to start your first basic speed test. The script will automatically choose the best server based on your location.

./speedtest-cli --simple
Ping: 10.331 ms
Download: 6.47 Mbit/s
Upload: 5.30 Mbit/s

You can use the –help switch to see all the options you have with the tool.

./speedtest-cli --help
usage: speedtest-cli [-h] [--share] [--simple] [--list] [--server SERVER]
                     [--mini MINI] [--source SOURCE] [--version]

Command line interface for testing internet bandwidth using speedtest.net.
--------------------------------------------------------------------------
https://github.com/sivel/speedtest-cli

optional arguments:
  -h, --help       show this help message and exit
  --share          Generate and provide a URL to the speedtest.net share
                   results image
  --simple         Suppress verbose output, only show basic information
  --list           Display a list of speedtest.net servers sorted by distance
  --server SERVER  Specify a server ID to test against
  --mini MINI      URL of the Speedtest Mini server
  --source SOURCE  Source IP address to bind to
  --version        Show the version number and exit

Create a permanent virtual IP address in Linux

Category : How-to

Get Social!

In a previous post, we saw how to create a virtual IP address, based on an existing network interface. The trouble with this method is that the virtual IP address will vanish when you reboot your machine.

On option is to attach the script to the network up and down scripts however there is a much easier way!

In Debian/ Ubuntu you simply create a new, virtual interface in the interfaces file.

vi /etc/network/interfaces

And add a network interface, based on an existing interface. The below example is a virtual IP based on eth0 – note if this is your second virtual IP you would use eth0:2, and so on.

auto eth0:1
iface eth0:1 inet static
address 192.168.100.9
netmask 255.255.255.0
network 192.168.100.0
broadcast 192.168.100.255

You will need to change the IP addresses to match your network. Notice there is no gateway – usually you can only have one gateway per machine.

Restart networking for the changes to take effect.


Visit our advertisers

Quick Poll

Which type of virtualisation do you use?
  • Add your answer

Visit our advertisers