Share GlusterFS volume to a single IP address

Share GlusterFS volume to a single IP address

Category : How-to

Get Social!

gluster-orange-antWhen you create a new GlusterFS Volume it is publicly available for any server on the network to read.

File servers do not generally have firewalls as they are hosted in a secure zone of a private network. Just because it’s secure doesn’t mean you should leave it wide open for anyone with access to connect to.

Using the auth.allow and auth.reject arguments in GlusterFS we can choose which IP addresses can access the volume. Access is provided at volume level, therefore you will need to alter access permissions on every new volume you create.

Run the below command on each server changing [VOLUME] to match the volume to be accessed and [IP ADDRESS] to be an IP address of the server which can connect to the current server.

gluster volume set [VOLUME] auth.allow [IP ADDRESS]

[IP ADDRESS] does not have to be a single IP address. You can also use an asterisk [*] as a wildcard, or multiple addresses separated by a comma [,]. The below example allows only servers with an IP address on the 10.1.1.x range, and 10.5.5.1 to access volume datastore.. All other servers will be denied access to the volume.

gluster volume set datastore auth.allow 10.1.1.*,10.5.5.1

Setup Glusterfs with a replicated volume over 2 nodes

Category : How-to

Get Social!

gluster-orange-antThis post will show you how to install GlusterFS in Ubuntu/ Debian however the steps will be similar with Red Hat based linux operating systems with minor changes to the commands.

Gluster File System is a distributed files system allowing you to create a single volume of storage which spans multiple disks, multiple machines and even multiple data centres.

Before we get started, install the required packages using apt-get. With Red Hat/ Cent based operating systems you will need to use yum, or download the package directly from http://download.gluster.org/pub/gluster/glusterfs/3.4/LATEST/

apt-get install glusterfs-server

Perform this on both of your servers. If you have more than two servers, perform this command on all of the servers required for the volume.

You will now need each of these servers to know about the others. Run gluster peer probe and the ip address of all the other servers in your GlusterFS cluster.

gluster peer probe gfs2.jamescoyle.net

Each of the commands should return with Probe successful which means the node is now known to this machine. You will only need to do this on one node of your cluster.

Run gluster peer status to check each node in your cluster is aware of the other nodes:

gluster peer status

The result should look like:

Number of Peers: 1

Hostname: gfs2.jamescoyle.net
Uuid: a0977ca2-6e47-4c1a-822b-99df896080ee State: Peer in Cluster (Connected)

Now we need to create the volume where the data will reside. the volume will be called datastore. First of all, we need to identify where on the host this storage is. For this example, it is /mnt/gfs_block on both nodes, but this could be any mount point of storage that you have. If the folder does not exist, it will be silently created so be sure to get the correct path on all nodes.

gluster volume create datastore replica 2 transport tcp gfs1.jamescoyle.net:/mnt/gfs_block gfs2.jamescoyle.net:/mnt/gfs_block

If this has been sucessful, you should see:

Creation of volume testvol has been successful. Please start the volume to access data.

As the message indicates, we now need to start the volume:

gluster volume start datastore

And wait for the message that is has started.

Starting volume testvol has been successful

Running either of the below commands should indicate that GlusterFS is up and running. The ps command should show the command running with both servers in the argument. netstat should show a connection between both nodes.

ps aux | grep gluster
netstat -tap | grep glusterfsd

As a final test, to make sure the volume is available, run gluster volume info. An example output is below:

gluster volume info

Volume Name: datastore
Type: Replicate
Status: Started
Number of Bricks: 2
Transport-type: tcp
Bricks:
Brick1: gfs1.jamescoyle.net:/mnt/datastore
Brick2: gfs2.jamescoyle.net:/mnt/datastore

That’s it! You now have a GlusterFS volume which will maintain replication across two nodes. To see how to use your volume, see our guide to mounting a volume.


Mount a GlusterFS volume

Get Social!

gluster-orange-antGlusterFS is an open source distributed file system which provides easy replication over multiple storage nodes. These nodes are then combined into storage volumes which you can easily mount using fstab in Ubuntu/ Debian and Red Hat/ CentOS. To see how to set up a GlusterFS volume, see this blog post.

Before we can mount the volume, we need to install the GlusterFS client. In Ubuntu we can simply apt-get the required package, or yum in Red Hat/ CentOS. For Ubuntu/ Debian:

apt-get install glusterfs-client

For Red Hat, OEL and CentOS:

yum install glusterfs-client

Once the install is complete, open the fstab and add a new line pointing to your server. The server used here is the server which contains the information on where to get the volume, and not necessarily where the data is. The client will connect to the server holding the data. The following steps are the same on both Debian and Red Hat based Linux distributions.

Easy way to mount

vi /etc/fstab

Replace [HOST] with your GlusterFS server, [VOLNAME] with the Gluster FS volume to mount and [MOUNT] with the location to mount the storage to.

[HOST]:/[VOLUME] /[MOUNT] glusterfs defaults,_netdev 0 0

Example:

gfs1.jamescoyle.net:/datastore /mnt/datastore glusterfs defaults,_netdev 0 0

Finally, reboot your machine to make the volume appear in df.

df -h
gfs1.jamescoyle.net:/testvol   30G  1.2G   27G   5% /mnt/volume

More redundant mount

The trouble with the above method is that there is a single point of failure. The client only has one GlusterFS server to connect to. To set up a more advanced mount, we have two options; create a volume config file, or use backupvolfile-server in the fstab mount. Remember this is not to specify where all the distributed volumes are, it’s to specify a server to query all the volume bricks.

fstab method

We can use the parameter backupvolfile-server to point to our secondary server. The below example indicates how this could be used.

gfs1.jamescoyle.net:/datastore /mnt/datastore glusterfs defaults,_netdev,backupvolfile-server=gfs2.jamescoyle.net 0 0

Using a volume config file

Create a volume config file for your GlusterFS client.

vi /etc/glusterfs/datastore.vol

Create the above file and replace [HOST1] with your GlusterFS server 1, [HOST2] with your GlusterFS server 2 and [VOLNAME] with the Gluster FS volume to mount.

volume remote1
  type protocol/client
  option transport-type tcp
  option remote-host [HOST1]
  option remote-subvolume [VOLNAME]
end-volume

volume remote2
  type protocol/client
  option transport-type tcp
  option remote-host [HOST2]
  option remote-subvolume [VOLNAME]
end-volume

volume replicate
  type cluster/replicate
  subvolumes remote1 remote2
end-volume

volume writebehind
  type performance/write-behind
  option window-size 1MB
  subvolumes replicate
end-volume

volume cache
  type performance/io-cache
  option cache-size 512MB
  subvolumes writebehind
end-volume

Example:

volume remote1
  type protocol/client
  option transport-type tcp
  option remote-host gfs1.jamescoyle.net
  option remote-subvolume /mnt/datastore
end-volume

volume remote2
  type protocol/client
  option transport-type tcp
  option remote-host gfs2.jamescoyle.net
  option remote-subvolume /mnt/datastore
end-volume

volume replicate
  type cluster/replicate
  subvolumes remote1 remote2
end-volume

volume writebehind
  type performance/write-behind
  option window-size 1MB
  subvolumes replicate
end-volume

volume cache
  type performance/io-cache
  option cache-size 512MB
  subvolumes writebehind
end-volume

Finally, edit fstab to add this config file and it’s mount point. Replace [MOUNT] with the location to mount the storage to.

/etc/glusterfs/datastore.vol [MOUNT] glusterfs rw,allow_other,default_permissions,max_read=131072 0 0

Proxmox 3.1 is now available!

Get Social!

proxmox logo gradA new release of Proxmox is now available, release 3.1.

The highlights of this new release are:

  • A new storage plugin for GlusterFS.

Proxmox storage types
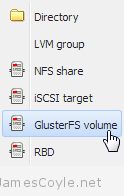
This is a new storage plugin which can be used to add usable storage to your Proxmox host. GlusterFS is an open source, distributed file system with potential to house a huge capacity of data.

GlusterFS is key to open source, scalable and highly available storage spanning many servers, and even data centres.

See their About page for more information: http://www.gluster.org/about/

  • The SPICE protocol has been implemented as a technology preview. Whilts it is not recommended for production systems, you can see what’s in store in the Proxmox roadmap.
  • One of the most dramatic changes of Proxmox 3.1 is that the package repositories have been split into subscription and none-subscription. The subscription repository is the only repository recommended for a production server, however it requires a paid subscription with Proxmox to access it. See this thread for more information on the new Updates GUI page.

Proxmox updates manager

You can update any 3.0 install of Proxmox to the latest 3.1. Before updating, make sure all your VM’s have been stopped. Run the below commands on each server in your cluster.

apt-get update
apt-get dist-upgrade

Restart all Proxmox servers to complete the update.


Visit our advertisers

Quick Poll

How many Proxmox servers do you work with?

Visit our advertisers