My experience with GlusterFS performance.

My experience with GlusterFS performance.

Category : How-to

Get Social!

gluster-orange-ant
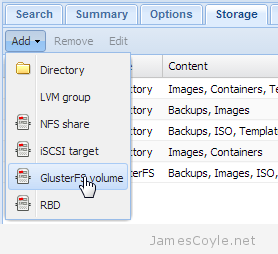
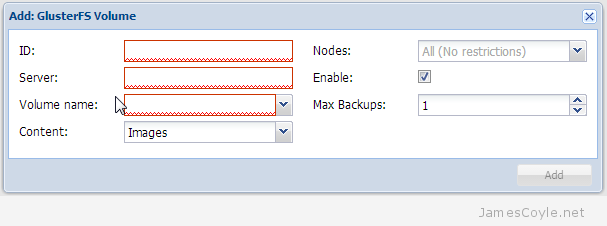
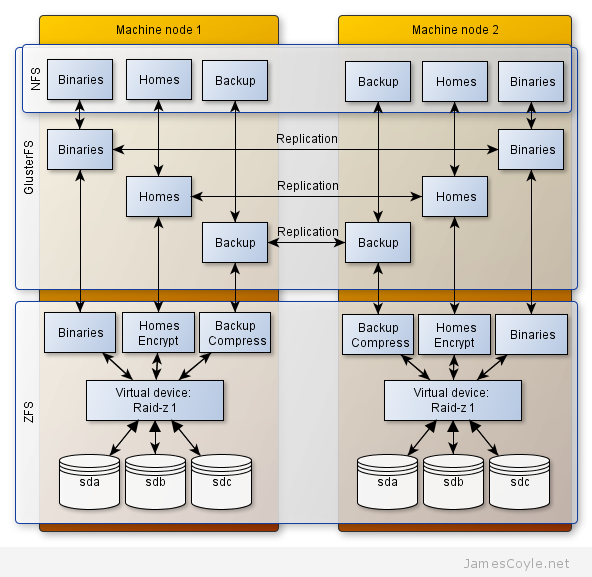
I have been using GlusterFS to replicate storage between two physical servers for two reasons; load balancing and data redundancy. I use this on top of a ZFS storage array as described in this post and the two technologies combined provide a fast and very redundant storage mechanism. At the ZFS layer, or other filesystem technology that you may use, there are several functions that we can leverage to provide fast performance. For ZFS specifically, we can add SSD disks for caching, and tweak memory settings to provide the most throughput possible on any given system. With GlusterFS we also have several ways to improve performance but before we look into those, we need to be sure that is it the GlusterFS layer which is causing the problem. For example, if your disks or network is slow, what chance does GlusterFS have of giving you good performance? You also need to understand how the individual components work under the load of your expected environment. The disks may work perfectly well when you use dd to create a huge file, but what about when lots of users create lots of files all at the same time? You can break down performance into three key areas:

  • Networking – the network between each GlusterFS instance.
  • Filesystem IO performance – the file system local to each GlusterFS instance.
  • GlusterFS – the actual GlusterFS process.

Networking Performance

Before testing the disk and file system, it’s a good idea to make sure that the network connection between the GlusterFS nodes is performing as you would expect. Test the network bandwidth between all GlusterFS boxes using Iperf. See the Iperf blog post for more information on benchmarking network performance. Remember to test the performance over a period of several hours to minimise the affect of host and network load. If you make any network changes, remember to test between each change to make sure it has had the desired effect.

Filesystem IO Performance

Once you have tested the network between all GlusterFS boxes, you should test the local disk speed on each machine. There are several ways to do this, but I find it’s best to keep it simple and use one of two options; DD or bonnie++. You must be sure to turn off any GlusterFS replication as it is just the disks and filesystem which we are trying to test here. Bonnie++ is a freely available IO benchmarking tool.  DD is a linux command line tool which can replicate data streams and copy files. See this blog post for information on benchmarking the files system.

Technology, Tuning and GlusterFS

Once we have made it certain in our minds that disk I/O and network bandwidth are not the issue, or more importantly understood what constraints they give you in your environment, you can tune everything else to maximise performance. In our case, we are trying to maximise GlusterFS replication performance over two nodes.

We can aim to achieve replication speeds nearing the speed of the the slowest performing speed; file system IO and network speeds.

See my blog post on GlusterFS performance tuning.


GlusterFS performance tuning

Category : How-to

Get Social!

gluster-orange-antI have been using GlusterFS to provide file synchronisation over two networked servers. As soon as the first file was replicated between the two nodes I wanted to understand the time it took for the file to be available on the second node. I’ll call this replication latency.

As discussed in my other blog posts, it is important to understand what the limitations are in the system without the GlusterFS layer. File system and network speed need to be understood so that we are not blaming high replication latency on GlusterFS when it’s slow because of other factors.

The next thing to note is that replication latency is affected by the type of file you are transferring between nodes. Many small files will result in lower transfer speeds, whereas very large files will reach the highest speeds. This is because there is a large overhead with each file replicated with GlusterFS meaning the larger the file the more the overhead is reduced when compared to transferring the actual file.

With all performance tuning, there are no magic values for these which work on all systems. The defaults in GlusterFS are configured at install time to provide best performance over mixed workloads. To squeeze performance out of GlusterFS, use an understanding of the below parameters and how them may be used in your setup.

After making a change, be sure to restart all GlusterFS processes and begin benchmarking the new values.

GlusterFS specific

GlusterFS volumes can be configured with multiple settings. These can be set on a volume using the below command substituting [VOLUME] for the volume to alter, [OPTION]  for the parameter name and [PARAMETER] for the parameter value.

gluster volume set [VOLUME] [OPTION] [PARAMETER]

Example:

gluster volume set myvolume performance.cache-size 1GB

Or you can add the parameter to the glusterfs.vol config file.

vi /etc/glusterfs/glusterfs.vol
  • performance.write-behind-window-size – the size in bytes to use for the per file write behind buffer. Default: 1MB.
  • performance.cache-refresh-timeout – the time in seconds a cached data file will be kept until data revalidation occurs. Default: 1 second.
  • performance.cache-size – the size in bytes to use for the read cache. Default: 32MB.
  • cluster.stripe-block-size – the size in bytes of the unit that will be read from or written to on the GlusterFS volume. Smaller values are better for smaller files and larger sizes for larger files. Default: 128KB.
  • performance.io-thread-count – is the maximum number of threads used for IO. Higher numbers improve concurrent IO operations, providing your disks can keep up. Default: 16.

Other Notes

When mounting your storage for the GlusterFS later, make sure it is configured for the type of workload you have.

  • When mounting your GlusterFS storage from a remote server to your local server, be sure to dissable direct-io as this will enable the kernel read ahead and file system cache. This will be sensible for most workloads where caching of files is beneficial.
  • When mounting the GlusterFS volume over NFS use noatime and nodiratime to remove the timestamps over NFS.

I haven’t been working with GlusterFS for long so I would be very interested in your thoughts on performance. Please leave a comment below.


GlusterFS storage mount in Proxmox

Category : How-to

Get Social!

proxmox logo gradProxmox 3.1 brings a new storage plugin; GlusterFS. Thanks to this storage technology we can use distributed and redundant network storage to drive OpenVZ containers, qemu disk images, backups, templates and iso’s – basically all the Proxmox storage types.

Proxmox 3.1 uses version 3.4 of the GlusterFS client tools and therefore a compatible GlusterFS server version is required. For the current version, please see this post for the latest PPA Ubuntu repository, and this post for setting up a 2 node GlusterFS server.

Adding a single GlusterFS share to Proxmox 3.1 is one of the easiest things you will do, providing the server is already set up. The trouble comes in when you are using GlusterFS in a redundant/ failover scenario as Proxmox only allows you to enter one GlusterFS server IP meaning that you are loosing all the benefits of having a redundant file system.

At this point it’s worth understanding something about the GlusterFS server setup. Let’s say you have two physical servers which replicate a single GlusterFS share. This gives you a level of redundancy as one server can fail without causing any issues. It also gives you load balancing but that is a separate point altogether. The client can then connect to one of these servers as it mounts the filesystem however because of the way GlusterFS works it needs access to both the GlusterFS servers. This is because the first connection the client makes is to one of the servers to get a list of servers available for the storage share it is going to mount. In our example here, there are two storage servers available and it is this list which is sent to the client. Then, as the mount point is used by the client, it can communicate with any server in the known list. So then, although using a single IP for a client is a single point of failure, it’s only a single point of failure on the initial communication when obtaining the list of servers available.

Add using Proxmox web GUI

proxmox add storage

To set up a single server mount point, click on the Storage tab which can be found on DataCenter. Click Add and then GlusterFS volume. You will then see the Add: GlusterFS Volume dialogue box.

proxmox add glusterfs volume

Enter your GlusterFS server information into the dialogue box along with the other required fields described below.

  • ID – the name to use for the storage mount point. This will be visible in your storage list.
  • Server – the GlusterFS server IP or hostname.
  • Volume name – the share name on the GlusterFS server.

Using the GlusterFS client you are able to specify multiple GlusterFS servers for a single volume. With the Proxmox web GUI, you can only add one IP address. To use multiple server IP addresses, create a mount point manually.


Add launchpad PPA repository to Ubuntu

Get Social!

launchpad.net logoMost Linux based systems use a software repository which is either local (a CD-ROM) or remote (a web address) to install new software and manage software updates to already installed software. For Ubuntu/ Debian based Linux distributions apt-get is used to interact with these software repositories, for Red Hat/ CentOS its yum.

With a default Linux installation a suite of repositories are installed to manage the core operating system and install additional applications. As these repositories are critical to the Linux distribution it is difficult for software developers to get their software included in them because they have to be verified for stability and security. This means that the repositories are often behind the official release schedule of 3rd party software or don’t include the software at all. In older versions of Linux support may have been dropped altogether in favour of maintaining the newer versions of the distribution.

It’s here where Launchpad comes in. Developers can add their software to the Launchpad or PPA repository which can be added to a Linux distribution to enable installation of additional software which is not available in the core repositories.

GlusterFS, for example, is at version 3.2.5 in the core Ubuntu 12.04 distribution however the official release of GlusterFS is 3.4. You could build the GlusterFS binaries directly from source and I’ll cover that in a future blog post, but we are not going to do that here.

Kindly, semiosis has created a GlusterFS repository on Launchpad which we can add to our Ubuntu installation to deliver the latest (or thereabouts) version of the software.

Although this example details the Ubuntu GlusterFS 3.4 specifically, any Launchpad repository is added in the same way. For other software visit https://launchpad.net/ubuntu/+ppas and use the search function.

Make sure you have the following python utility installed which is used to add the repository to your Ubuntu sources list:

apt-get install python-software-properties

Use the command add-apt-repository with the username who created the repository on Launchpad and the repository name. You can find the user and repository that you require by searching on https://launchpad.net/

add-apt-repository ppa:[USERNAME]/[REPOSITORY NAME]

Glusterfs example:

add-apt-repository ppa:semiosis/ubuntu-glusterfs-3.4


ZFS and GlusterFS network storage

Tags :

Category : How-to

Get Social!

gluster-orange-antSince ZFS was ported to the Linux kernel I have used it constantly on my storage server. With the ability to use SSD drives for caching and larger mechanical disks for the storage arrays you get great performance, even in I/O intensive environments. ZFS offers superb data integrity as well as compression, raid-like redundancy and de-duplication. As a file system it is brilliant, created in the modern era to meet our current demands of huge redundant data volumes. As you can see, I am an advocate of ZFS and would recommend it’s use for any environment where data integrity is a priority.

Please note, although ZFS on Solaris supports encryption, the current version of ZFS on Linux does not. If you are using ZFS on Linux, you will need to use a 3rd party encryption method such as LUKS or EcryptFS.

The problem with ZFS is that it is not distributed. Distributed file systems can span multiple disks and multiple physical servers to produce one (or many) storage volume. This gives your file storage added redundancy and load balancing and is where GlusterFS comes in.

GlusterFS is a distributed file system which can be installed on multiple servers and clients to provide redundant storage. GlusterFS comes in two parts:

  • Server – the server is used to perform all the replication between disks and machine nodes to provide a consistent set of data across all replicas. The server also handles client connections with it’s built in NFS service.
  • Client – this is the software required by all machines which will access the GlusterFS storage volume. Clients can mount storage from one or more servers and employ caching to help with performance.

The below diagram shows the high level layout of the storage set up. Each node contains three disks which form a RAIDZ-1 virtual ZFS volume which is similar to RAID 5. This provides redundant storage and allows recovery from a single disk failure with minor impact to service and zero downtime. The volume is then split into three sub volumes which can have various properties applied; for example, compression and encryption. GlusterFS is then set up on top of these 3 volumes to provide replication to the second hardware node. GlusterFS handles this synchronisation seamlessly in the background making sure both of the physical machines contain the same data at the same time.

zfs and glusterfs highlevel structure

For this storage architecture to work, two individual hardware nodes should have the same amount of local storage available presented as a ZFS pool. On top of this storage layer, GlusterFS will synchronise, or replicate, the two logical ZFS volumes to present one highly available storage volume.

See this post for setting up ZFS on Ubuntu. For the very latest ZFS binaries, you will need to use Solaris as the ZFS on Linux project is slightly behind the main release. Set up ZFS on both physical nodes with the same amount of storage, presented as a single ZFS storage pool. Configure the required ZFS datasets on each node, such as binaries, homes and backup in this example. At this point, you should have two physical servers presenting exactly the same ZFS datasets.

We now need to synchronise the storage across both physical machines. In  Gluster terminology, this is called replication. To see how to set up GlusterFS replication on two nodes, see this article.

These two technologies combined provide a very stable, highly available and integral storage solution. ZFS handles disk level corruption and hardware failure whilst GlusterFS makes sure storage is available in the event a node goes down and load balancing for performance.

Quick poll

Do you use GlusterFS in your workplace?

Do you use ZFS on Linux?


GlusterFS firewall rules

Category : How-to

Get Social!

gluster-orange-antIf you can, your storage servers should be in a secure zone in your network removing the need to firewall each machine. Inspecting packets incurs an overhead, not something you need on a high performance file server so you should not run a file server in an insecure zone. If you are using GlusterFS behind a firewall you will need to allow several ports for GlusterFS to communicate with clients and other servers. The following ports are all TCP:

Note: the brick ports have changed since version 3.4. 

  • 24007 – Gluster Daemon
  • 24008 – Management
  • 24009 and greater (GlusterFS versions less than 3.4) OR
  • 49152 (GlusterFS versions 3.4 and later) – Each brick for every volume on your host requires it’s own port. For every new brick, one new port will be used starting at 24009 for GlusterFS versions below 3.4 and 49152 for version 3.4 and above. If you have one volume with two bricks, you will need to open 24009 – 24010 (or 49152 – 49153).
  • 38465 – 38467 – this is required if you by the Gluster NFS service.

The following ports are TCP and UDP:

  • 111 – portmapper

Visit our advertisers

Quick Poll

How often do you change the password for the computer(s) you use?

Visit our advertisers