Speed up Multiple apt-get install Requests by Caching the Repository
Category : How-to
 apt-get is the tool used in Debian and Ubuntu to manage packages installed on the system. Each time an update is available, or you install a new package the files will be downloaded from one of the central repository servers out on the internet and installed on your system.
There are two main problems with this:
- Your servers may not be on able to access the internet directly for security reasons
- Installing the same package on multiple servers will result in downloading the package the same amount of times. This could be slow or expensive in terms of bandwidth.
To solve the problem you can mirror the source repository on your own local server and add that as a source for your servers to update from. The main issue with this is that each distribution has a huge catalog of package which would take up vast amounts of space. Multiply this by the different releases of operating system in your environment and you could be talking terabytes of space.
Various utilities have been created to work round this problem such as apt-proxy, apt-cacher and debproxy. These utilities work by only caching some of the most used packages and fetching the rest from the source.
The below example will use apt-cacher-ng which is a middle man who sits in between the server being updated and the source repository out on the internet. It chooses to cache some regularly or recently used files locally and will recall them when they are requested which greatly speeds up the process for the requesting machine. The cache is frequently cleared to make sure that disk space is only being used for the most necessary packages. This drastically reduces resource required to run the service, whilst speeding up package downloading and guaranteeing that all packages are available.
Setting up apt-cacher-ng server
The apt-cacher-ng utility sits on a server which must be able to access both the public network and any internal network which your other servers may sit on.
Run apt-get install to install the proxy utility.
apt-get install apt-cacher-ng
The default installation of apt-cacher-ng holds details of both Ubuntu and Debian source repositories and is ready to use.
If you need to change the settings of the application such as the port it listens on, edit the below file:
vi /etc/apt-cacher-ng/acng.conf
You can now access the web interface using using the local machine’s IP or host name and the port. The default port is 3142.
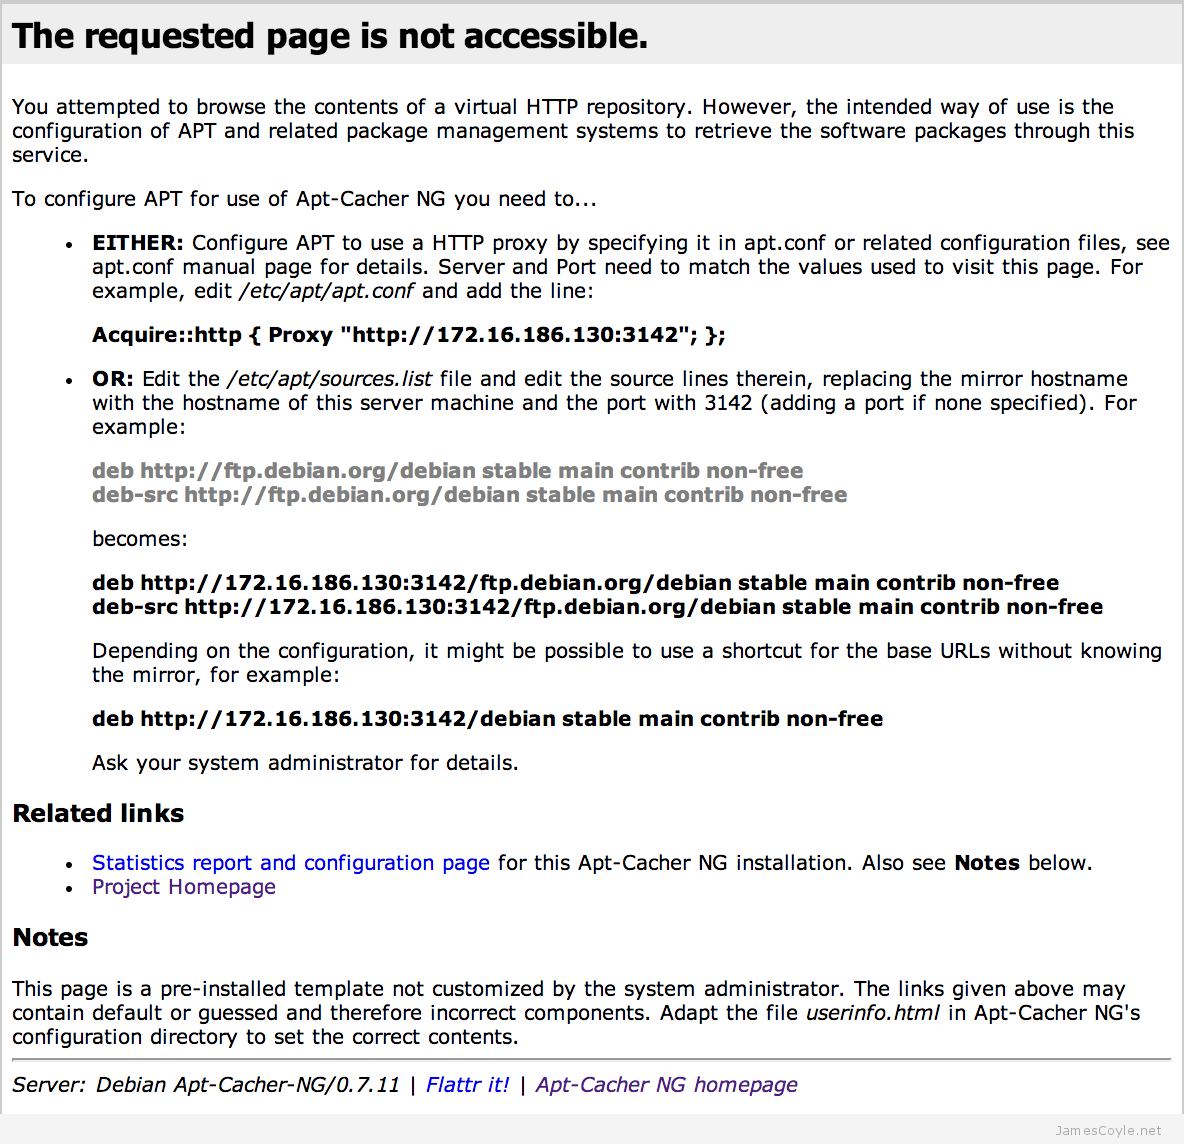
This page shows that apt-cacher-ng is working correctly and is ready to cache the first source requests.
The next step is to add the server location to your clients. Create the below file and add details of your caching server.
/etc/apt/apt.conf.d/02proxy
Add the below line and edit [SERVER_IP] and [SERVER_PORT] to match your apt-cacher-ng configuration.
Acquire::http { proxy "http://[SERVER_IP]:[SERVER_PORT]"; };
Eg.
Acquire::http { proxy "http://10.10.10.1:3142"; };
Finally, run the update command on your clients to cause the proxy to cache the package lists. Packages will also be cached soon as you start to install or updates packages on your client.
To make sure that apt-cacher-ng is doing it’s job, tail the log to make sure entries are appearing.
tail -f /var/log/apt-cacher-ng/apt-cacher.log
In addition, you can also view the webpage for statistics on cache hits and misses:
http://[SERVER_IP]:[SERVER_PORT]/acng-report.html?doCount=Count+Data#top
 With Git you are able to define file exceptions to exclude certain files and folders from git repository commits. You can create files which contain a list of patterns which git will check against on each git add and ignore any matching files.
 Creating multiple SSL certificates for web servers and application can be a repetitive task. Generally speaking, when creating these things manually you would follow the below steps: