Category Archives: How-to

Limit backup I/O bandwidth

Category : How-to

Get Social!

proxmox_logoWhen backing up in Proxmox, especially on the lower end of the server market, the backup process can cause your system to almost grind to a halt. Luckily, there is a config change which we can make to limit the bandwidth of the backup process to make sure there is sufficient bandwidth for everything else.

The setting cannot be changed using the web gui, you must log into your Proxmox server using SSH. Once you have logged in, open the config file:

vi /etc/vzdump.conf

Find the line which contains bwlimit, remove the hash and append the value of KB/s which you would like the backup limiting to. The below example limits the backup process to 40000 KB/s.

bwlimit 40000

To calculate how many KB/s you need will take trial and error to see what affect speeds have on your system. Something which is helpful however, is converting MBs (Megabytes) into KB/s (Kilobytes). The formula is simple – just multiply the MB value by 1024 as there are 1024 KB in a MB.

MB/s * 1024 = KB/s

If you want a transfer speed of 10 MB/s you would use a bwlimit value of 10240 as the below example shows.

10 MB/s * 1024 = 10240 KB/s

Backup ESXi 5.x running virtual machine

Category : How-to

Get Social!

ESXi does not provide an option to backup a running virtual machine, without paying VMware a substantial amount of money. You can get round this by turning off the guest and copying the VMDK however this requires downtime for the guest. You cannot copy the VMDK while the guest is running because the VMDK virtual disk cannot be copied while it is in use. As this is likely to be the boot disk for the virtual machine, stopping disk activity without turning the instance off is impossible. The below simple script creates a snapshot of the guest which forces the guest to write all new changes to a new file instead of writing them to the virtual disk. This frees the disk to be copied. Once the copy has completed, the snapshot is removed writing all changes since the backup started back to the virtual disk.

This script contains little error checking and requires a few conditions to be met in order to complete successfully.
• No device maps for physical disks must exist in the instance
• ‘Independent’ disks must not exist in the instance
• The parameters of the script must be completed correctly.

There are 2 lines in the script which must be configured. Open the script using a text editor and change the below variables to match your preferences.
#Config
BASE_PATH=”PATH_TO_VIRTUAL_MACHINES”
BACKUP_ROOT=”PATH_TO_SAVE_BACKUP”

Example
#Config
BASE_PATH=”/vmfs/volumes/datastore1/Machines/”
BACKUP_ROOT=”/vmfs/volumes/datastore1/Backup/”

Copy the script to the below location on your ESXi server. The file name of the script should be VMbackupBash E.G. /usr/bin/VMbackupBash

To run the script, type
VMbackupBash [MACHINE_FOLDER_TO_BACKUP]
The machine name must be the name of the folder in BASE_PATH which contains the instance to backup.

#!/bin/bash
#Backup VMware instance

echo ""
echo "-------------------------------"
echo "- VM Backup Script -"
echo "- James Coyle -"
echo "-------------------------------"
echo ""

#Config
#root path to where your running instances are stored.
BASE_PATH="/vmfs/volumes/datastore1/Machines/"

#root path to where you would like to save the backup
BACKUP_ROOT="/vmfs/volumes/datastore1/Backup/"

#Do not edit
if [ "$1" ]; then
MACHINE=$1

else
#MACHINE=$1
echo "Enter machine name: "
read MACHINE

fi

BACKUP_APPEND=$(date +"%Y%m%d-%H%M%S")
MACHINE_PATH="$BASE_PATH$MACHINE/"
BACKUP_PATH="$BACKUP_ROOT$MACHINE$BACKUP_APPEND/"

if [ -d $MACHINE_PATH ] && [ -d $BACKUP_ROOT ]; then

cd $MACHINE_PATH

VIMID=`vim-cmd vmsvc/getallvms | egrep -o "[0-9]+[ ]+$MACHINE" | cut -d" " -f1`

if [ -z VIMID ]; then
echo "Could not get VM ID."
vim-cmd vmsvc/getallvms

echo ""
echo "Enter vimid of $MACHINE"
read VIMID
echo ""
echo ""

fi

#Get existing files
FILE_ARRAY=`find $MACHINE_PATH -type f`

I=0
for T in $FILE_ARRAY[@]
do
#echo "$I[$T]"
I=$((I+1))
done

echo "- Backup info"
echo "-------------------------------"
echo " Machine path: $MACHINE_PATH"
echo " Backup path: $BACKUP_PATH"
echo " Using VM ID: $VIMID."
echo " Machine name: $MACHINE."
echo " Files in Machine folder: $I."
echo ""

echo "- Starting backup"
echo "-------------------------------"
mkdir $BACKUP_PATH

echo " Creating snapshot..."
vim-cmd vmsvc/snapshot.create $VIMID tempbackupsnapshot
echo " Snapshot complete."
IFS='
'
for A in $FILE_ARRAY
do
if [ -n "`echo \"$A\" | egrep '.vmdk|.nvram|.vmx'`" ] ; then
FILESIZE=$(stat -c%s "$A")
echo " Copying file: $A - Size: $FILESIZE bytes"
cp "$A" "$BACKUP_PATH"

else
echo " Skipping file: $A"

fi

done

#Remove snapshot
echo " Removing snapshot..."
vim-cmd vmsvc/snapshot.removeall $VIMID
echo " Snapshot removed."

echo " Starting compression..."
tar -czpf "$BACKUP_ROOT/$MACHINE-$BACKUP_APPEND.tgz" "$BACKUP_PATH"
echo " Compression complete."

echo " Removing backup temp..."
rm -rf "$BACKUP_PATH"
echo " Removed temp files."

echo ""
echo "-------------------------------"
echo " Backup Complete!"
echo "-------------------------------"

else
echo ""
echo ""
echo "-------------------------------"
echo " Error"
echo "-------------------------------"
echo " Folder $MACHINE_PATH or $BACKUP_ROOT does not exists"
#exit 1
fi

Set I/O Priority for Proxmox/ OpenVZ Containers

Category : How-to

Get Social!

proxmox logo gradSince the 2.6.18-028stable021 kernel, it has been possible to set the I/O priority of an OpenVZ container. It is not currently possible to set any I/O limits for containers, only the priority. If you require I/O limits you should use KVM.
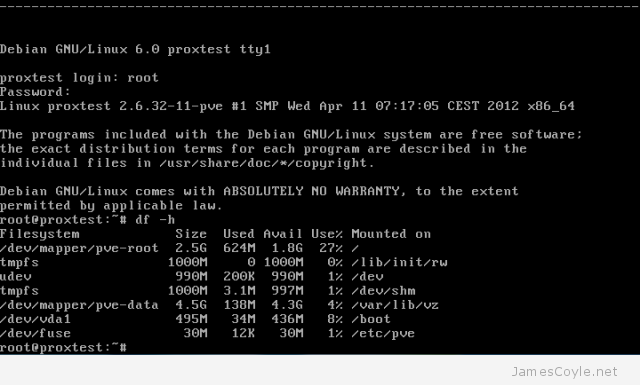
The higher the priority is for a container, the more time the container will have for using disks. You can choose between 0 – 7 inclusive, the default value is 4. The higher the value you use, the more I/O time your container will receive. Remember, as this is a priority system each container setting is relative to another. For example, if you set all your containers to priority 7, they will still receive the same amount of I/O time each.

To set the I/O priority of an OpenZV container, login to the host using the console and use the below command.

vzctl set [VM ID] --ioprio [Priority] --save

Replace [VM ID] with the ID of the container you would like to modify, and replace [Priority] with the priority value to use between 0 and 7. The below example sets the priority of container 200 to 7.

vzctl set 200 --ioprio 7 --save

You can also edit the config file directly. In Proxmox this is saved in /etc/pve/openvz/[VMID].conf

Add, or change the existing entry in the conf file to: IOPRIO=”[Priority]”

You will need to reboot the container for the changes to take effect.


WordPress and OpenSearchServer

Get Social!

OpenSearchServer is an open source website crawler and query engine to provide advanced search capabilities to your website.

Onced you have installed OpenSearchServer you simply add an index, specify a URL to begin crawling and you website will be indexed and available to search.

WordPress has a pluginwhich integrates OpenSearchServer and replaces the existing search box to serve search queries directly to your OpenSearchServer instance. The pluginsite is available here.

Configure OpenSearchServer Search plugin

Login to your WordPress admin site and click Add New under Plugins. Search for opensearchserver and click Install Now.

Once you have the plugin installed, click Activate to enable the plugin.

You will then need to configure the OpenSearchServer plugin. The configuration page is under Plugins, then OpenSearchServer. Under Instance settings fill in your OpenSearchServer details.

  • : is the URL which points to your OpenSearchServer installation. Example: http://search.jamescoyle.net:8080/
  • The index name you created on your OpenSearchServer to hold the search database for your WordPress site.
  • : Authentication username for your OpenSearchServer.
  • : Authentication API key for your OpenSearchServer.
Click Update Settings once you have entered the details.

For better search results, I would recommend using the following code under :

title:($$)^10 OR title:("$$")^10 OR
titleExact:($$)^10 OR titleExact:("$$")^10 OR
titlePhonetic:($$)^10 OR titlePhonetic:("$$")^10 OR
url:($$)^5 OR url:("$$")^5 OR
urlSplit:($$)^5 OR urlSplit:("$$")^5 OR
urlExact:($$)^5 OR urlExact:("$$")^5 OR
urlPhonetic:($$)^5 OR urlPhonetic:("$$")^5 OR
content:($$) OR content:("$$") OR
contentExact:($$) OR contentExact:("$$") OR
contentPhonetic:($$) OR contentPhonetic:("$$")

Click Update Options once you have finished.

Your Search box is replaced as soon as you activate the OpenSearchServer plugin. You will need to make sure your Search box is available on your site.

Your search queries will now be served from your local search server!


How much disk space does Proxmox 2.x require?

Category : How-to

Get Social!

Proxmox can be installed on very little disk space. I tested Proxmox version 2.2 and installed it on a 10GB hard disk and Proxmox installed without an issue. On an earlier test, a 2GB hard disk was not sufficient and the installer showed an error.

The official webpage for Proxmox hardware requirements does not state a required or recommended size. I would suggest that more is better because each VM or OpenVZ container will be stored on your hard disk. If you have multiple hard disks, you should always put your OpenVZ containers and virtual disks on the fastest one. A common setup with just two disks is detailed below.

Disk A
  • Proxmox install
  • ISO images
  • OpenVZ templates
  • Backups
Disk B
  • OpenVZ containers
  • Virtual disks

This setup should reduce the time it takes to backup and create your OpenVZ containers and virtual machines as the reads and writes are on different disks. In addition it keeps your backups on a separate disk to the OpenVZ containers and virtual disks so if one disk fails, you will still have a copy.

For a test setup, two 250GB disks would be ample and enable you to try Proxmox and create multiple guests. For a production setup, the size of the disks would depend on the work load and volume of guests required. One thing is for sure though, faster is better. With SSD disks you will get the best performance with near zero seek time however they cost the most per gigabyte. For mechanical drives, use 15k rpm disks in a raid 0, or raid 10 for best speed and redundancy.


Proxmox OpenVZ CPU units

Tags :

Category : How-to

Get Social!

openvz-logo-150px_new_3OpenVZ containers have a mechanism in place to prioritise CPU resource assignment. You can make sure that your most critical guests have the CPU resource they require.
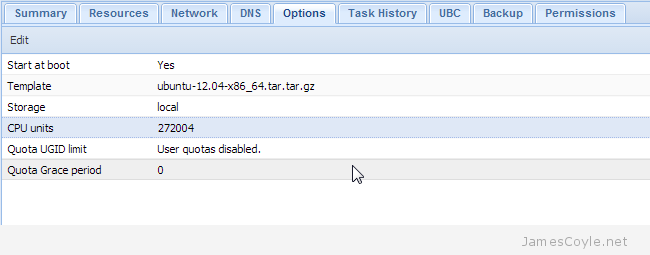
In Proxmox you can set the CPU units attribute through the web GUI by clicking on the container to change, selecting the Options tab and double clicking CPU units.

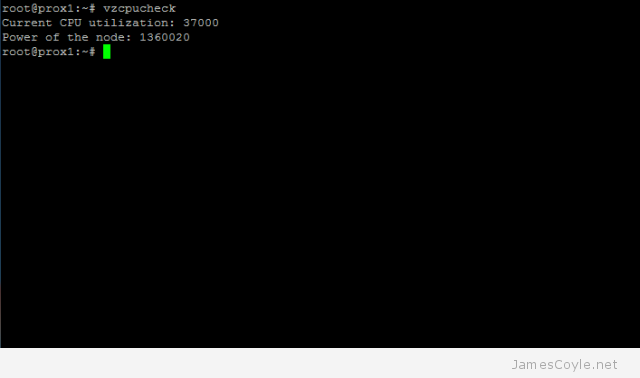
This setting dictates the minimum amount of CPU time, or CPU units, the guest will have. Before you change the setting you will need to find out how many CPU units your system has available. Run vzcpucheck to find out how many CPU units you have available.

Power of the node: 1360020 indicates the maximum CPU units your system has available for use. You can now distribute these CPU units to your guests however, this setting should be used as a minimum amount of CPU time your guest will have. The guest will only use the allocated resource if it needs it, otherwise will be available for other guests.

For example, if you wanted to give a container 20% of the total CPU time, you would would enter 272004.

1360020 * 20% = 272004
(Total units) * (desired %)

This value can be entered into the Proxmox web GUI under Options on the container screen.

proxmox cpu units

If you prefer the command line, on the host you can use the vzctl set command:

vzctl set 101 --cpuunits 272004 --save

Visit our advertisers

Quick Poll

Are you using Docker.io?

Visit our advertisers