Category Archives: How-to

Export and Import a Docker Image Between Nodes

Get Social!

docker-logoOne of the driving forces behind Docker is to create a consistent environment across all Docker enabled machines and to create portable templates, or images, which can be ran on any Docker enabled server.

It would, therefore, make perfect sense that Docker have made it very easy for us to export a running container and re-import it on another Docker server.

Lets assume, for this example, that you have a running container that you would like to move to another host. The summary of the process is to save the container to an image, save it to a tar file, move it to your new host and load the image into the new docker server.

Find the ID of the container that you would like to move.

$ docker ps -a
CONTAINER ID        IMAGE               COMMAND             CREATED             STATUS              PORTS               NAMES
f4b0d7285fec        ubuntu:14.04        /bin/bash           38 minutes ago      Exit 0                                  hungry_thompson
8ae64c0faa34        ubuntu:14.04        /bin/bash           41 minutes ago      Exit 0                                  jovial_hawking
3a09b2588478        ubuntu:14.04        /bin/bash           45 minutes ago      Exit 0                                  kickass_lovelace

I’m going to use the above 3a09b2588478 ID for this example.

Commit your changes and save the container to an image called mynewimage.

$ docker commit 3a09b2588478 mynewimage
4d2eab1c0b9a13c83abd72b38e5d4b4315de3c9967165f78a7b817ca99bf191e

Save the mynewimage image to a tar file. I will use the /tmp/ directory to save the image but you could easily use a NFS share to make it easier to move the completed tar file.

$ docker save mynewimage > /tmp/mynewimage.tar

Copy the mynewimage.tar file to your new Docker instance using whatever method works in your environment, for example FTP, SCP, etc.

Run the docker load command on your new Docker instance and specify the location of the image tar file.

$ docker load < /tmp/mynewimage.tar

Finally, run the docker images command to check that the image is now available.

$ docker images
REPOSITORY          TAG                 IMAGE ID            CREATED             VIRTUAL SIZE
mynewimage          latest              4d2eab1c0b9a        5 minutes ago       278.1 MB
ubuntu              14.04               ad892dd21d60        11 days ago         275.5 MB
<none>              <none>              6b0a59aa7c48        11 days ago         169.4 MB
<none>              <none>              6cfa4d1f33fb        7 weeks ago         0 B

Installing Docker on Ubuntu 14.04

Get Social!

docker-logoDocker is an up and coming virtualisation technology utilising Linux Containers (LXC) to provide a private and consistent working environment across all Docker installations. Docker aims to create portable templates which can be created and distributed to run on any Docker enabled host.

Docker works on a similar premise to OpenVZ and is therefore limited by the same constraints, such as only Linux guests can be created in Docker as each guest shares the hosts kernel. Installing Docker on Ubuntu couldn’t be easier since version 14.04 of Ubuntu saw the Docker packages available through the standard Ubuntu repositories.

Install Docker using the apt-get command:

$ apt-get install docker.io

Check that the docker daemon has been started with the status argument, or start it with the start argument:

$ service docker.io status
$ service docker.io start

Create a symlink to the Docker executable so that the Docker documentation commands can be executed without changing the path. This is required because the Ubuntu package for Docker is installed to a different directory to the default Docker recommendation.

$ ln -sf /usr/bin/docker.io /usr/local/bin/docker

And that’s all there is to it! You now have a working Docker environment. See my next blog post for Creating your first Docker container.

Quick Poll

Are you using Docker.io?

Installing Open vSwitch in Proxmox

Get Social!

open-vswitchOpen vSwitch is a virtual switch which enables you to create multiple virtual networks on a single physical host. In Proxmox, it’s a more flexible networking approach over the standard Linux Bridge method.

The default install of Proxmox does not contain the required packages for Open vSwitch so you will have to install them manually.

You will receive the following error if you try to configure Open vSwitch using the Proxmox web GUI before you install the required packages.

Open VSwitch is not installed (need package 'openvswitch-switch') (500)

proxmox-open-vswitch-is-not-installed

Login to your Proxmox host and run the below apt-get command to install Open vSwitch.

apt-get install openvswitch-switch

You can now use the Proxmox web GUI to create a new OVS network interface.


Default Ports for Samba

Tags :

Category : How-to

Get Social!

The ports required by Samba vary depending on if you use Samba as a domain controller or not. The most common type of Samba deployment would be to use a non domain controller deployment of Samba to create file shares for an existing domain or workgroup.

All of the below ports are TCP:

  • 137 (netbios-ns) – is used for the NETBIOS name service
  • 138 (netbios-dgm) – is used for the NETBIOS datagram service
  • 139 (netbios-ssn) – is used for the NETBIOS session service
  • 445 (microsoft-ds) – is required if you are using Microsoft Active Directory

Install the Splunk Forwarder on Ubuntu

Get Social!

splunk
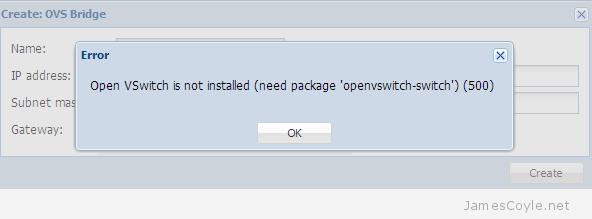
The Splunk Universal Forwarder is a small, light weight daemon which forwards data to your main Splunk server from a variety of sources.

This guide assumes that you have already installed the Splunk server to receive the data.

Download the Splunk Universal Forwarder .deb file from the Splunk website:

Upload the file to your Ubuntu server and place it a temporary directory.

Run the dpkg command to install the Splunk server.  The file name of the .deb file may change as new versions are made available so make sure that you have downloaded.

dpkg -i splunkforwarder-6.0.3-204106-linux-2.6-amd64.deb

The output will look like the below. Once you see complete, the Splunk Forwarder installation will be complete.

Selecting previously unselected package splunkforwarder.
(Reading database ... 28352 files and directories currently installed.)
Unpacking splunkforwarder (from splunkforwarder-6.0.3-204106-linux-2.6-amd64.deb) ...
Setting up splunkforwarder (6.0.3-204106) ...
complete

Next we need to create the init.d script so that we can easily start and stop Splunk. Change the the Splunk directory and run the splunk executable with the below arguments.

cd /opt/splunkforwarder/bin/
./splunk enable boot-start

Press SPACE to view all of the license agreement and then Y to accept it.

You can now start the forwarder daemon using the init.d script.

service splunk start

See reading log files with the Splunk Forwarder to read your first log file and send the data to the Splunk server.


Create a Ubuntu 14.04 OpenVZ Template for Proxmox

Get Social!

proxmox logo gradThe latest Ubuntu long term support is now available, called Ubuntu 14.04.

There isn’t currently a template available over on OpenVZ however I’m sure that will be shortly rectified. In the meantime, however, you can use the below steps to create a 14.04 Ubuntu template for OpenVZ/ Proxmox. This template has only been lightly tested so please report any errors as you find them.

This template is BETA, please report any problems in the comments.

Vistit Downloads Page


You can download a pre-created VM from here directly, or you can create your own using the below notes.


Before continuing, this guide assumes that you already have an installation of Ubuntu up and running which you can SSH to. This could be either a KVM or physical machine.

We will use debootstrap to create the template so make sure it’s installed and install it if you haven’t already.

apt-get install -y debootstrap

Use debootstrap to download and configure all the required packages to a temporary directory. For this example, we’ll use /tmp/deb.

debootstrap --arch amd64 trusty /tmp/deb ftp://ftp.ubuntu.com/ubuntu

Copy the below script into the tmp directory of the template root which has just been created. For this example you’ll need to copy the text into this path:

vi /tmp/deb/tmp/client.sh
#!/bin/bash

echo "root:password" | chpasswd

apt-get update

apt-get purge -y console-setup ntpdate whiptail eject ureadahead sudo vim-tiny rsync
apt-get install -y vim openssh-server

find / -name *ondemand -exec rm -rf {} \;
rm -f /etc/init/console* /etc/init/tty*

sed -i -e 's/^\$ModLoad imklog/#\$ModLoad imklog/g' /etc/rsyslog.conf
sed -i -e 's@\(space:\)\(/var/log/\)@\1-\2@' /etc/rsyslog.d/*.conf
sed -i -e 's/^\#cron./cron./g' /etc/rsyslog.d/50-default.conf

sed -i -e 's/^\console output/#console output/g' /etc/init/rc.conf
sed -i -e 's/^\env INIT_VERBOSE/#env INIT_VERBOSE/g' /etc/init/rc.conf

locale-gen en_US.UTF-8
locale-gen en_GB.UTF-8
dpkg-reconfigure locales

cp /usr/share/zoneinfo/Europe/London /etc/localtime

cat <<EOF > /etc/init/tty1.conf
# tty1 - getty
#
# This service maintains a getty on tty1 from the point the system is
# started until it is shut down again.

start on stopped rc RUNLEVEL=[2345]

stop on runlevel [!2345]

respawn
exec /sbin/getty -8 38400 tty1
EOF

rm -f /etc/ssh/ssh_host_*

cat << EOF > /etc/init.d/generate_ssh_keys
#!/bin/bash
ssh-keygen -f /etc/ssh/ssh_host_rsa_key -t rsa -N ''
ssh-keygen -f /etc/ssh/ssh_host_dsa_key -t dsa -N ''
rm -f \$0
EOF

chmod a+x /etc/init.d/generate_ssh_keys
update-rc.d generate_ssh_keys defaults

apt-get clean
find /var/ -name *.log -exec rm -rf {} \;
rm -rf /boot /dev /media /opt /run /srv /tmp /root/.bash_history /root/.viminfo /etc/ssh/ssh_host_*
mkdir /dev /run /tmp
touch /dev/null

exit

Make the script runnable which chmod.

chmod +x /tmp/deb/tmp/client.sh

Run the above script using the chroot command to set up the template.

chroot /tmp/deb /tmp/client.sh

The script will now run and set up the template using /tmp/deb/ as the templates root.

Once completed, create an archive of the template root device and install it on your OpenVZ/ Proxmox server.

cd /tmp/deb
tar -czpf /tmp/ubuntu-14.04-x86_64-initial1.tar.gz .

Copy the /tmp/ubuntu-14.04-x86_64-initial1.tar.gz file to your cache directory of your Proxmox install and create your first Ubuntu 14.04 container!

proxmox-ubuntu-1404-template


Visit our advertisers

Quick Poll

Do you use GlusterFS in your workplace?

Visit our advertisers