 ZFS is a disk and logical volume manager combining raid like functionality with guaranteeing data integrity. Every block of data read by ZFS is checksumed and recovered if an error is found. ZFS also periodically checks the entire file system for any silent corruption which may have occurred since the data was written.
ZFS was initially developed by Sun for use in Solaris and as such was not available on Linux distributions. Thanks to some clever guys over at ZFS on Linux, this has now changed. We can now install the ZFS on most Linux distributions such as Debain/ Ubuntu and Red Hat/ CentOS.
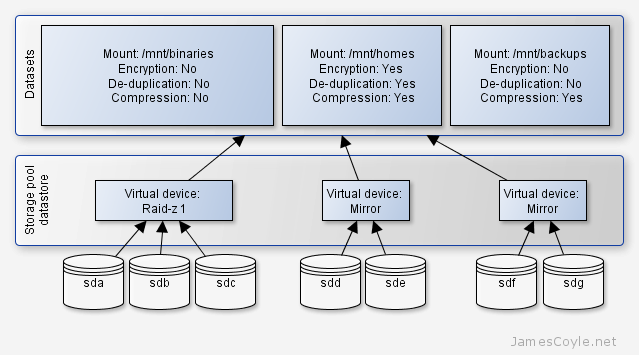
ZFS provides a data volume which can have multiple mount points, spanning multiple disks. Disks can be combined into virtual groups to allow for various redundancy options:
- Mirror – data will be mirrored across disks, equivalent to RAID 1. This is quite simply a copy of one disk to another every time data is changed. You require a minimum of two disks for a mirrored set. This provides the best redundancy but requires the most space. For example, if you use 2x 500GB disks, only 500GB will be available as the other 500GB will be a copy of the first disk.
- Stripe – data will be stored across all available disks, equivalent to RAID 0. In a two disk striped array, half of a file would be on disk one and half of the file on disk two. This provides the fastest read and write speeds but it offers no redundancy. In the event of a failed disk, all data on the stripe will be lost.
- RAID-Z – data will be written to all but one of the disks, with the remaining disk used for parity. This is equivalent to RAID 5. A minimum of three disks are required with one disk always being used for parity. In the even of a single disk failure, all data can be recovered and in fact, will still be accessible providing no further disks fail. In the even of a second disk failure, all data on the RAIDZ will be lost.
- RAID-Z 2 and RAID-Z 3 – these are the same as RAIDZ but with two and three disks used for parity respectively. RAID-Z 3 is recommended for highly critical data consistency environments. RAIDZ-2 requires a minimum of 4 disks, and RAID-Z 3 requires 5 disks as a minimum.
In addition to these virtual groups, multiple groups can be combined. For example, you can mirror a striped virtual volume to create a RAID 10. This gives the added performance of striped volumes with the redundancy of mirrored volumes.
For our below example, we are going to create a single RAIDZ 1 with three disks. This gives us two full disks of storage, and a further disk for parity.
Installing ZFS on Ubuntu
Before we can start using ZFS, we need to install it. Simply add the repository to apt-get with the following command:
apt-add-repository --yes ppa:zfs-native/stable
In a minimum package install, you may not have the apt-add-repository installed.
The program 'apt-add-repository' is currently not installed.  You can install it by typing:
apt-get install python-software-properties
If this is the case, install it before running the apt-add-repository command.
apt-get install python-software-properties
Update the apt cache with the update argument
apt-get update
Install the ZFS binaries, tools and kernel modules. This may take a while due to the amount of packages apt will have to download, building the tools and the ZFS modules for the kernel.
apt-get install ubuntu-zfs
At this point, it is best to test the kernel was correctly compiled and loaded.
dmesg | grep ZFS
The output should look like below. If it does not try running modprobe zfs.
[ 824.725076] ZFS: Loaded module v0.6.1-rc14, ZFS pool version 5000, ZFS filesystem version 5
Create RAID-Z 1 3 disk array
Once ZFS is installed, we can create a virtual volume of our three disks. The three disks should all be the same size, if they are not the smallest disk’s size will be used on all three disks.
Identify the disks you would like to use with fdisk. Some disk controllers may have their own naming conventions and administration tools but we’ll use fdisk in this example. Whilst we are on this point, raid controllers should not be set up with raid functionality when using ZFS. Some of the mechanisms in ZFS can be fooled with an underlying layer also doing data parity and therefore data corruption can occur in this environment.
fdisk -l | grep /dev/
The output will look like:
Disk /dev/vdb doesn't contain a valid partition table
Disk /dev/vdc doesn't contain a valid partition table
Disk /dev/vdd doesn't contain a valid partition table
And there we have it! The three disks to add to our ZFS array. Note, I have removed the root volume in this example to avoid confusion.
Run the zpool create command passing in the disks to use for the array as arguments. By specifying the argument -f it removes the need to create partitions on the disks prior to creating the array. This command creates a zpool called datastore however you can change this to suit your needs.
zpool create -f datastore raidz /dev/vdb /dev/vdc /dev/vdd
Confirm the zpool has been created with:
zpool status datastore
The output should be similar to:
  pool: datastore
 state: ONLINE
  scan: none requested
config:

        NAME        STATE     READ WRITE CKSUM
        datastore   ONLINE       0     0     0
          raidz1-0  ONLINE       0     0     0
            vdb1    ONLINE       0     0     0
            vdc1    ONLINE       0     0     0
            vdd1    ONLINE       0     0     0

errors: No known data errors
Create ZFS dataset
At this point, we now have a zpool spanning three disks. One of these is used for parity, giving us the chance to recover in the event of a single disk failure. The next step is to make the volume usable and add features such as compression, encryption or de-duplication.
Multiple datasets or mount points can be created on a single volume. Generally, you do not specify these size of these. Put simply, the storage of the zpool with be available to any dataset as it requires it. You can set up quotas to manage dataset sizes but that won’t be covered in this tutorial.
What we are interested in is creating three volumes; binaries, homes and backups. These will be mounted at /mnt/binaries, /mnt/homes and /mnt/backups respectively. Using zfs create command, create the three required volumes.
We specify the mount point, zpool and dataset name in the command.
zfs create -o mountpoint=[MOUNT POINT] [ZPOOL NAME]/[DATASET NAME]
Example:
zfs create -o mountpoint=/mnt/binaries datastore/binaries
zfs create -o mountpoint=/mnt/homes datastore/homes
zfs create -o mountpoint=/mnt/backups datastore/backups
Test the datasets have been created with zfs list.
zfs list
NAME                 USED  AVAIL  REFER  MOUNTPOINT
datastore            312K  62.6G  38.6K  /datastore
datastore/backups   38.6K  62.6G  38.6K  /mnt/backups
datastore/binaries  38.6K  62.6G  38.6K  /mnt/binaries
datastore/homes     38.6K  62.6G  38.6K  /mnt/homes
And an ls in /mnt should give us the mount points.
ls /mnt/
backups/   binaries/   homes/
You can now use your mounted datasets as required. You can export them as NFS, CIFS or simply use them as local storage!
See my other posts for compression and encryption. Please note, encryption is not currently available on ZFS for Linux.
 apt-get is the tool used in Debian and Ubuntu to manage packages installed on the system. Each time an update is available, or you install a new package the files will be downloaded from one of the central repository servers out on the internet and installed on your system.
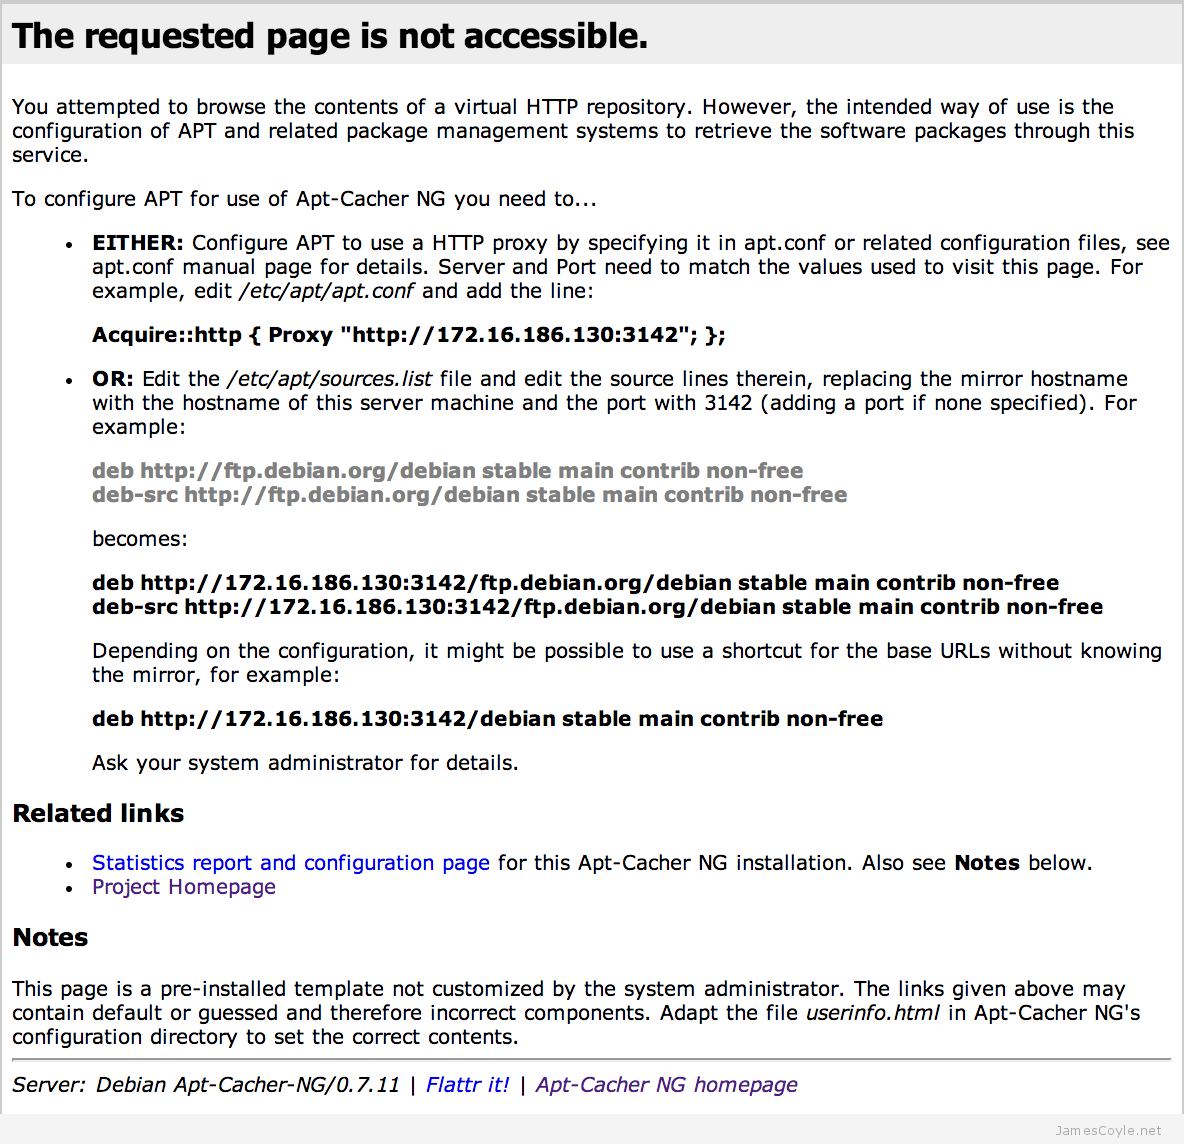
 I have recently been playing around with Git on Ubuntu and noticed that the version in the standard repository is a few versions behind the latest release.